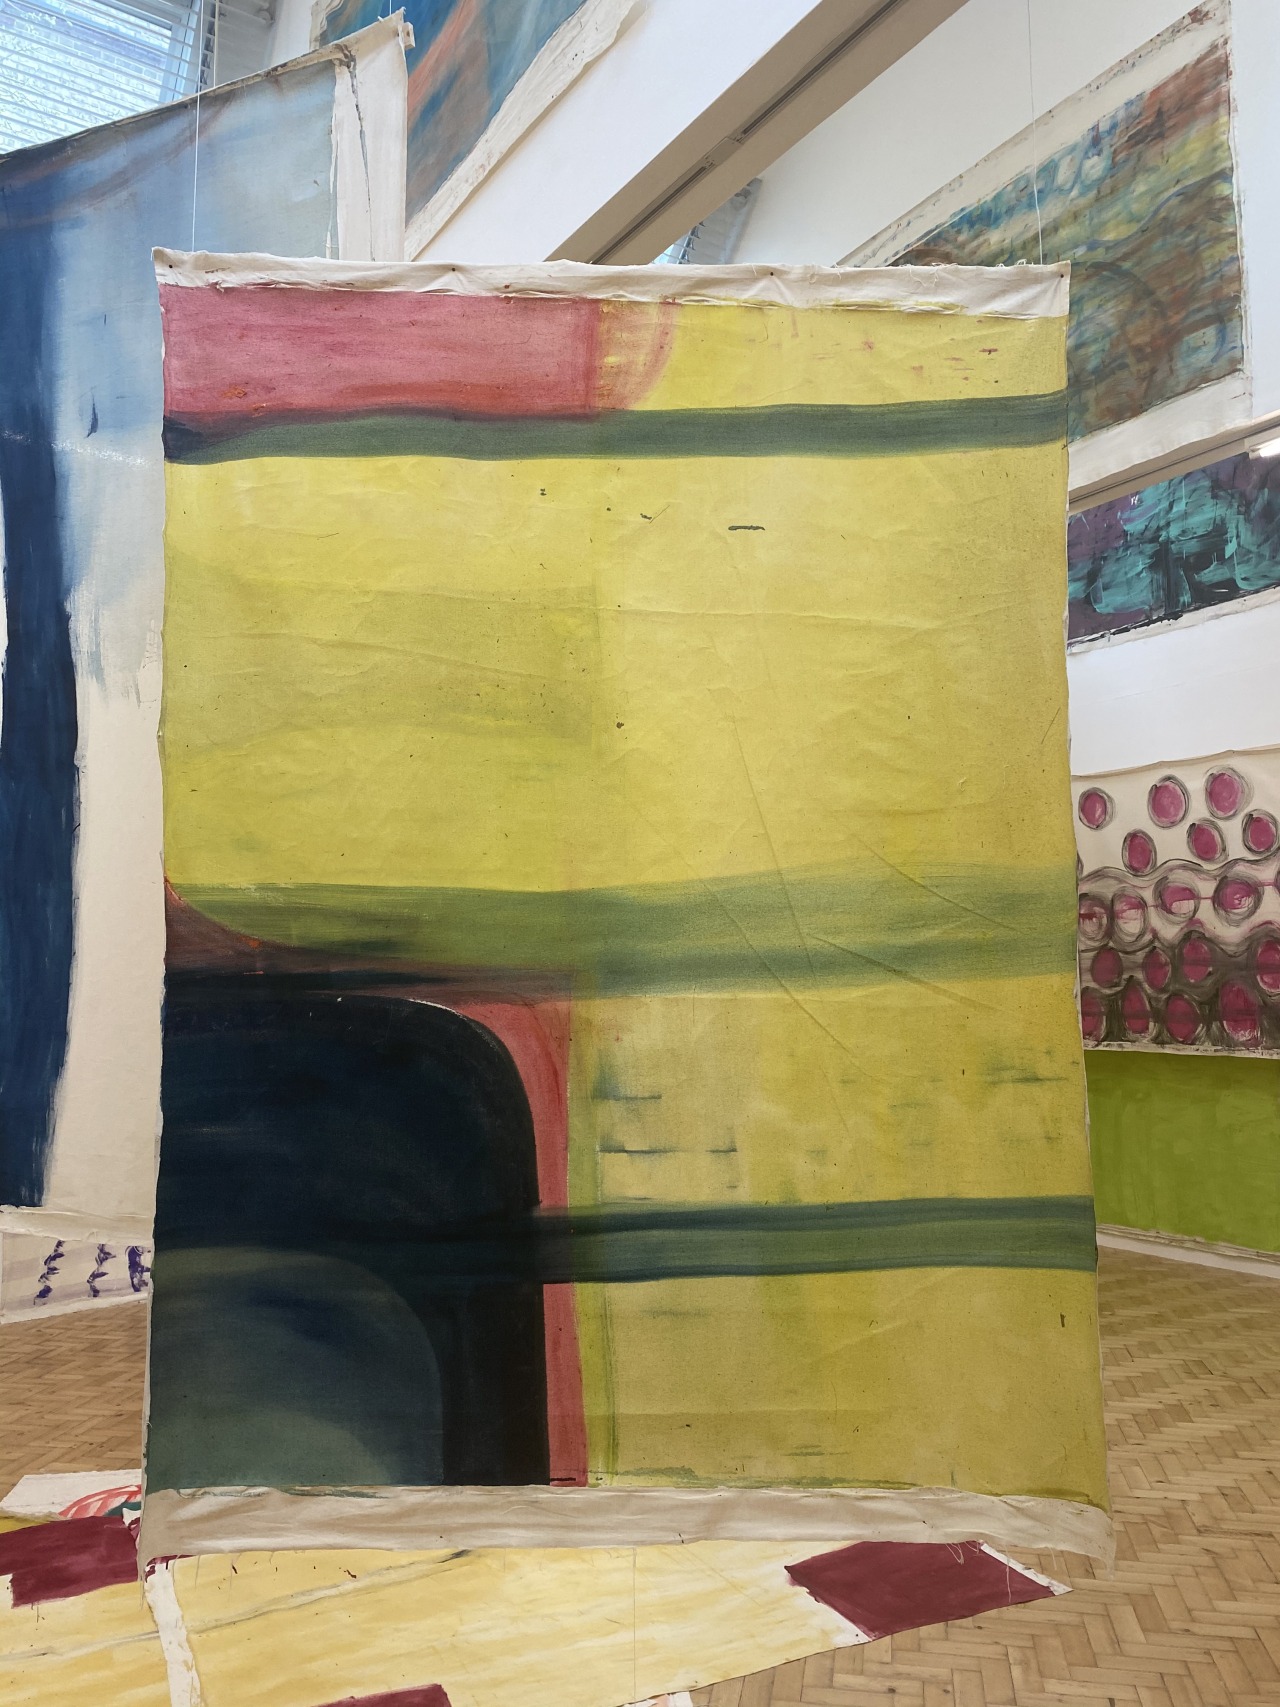
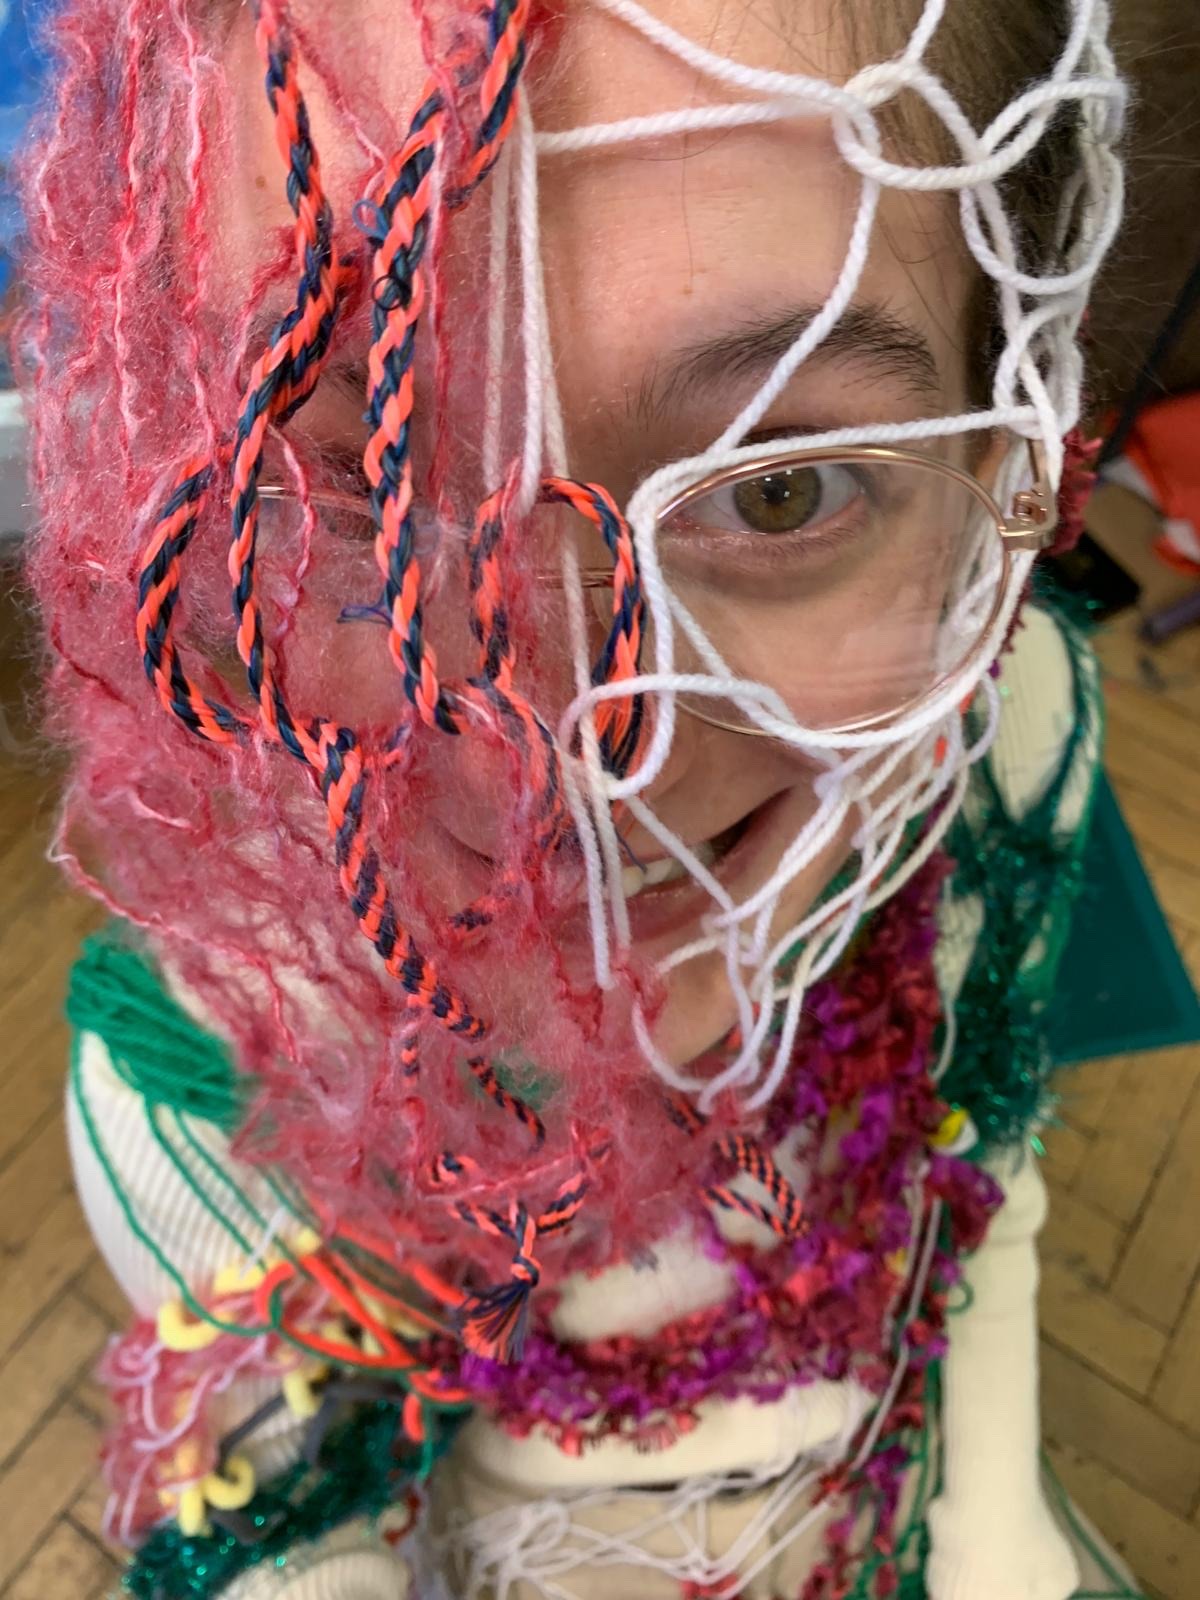
Bringing my project to an end...
Bringing my ideas full circle is interesting as I've explored many avenues of the topic of nature, going from drawing cacti at Kew Gardens to developing 2D prints, exploring more textures through stitch and developing 3 dimensional shapes to working on the body. Its rewarding to see my ideas develop naturally and be able to express and combine aspects of nature with man made gardens, architecture, and the Covid-19 pandemic which has affected us and this project so much.
Although I don't have one particular final piece that I've spent weeks working towards, I do feel that I have brought my ideas to a conclusion through many outcomes resulting in lots of different samples. I am confident that I've explored many different ideas and contextualised them in different ways through fashion on the body and as interiors as well. I think for this project it was important to me to explore a range of techniques and keep pushing my ideas. I feel if I spent too much time focusing on creating on a larger scale or multiple of the same outcome using the same technique it would of been a waste of time that I could spend further developing new ideas.
An aim of this project was to showcase different skills and push myself as a designer which I feel I've done. I've learnt many new skills during this project and stepped out of my comfort zone in ways I didn't expect to but with the challenge of coronavirus and having to work from home without as much guidance or facilities I'd of had on campus I've definitely developed a lot more independence within my practice. Having to step back and look at my work, reevaluate ideas, know when to stop and move on and lead myself through this project has been incredibly beneficial for me as a textile student. I've also got to learn a lot about nature and coming home back to Devon and be surrounded by nature again definitely helped push and shape this project. Having a garden and being able to roam free within nature here has inspired me and motivated me to keep going during this strange time of isolation. Having classmates on FaceTime to compare work and brainstorm new ideas was also important during isolation as I struggled at times with getting stuck or struggling to push my creativity at times. Talking to peers helped that a lot and is what I'd be doing in the studio if it weren't for the current situation.
Reflection 13/04/20 - 'Contained'
Contained was one of the words which sprung to mind when I was thinking about man made gardens, the idea of plants being contained within a manmade structure for the pleasure of humans.
Contained is also a significant word when talking about the current world issue of Covid-19. 6 weeks ago we were hearing the Government talk about 'containing' the virus, finding people who'd caught it and isolating those and those who'd come into contact with the virus to prevent the spread. The contrast to this is our current situations weeks later where the public have been forced into a lockdown as the virus has spread so much to a point where we can no longer contain it. the safest thing to do is keep people inside to slow the spread of the virus. If people are inside and not out and about at work or on public transport the transmission of the virus from person to person is significantly lowered. This takes pressure off of the NHS and prevents many avoidable deaths.
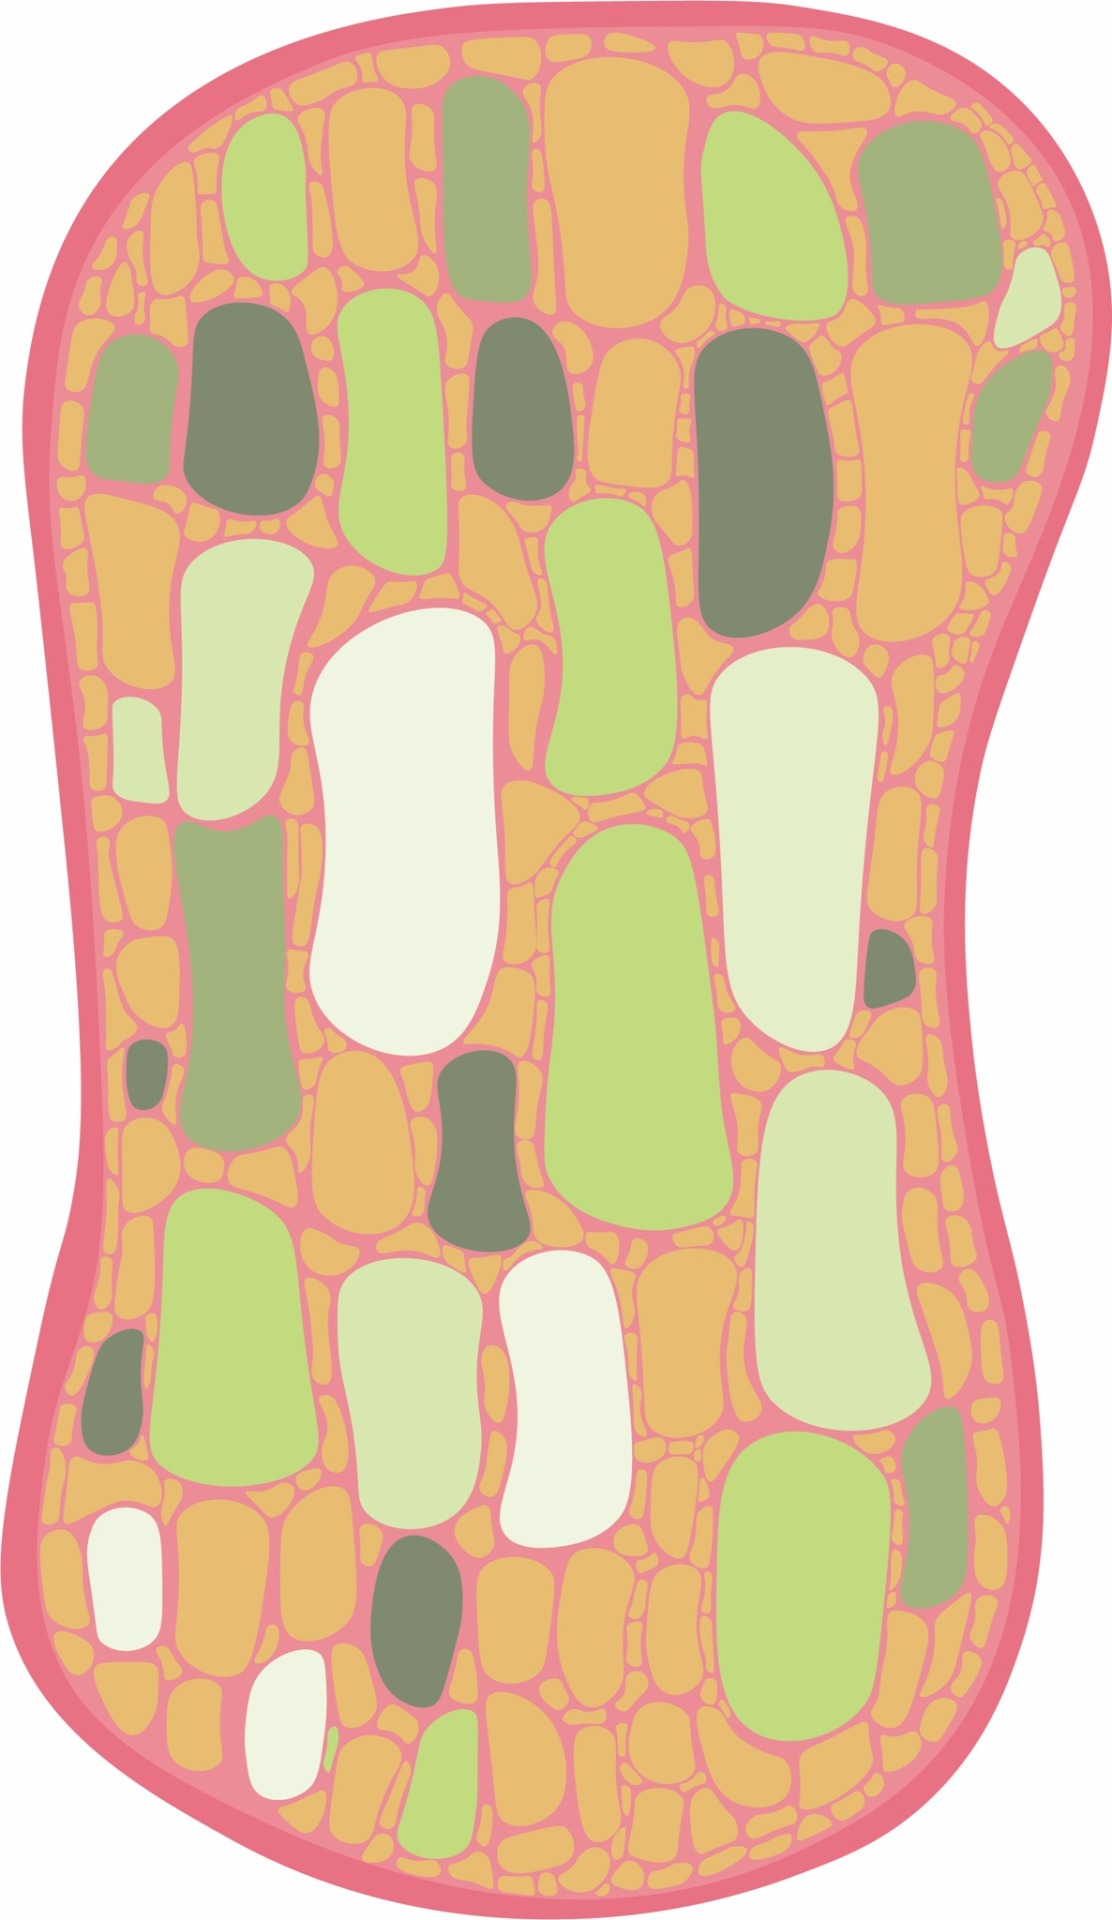
Most people would agree that we all feel contained inside our houses. We no longer have the freedom we used to have to be able to go outside and see friends, people are only allowed out once a day for a walk or to go to the shops to get food. I was exploring this idea visually by using a knitted sample behind my monoprinted cell structure which originally reminded me of the shape of the walkie talkie. The knitted sample is pouring out the the structure which symbolises people in their homes, contained but roaming freely within their house. The hole that is the cell shape acts as a window to that (the knit). This is an interesting idea and since I have a lot of samples with hole shapes in them I am going to experiment with this idea further this week.
CONTAINED (13/04/20)
Reflection 09/04/20
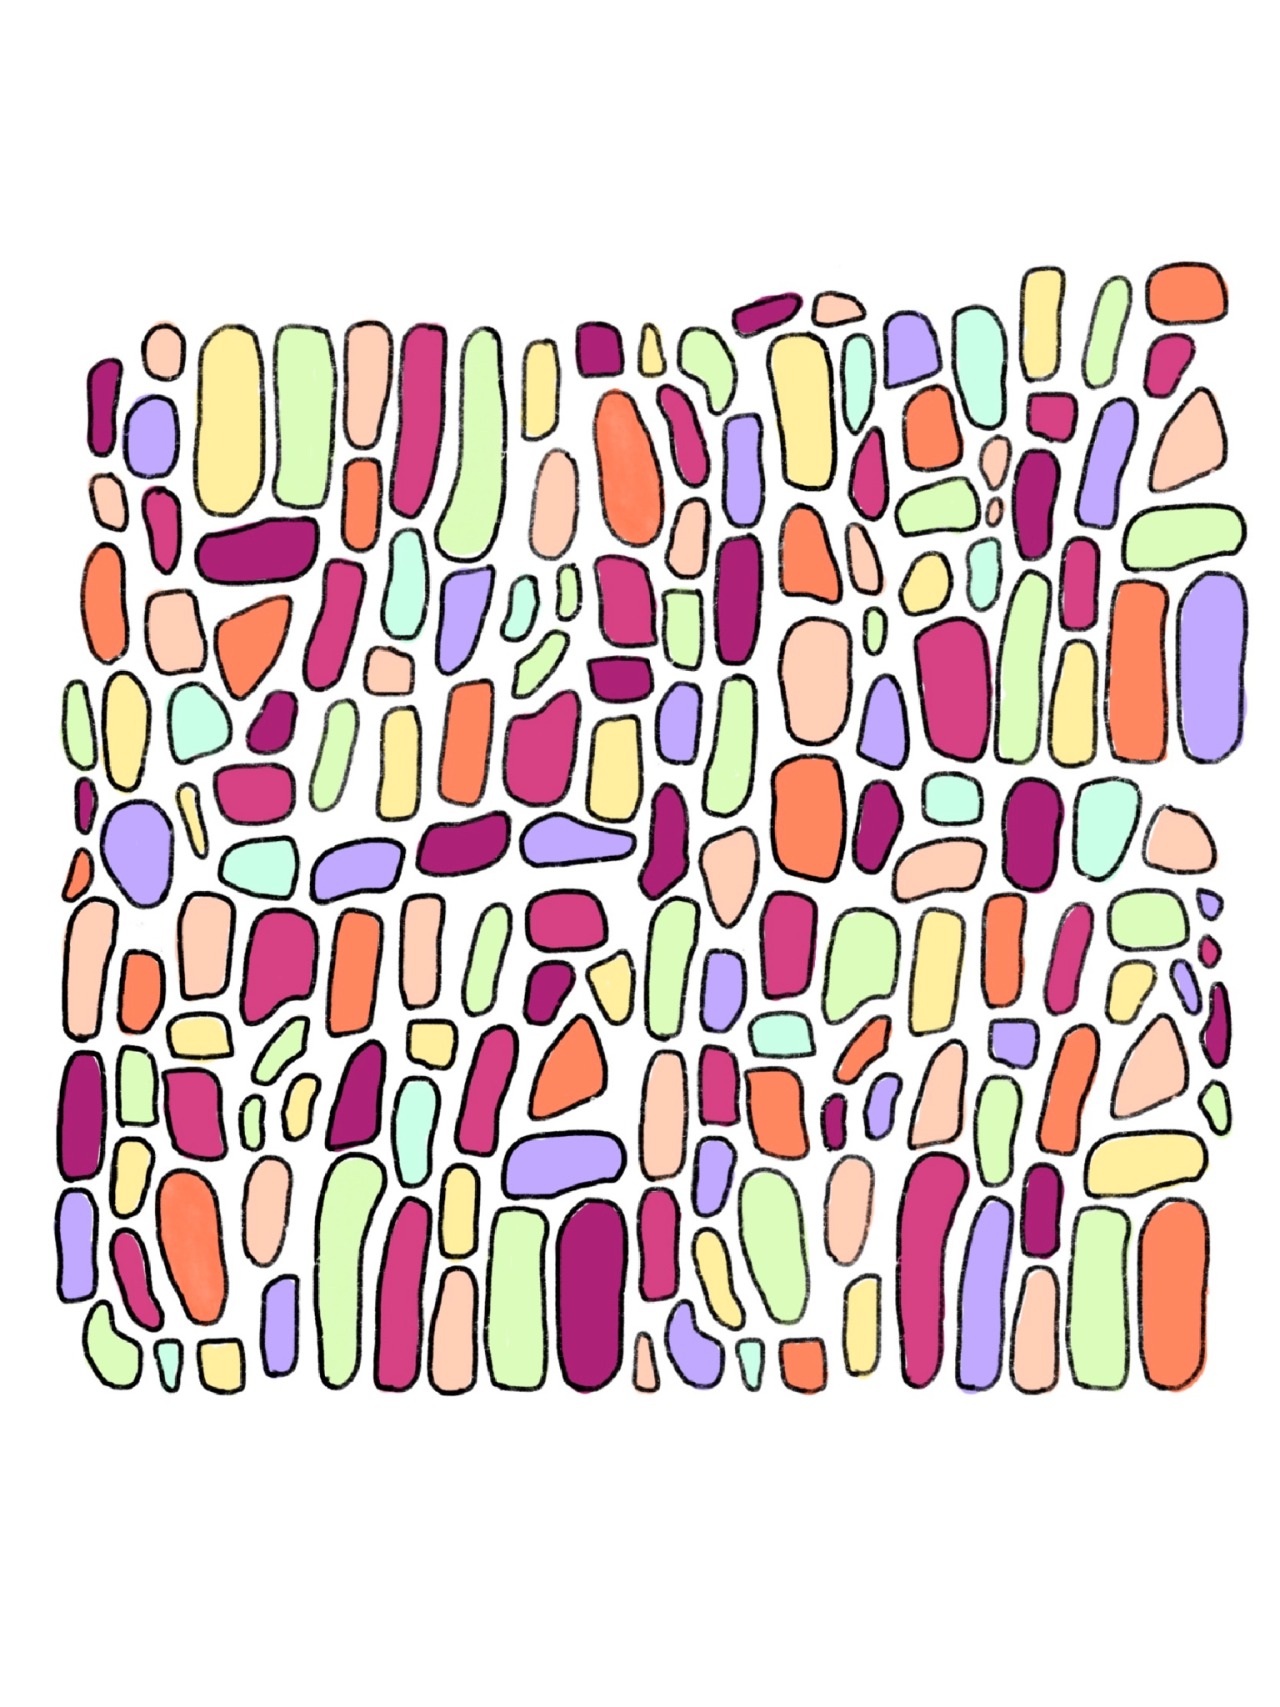
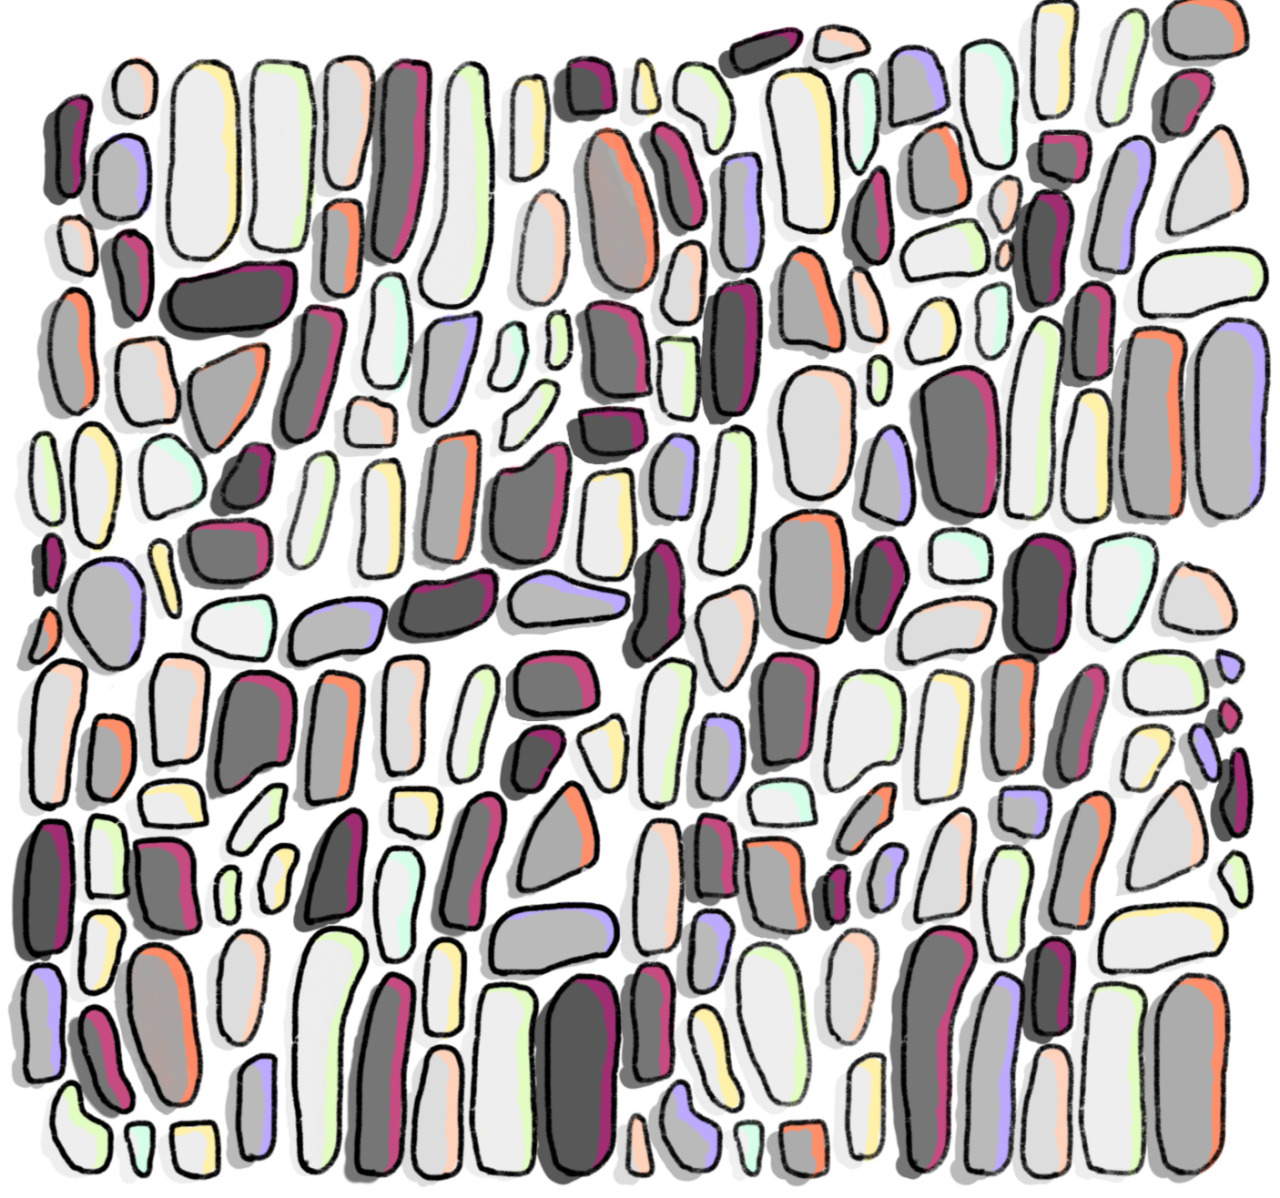
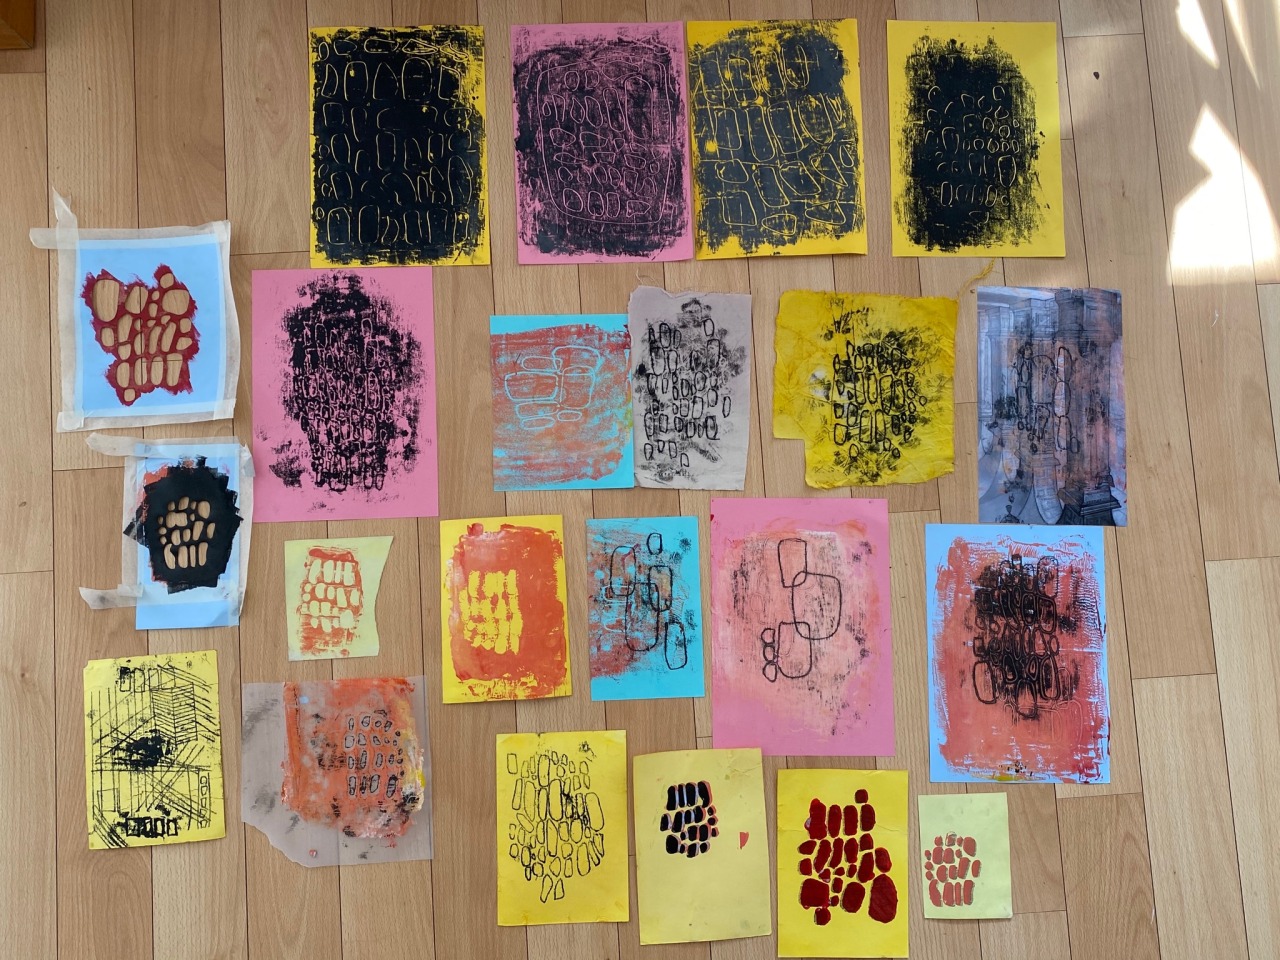
Today I started working on a drawing on the barbican centre digitally on my iPad. I used this drawing to create prints by cutting them into the cell shapes. This to me was the most logical way of combining the ideas of architecture of the 'man made garden' with the natural cell patterns I've developed. These experiments turned out well and I created a series of prints which I then edited and contextualised as wall papers. These prints are all very vibrant and loud but my aim was mainly to experiment with colour and shape to express my ideas. I'm really happy with how these images turned out.
Reflection 07/04/20
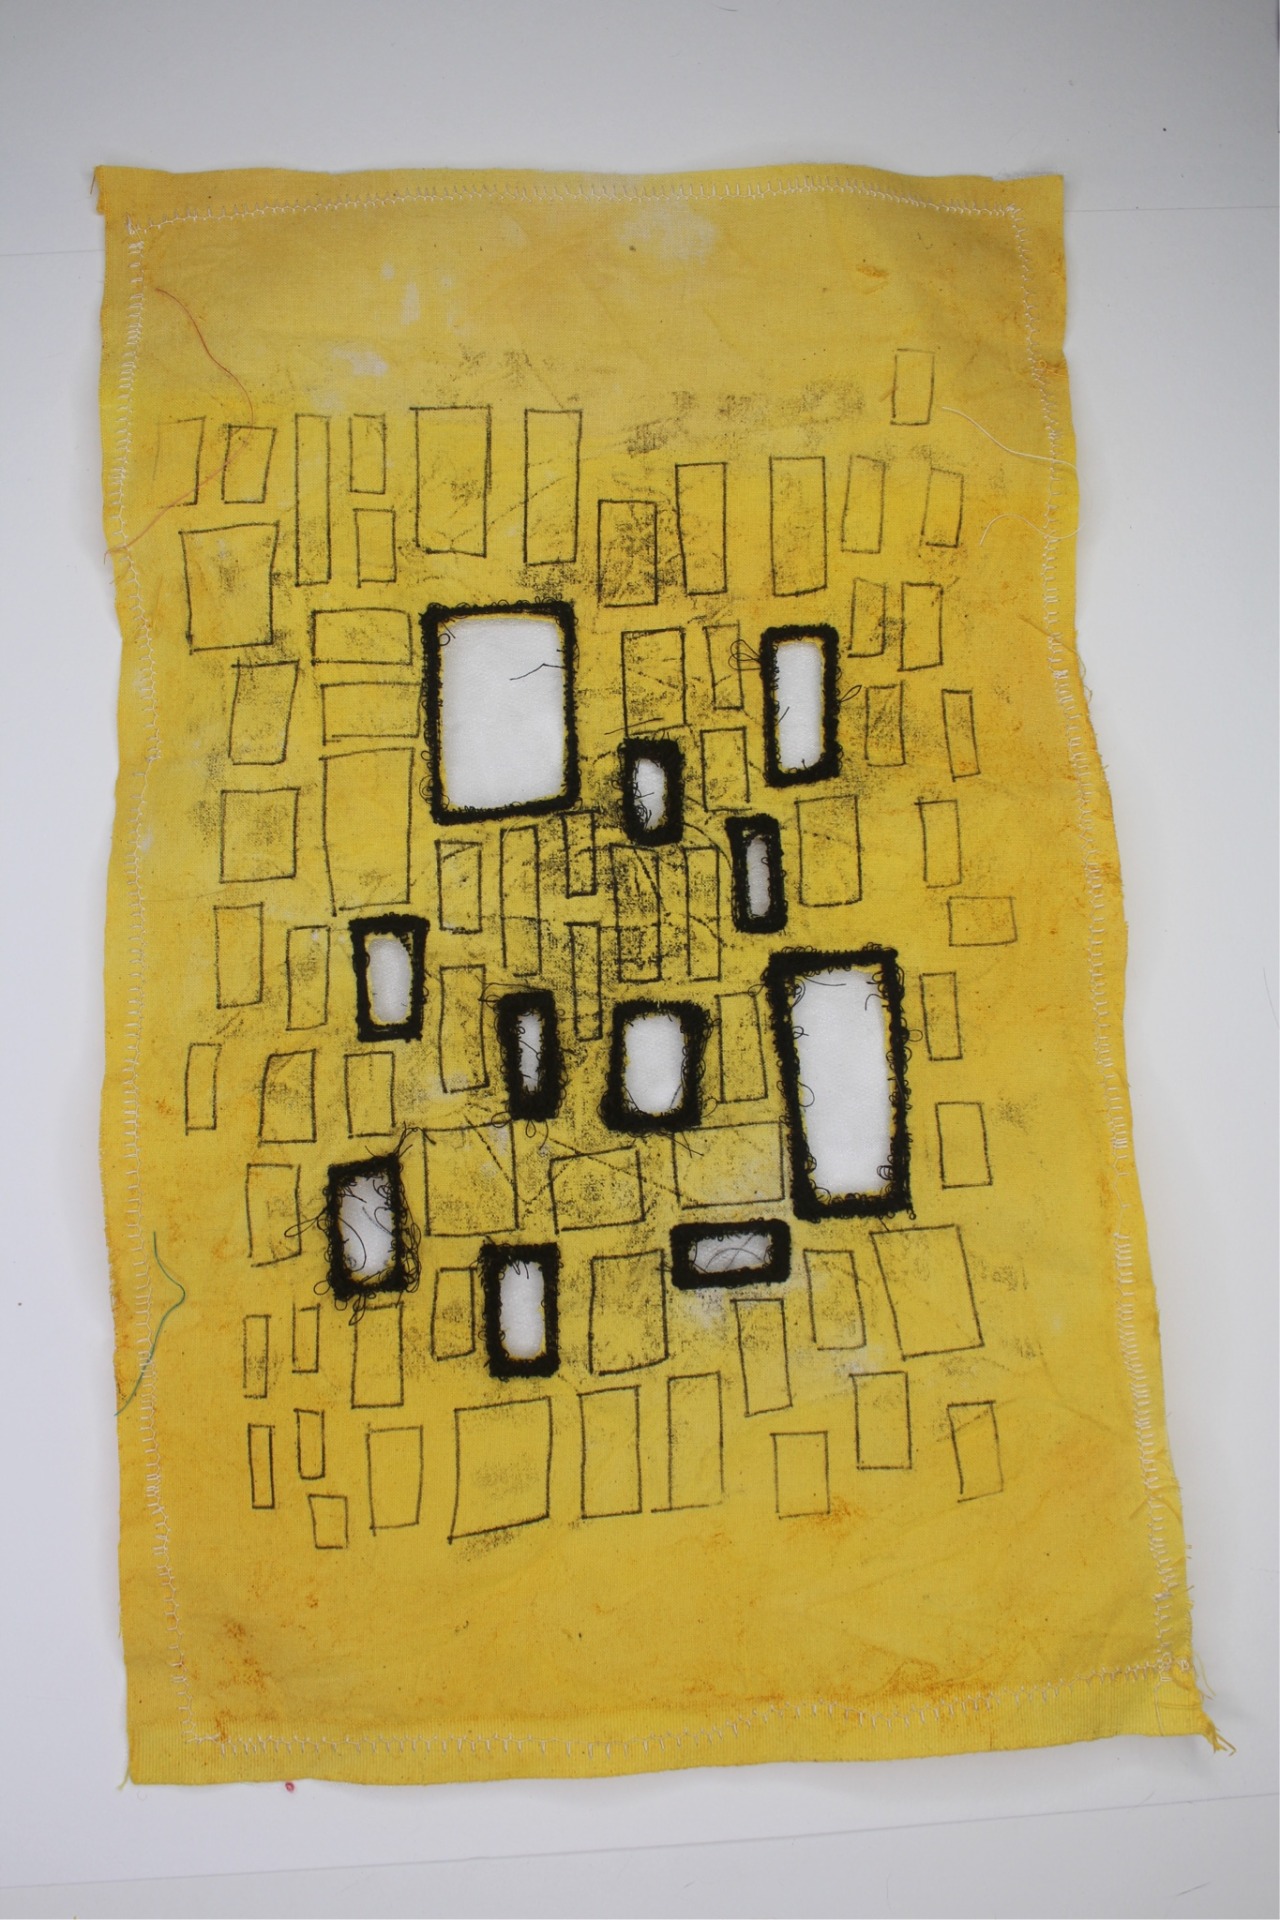
Today I decided to focus on more architectural shapes and followed my tutors advice to change the circular / oval cell shapes into squares with straighter lines. The process for making this was monoprinting the squares onto natural dyed fabric (tumeric), I stitched net and organza under the sample so that when I cut holes through the stitched squares it would leave an opaque shiny layer instead of going straight through. I’m happy with this sample although it looks very similar to the circular shaped samples I’ve made previously it just uses a more linear shape. I need to work on where I’m taking my ideas moving forward as I don’t want to create such similar looking samples and take a leap as my tutor said. I was thinking of maybe turning these square shapes into large cardboard cut outs and try different placement to experiment.
Reflection 06/04/20
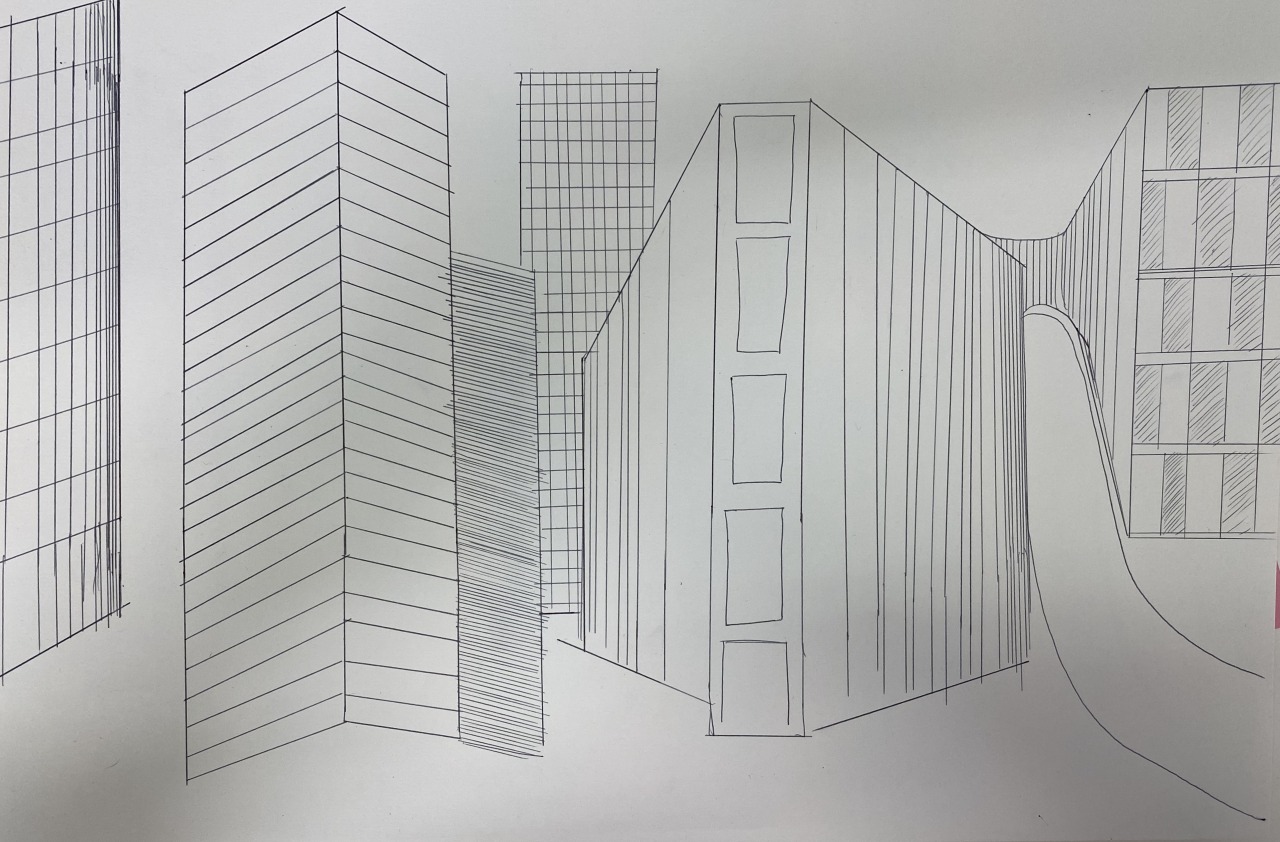
Today I wanted to explore some more human and architectural structures. After speaking with my tutor over email I’ve come to the conclusion I need to try to bring in human man made lines in combination with the natural cell shapes. I started by using old mono prints to collage and create architectural structures with in my sketchbook. While doing this I was reflecting on the images and video from Italy of people singing from their balconies whilst in lockdown. Due to the Coronavirus majority of people are being forced into their homes and to stay inside, myself included. Many people are spending time in the houses they’ve built and work so hard to built and maintain. A home should be somewhere we enjoy, a place of comfort and safety. I was thinking about the tall buildings along streets in Paris and Italy as well as my favourite houses in Notting hill. I decided to monoprint these buildings on different coloured pieces of paper. They are messy and quick but I like this affect, I was focusing on getting the shapes down over accuracy and detail. This reminded me of some of the collages I did for a previous project where we had to focus on an area of London. I focused on Camberwell and the old Georgian houses. Due to the Coronavirus I’ve had to move back to Devon and I find myself missing London a lot as it’s where I call home and spend the majority of my time. These drawings reflect that. I’m going to collage with these with different papers and news headlines as well on my iPad including drawings and maybe the fashion illustrations I’ve created.
A collage I made on my iPad using the mrnoprinted houses. Includes some of my fashion illustrations.
Reflection 03/04/20
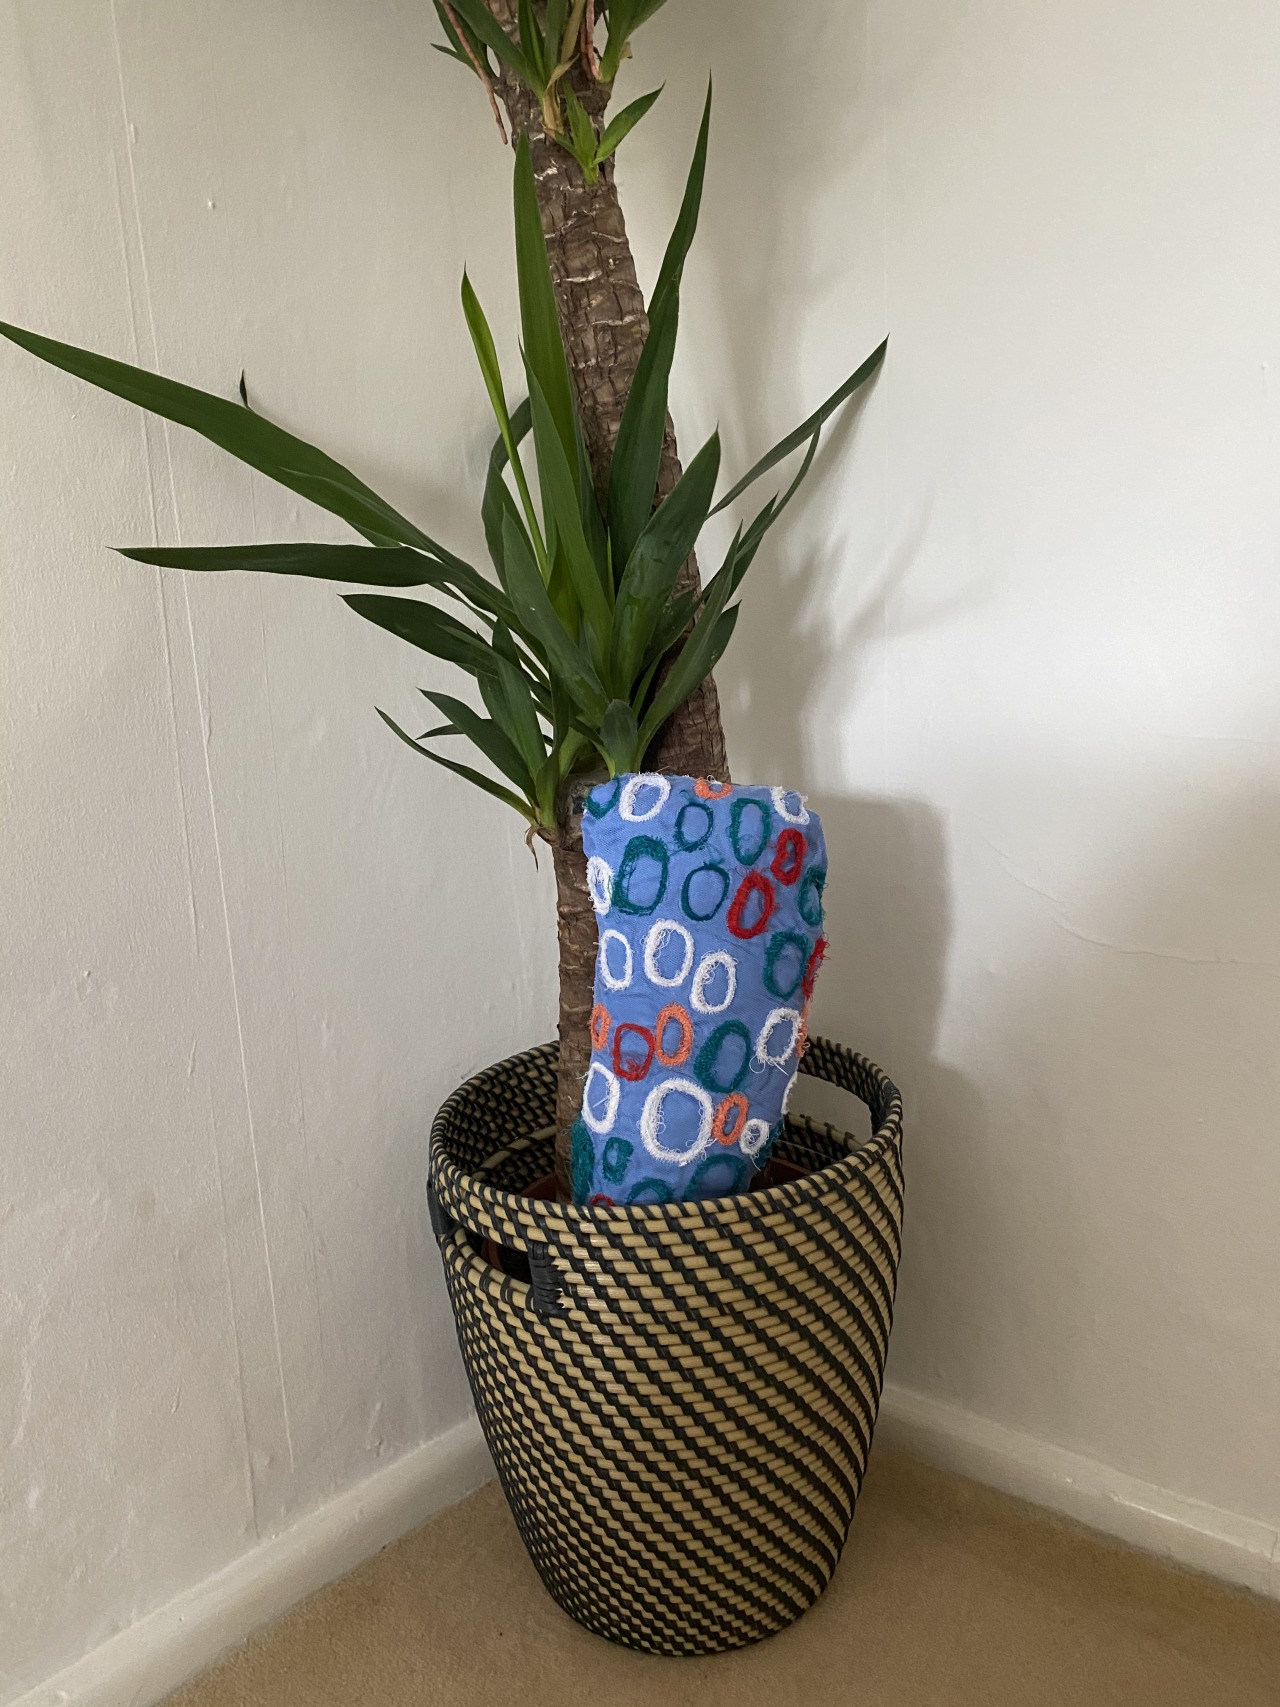
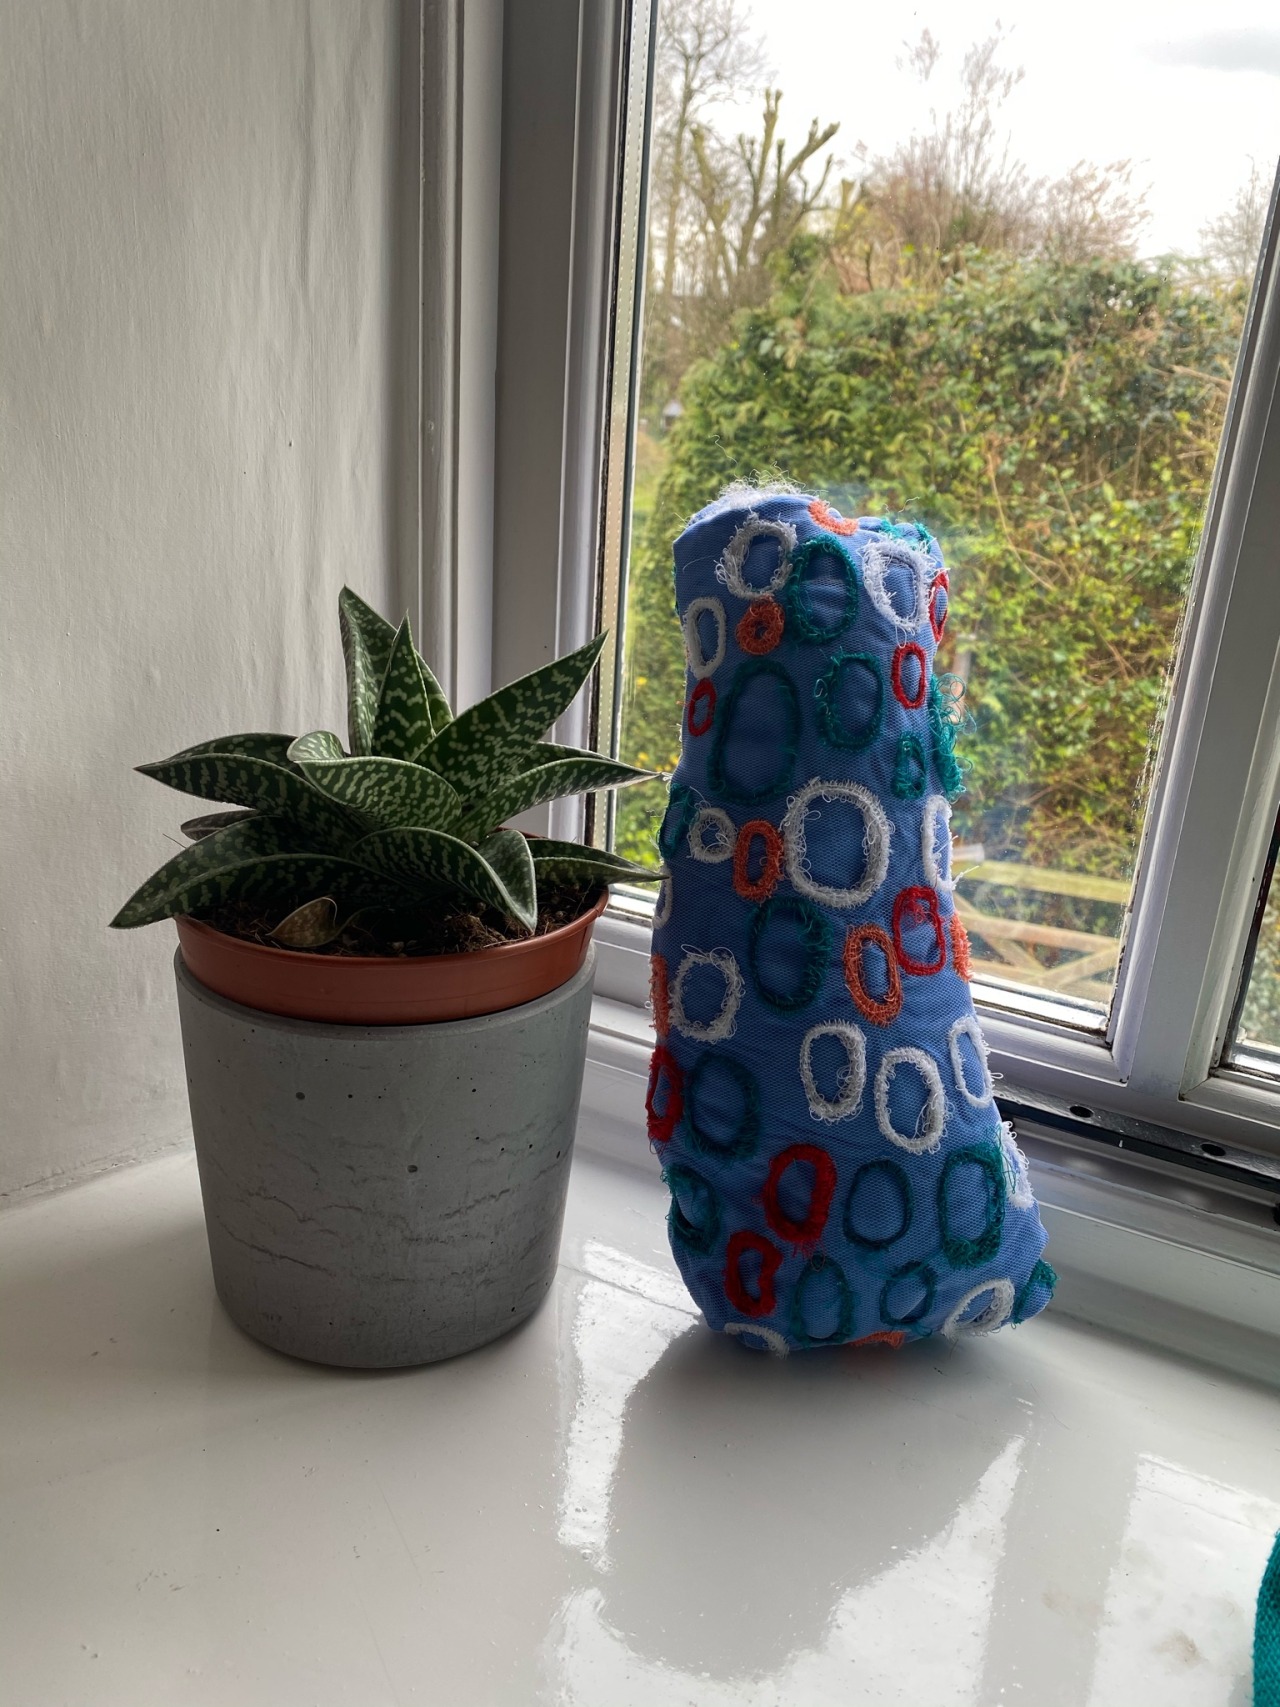
Today I worked on another 3D cell which I started yesterday. I completed the cell today by finishing the embroidery and stuffing. I took a couple of pictures of the cell amongst some cacti plants since it was inspired by the cacti cells themselves. I’m really happy with this outcome and have started making a larger cell with white fabric and a different colour scheme. I want to make a couple for a final collection. My plan after the FMP is finished is to make these to sell during lockdown. Each would be one of a kind and full of personality. I see them as unique abstract shapex toys or cushions. The feedback I received from friends and peers are that the sample is cute and personable with a unique design which stands out. This makes me really happy as I feel I’ve come to this technique and pattern through hard work and natural idea evolution.

Reflection 27/03/20
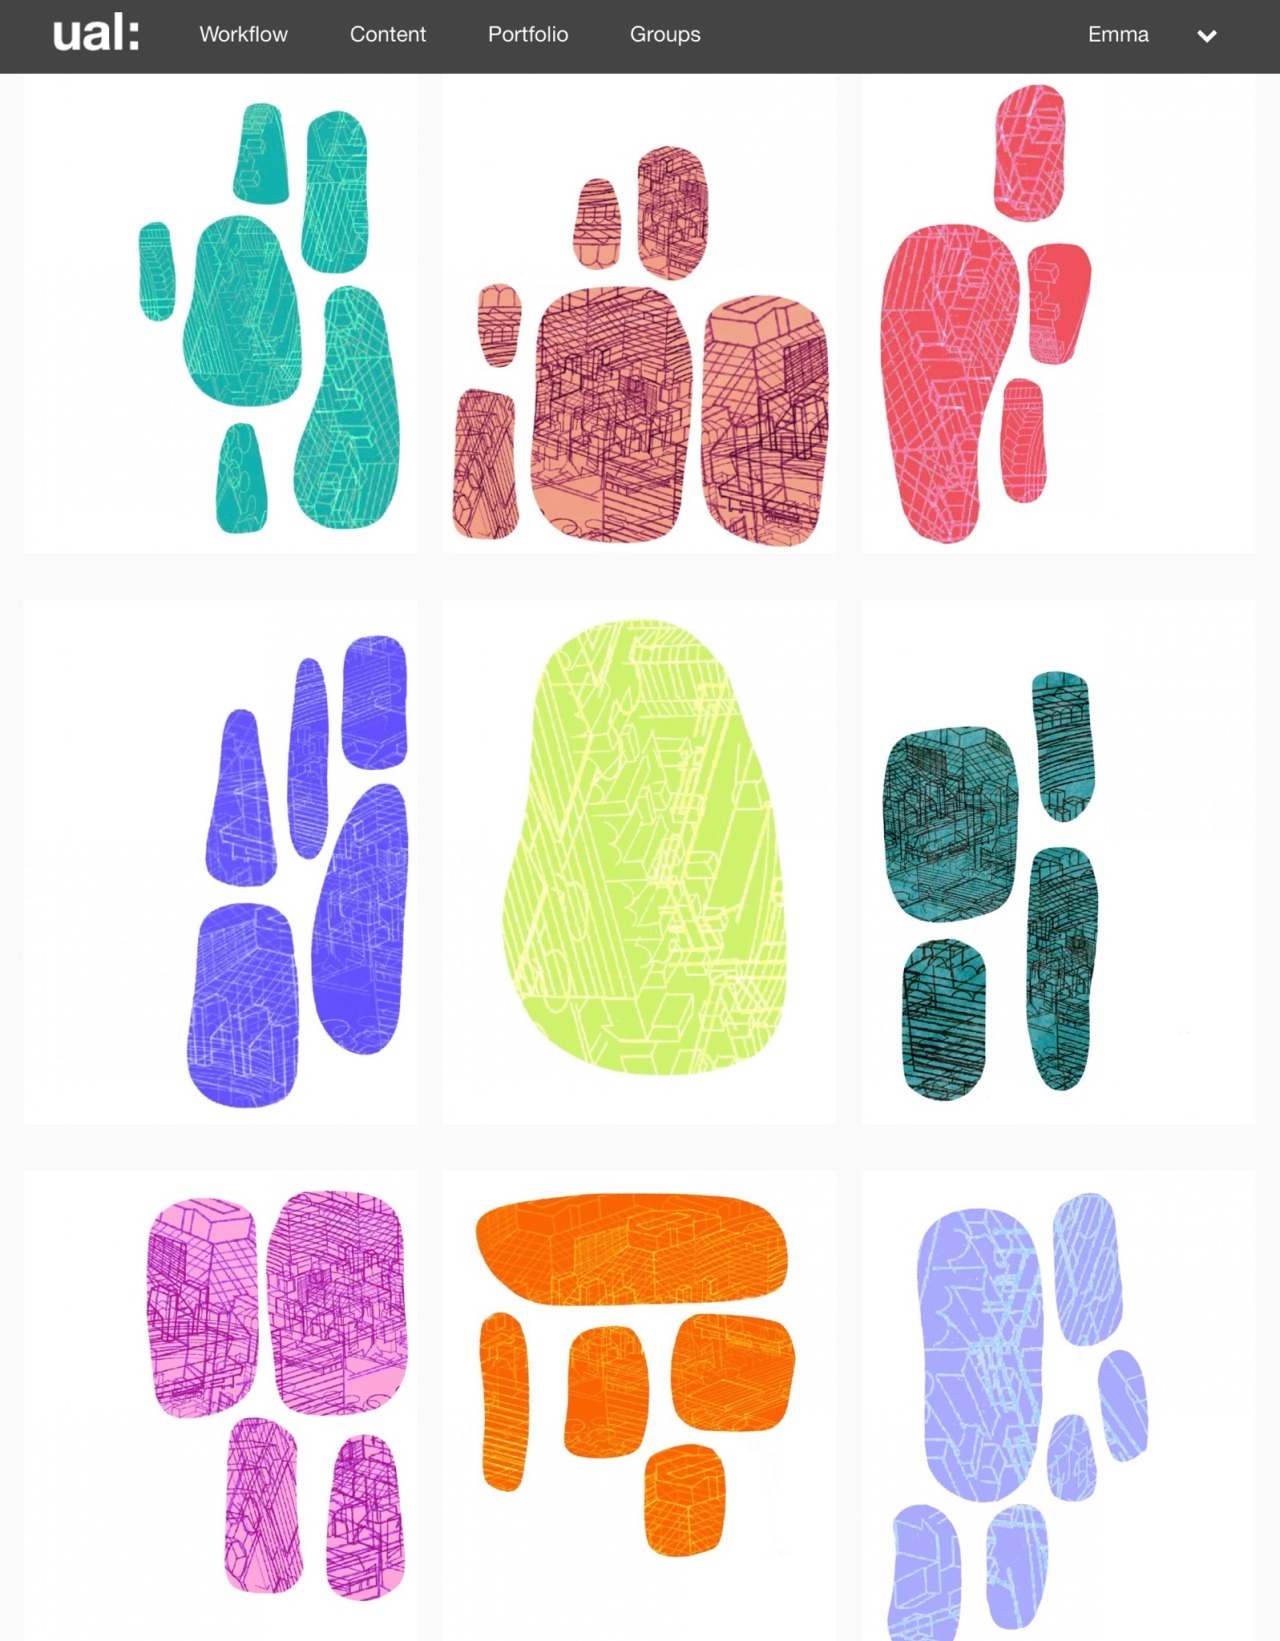
Today I worked on updating my workflow from yesterday’s work and creating a fashion illustration using my print. I spent the evening last night creating prints using the cell shapes on my iPad. I played with different colours. I also produced a workflow / idea progression style diagram which show how my ideas have naturally evolved over the last two weeks from knitted samples to prints to textured samples. I think this is very effective at showing my work flow and progression of my ideas and creative process. It can be seen on the research page of my workflow.
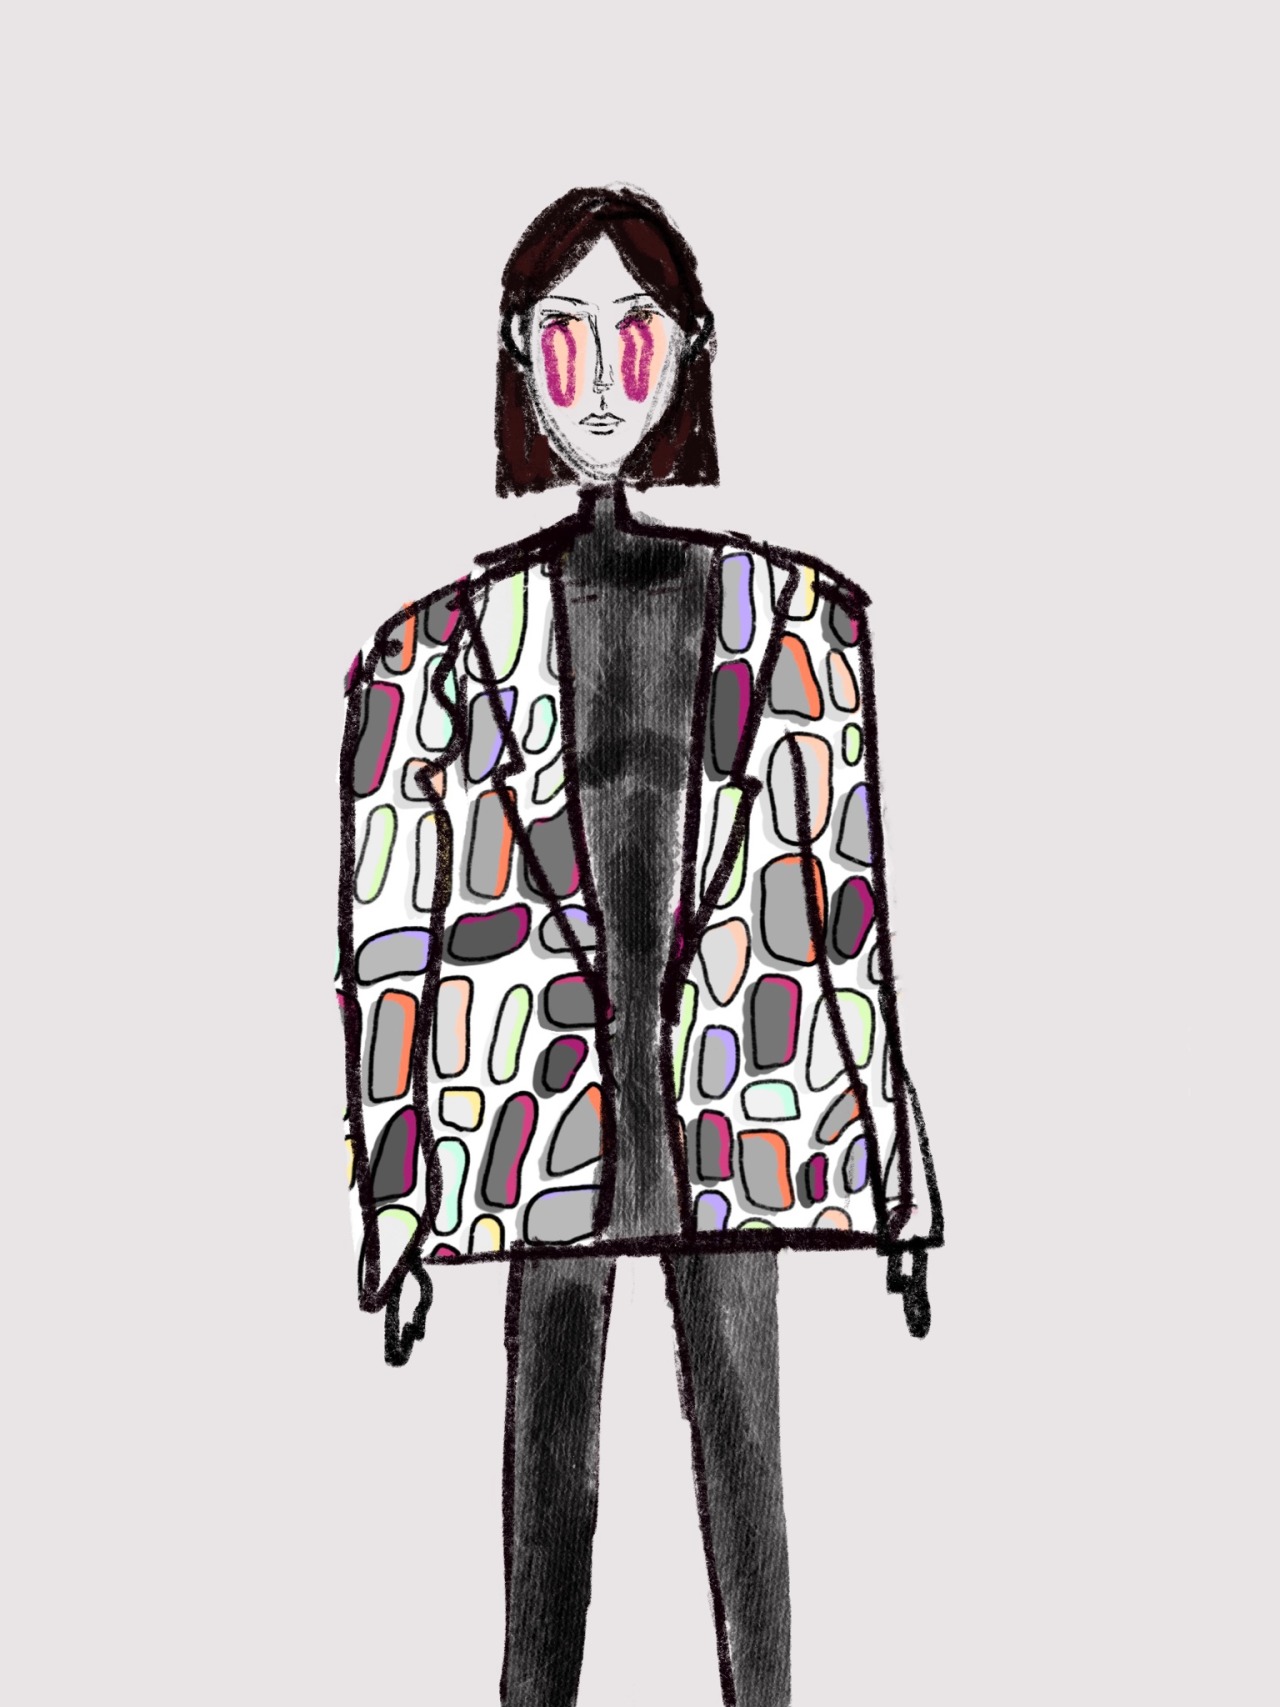
I contextualised by creating a fashion illustration how I’d imagine the print on a blazer. I also contextualised the print as a wall paper in a children’s bedroom. I’m happy with how these prints have turned out. The fashion illustration is very literal but I knew what I was trying to illustrate. I’d like to play around with some more expressive illustrations using this print and these shapes. Working on my iPad is great as I can play around with layout and change the colours effortlessly.

Reflection 25/03/20
Today I wanted to focus on how I can incorporate stitch with my printed samples. I discovered I could use the stitch found on the underside of a sample when flipping it upside down and sew on the sewing machine that way. I used this technique to create this sample:
A sample I made by stitching on the sewing machine with the sample flipped upside down. I stitched around the black outline of the cells on the sample which I’d monoprinted using the drawing on the back technique. The sewing machine left loose messy stitches on the bottom which I really liked as they framed the cell naturally giving an unruly affect. This gave the sample more depth. I cut out holes where the cell was so where the cell was was exposed. I am really happy with this sample and can see these ideas developing further onto the body or 3 dimensional samples.
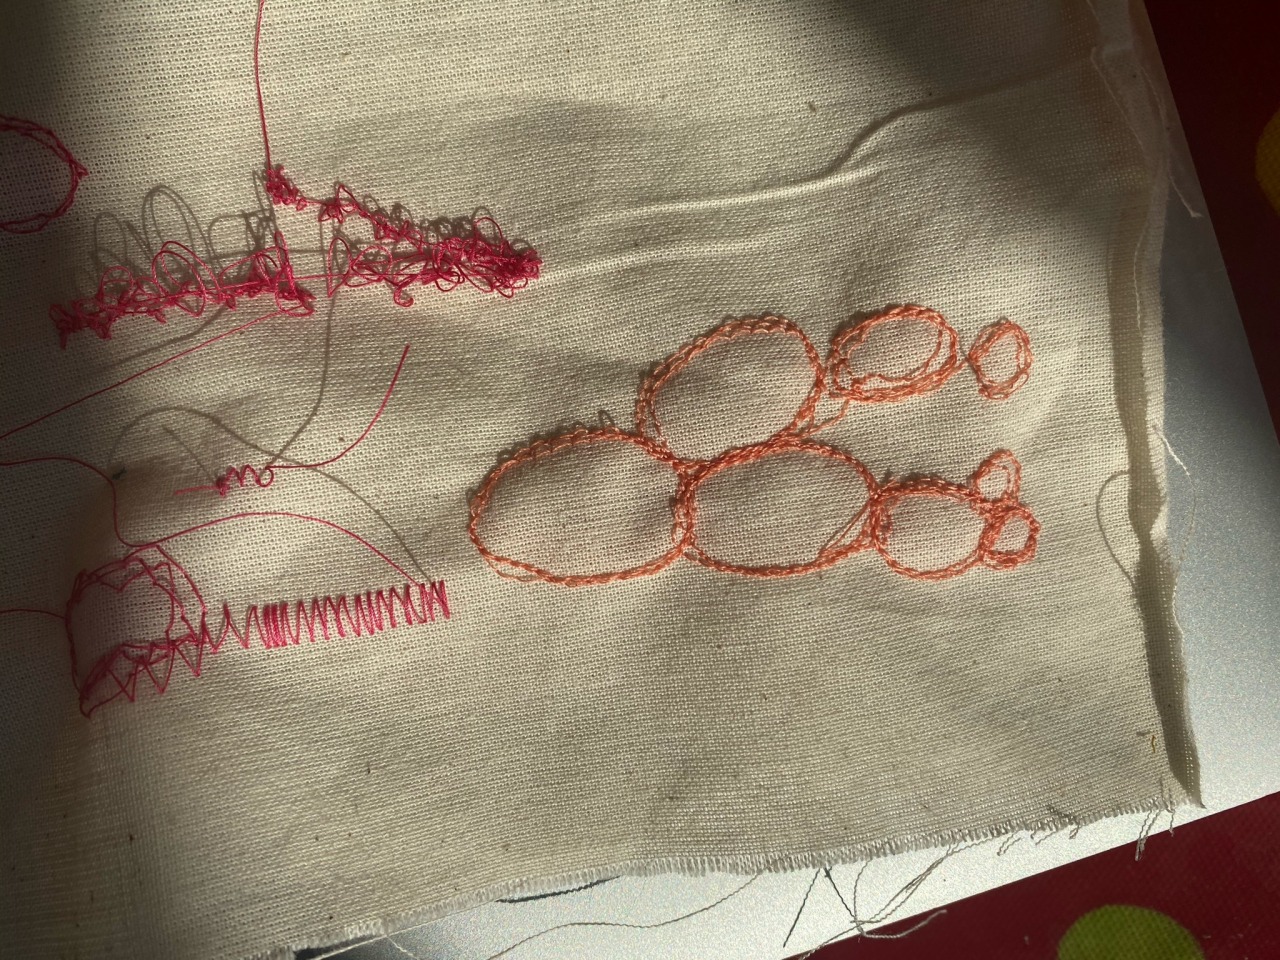
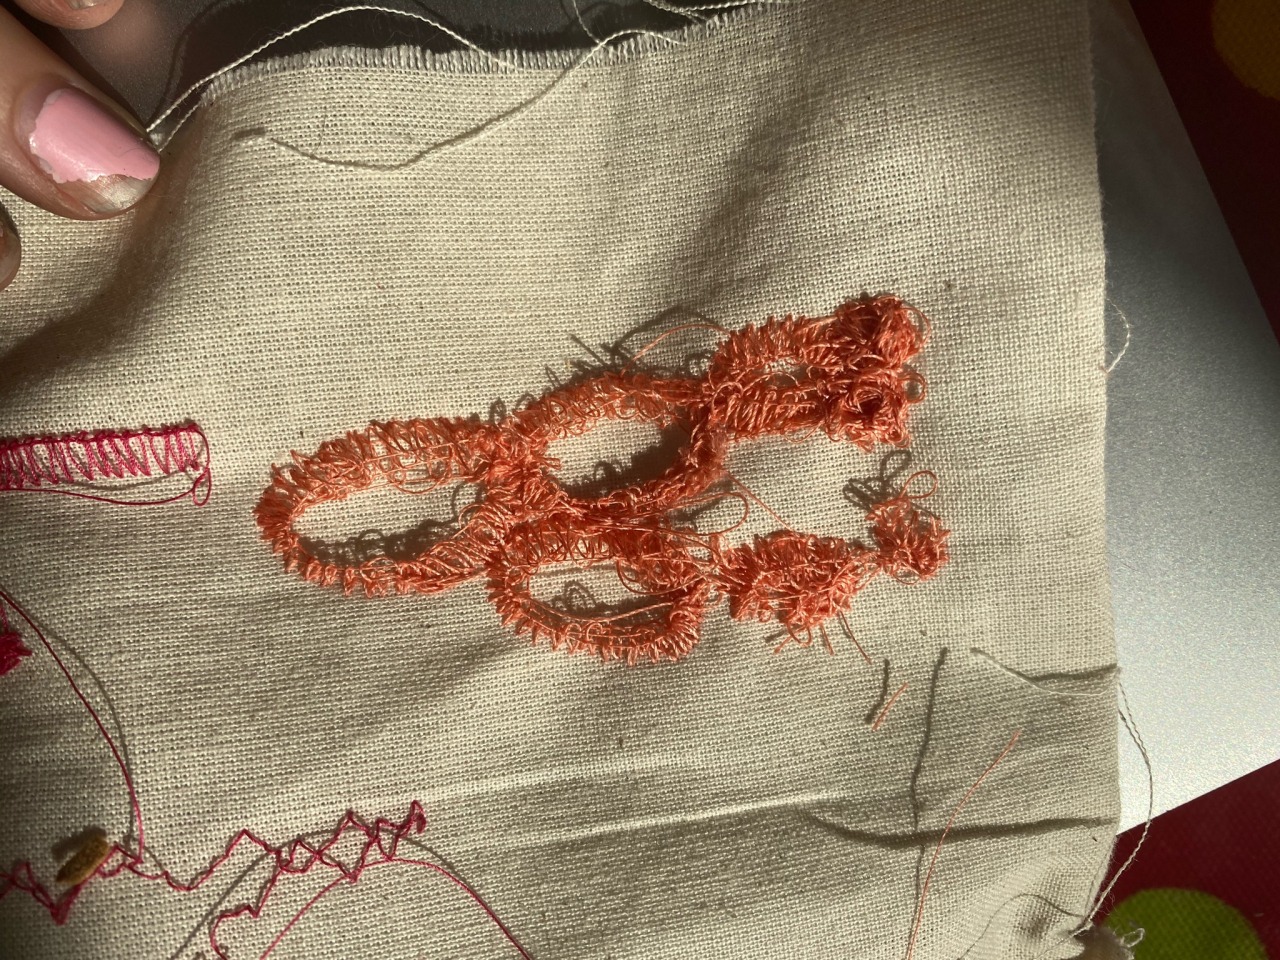
This is how I descovered that the underside of the stitch in the sewing machine is much more interesting. It’s thicker and more full, the stitches are messy and tangled which I really like.
Cutting out the holes was difficult as I didn’t want to disturb the stitching. This was hard as a lot of the loops were larger so I had to precisely cut pulling back the stitches so I didn’t cut them too much. As time went on I found the best way to cut was to stab the middle of the hole then cut an X. From there I’d cut each quarter of the fabric until the entire hole was exposed.
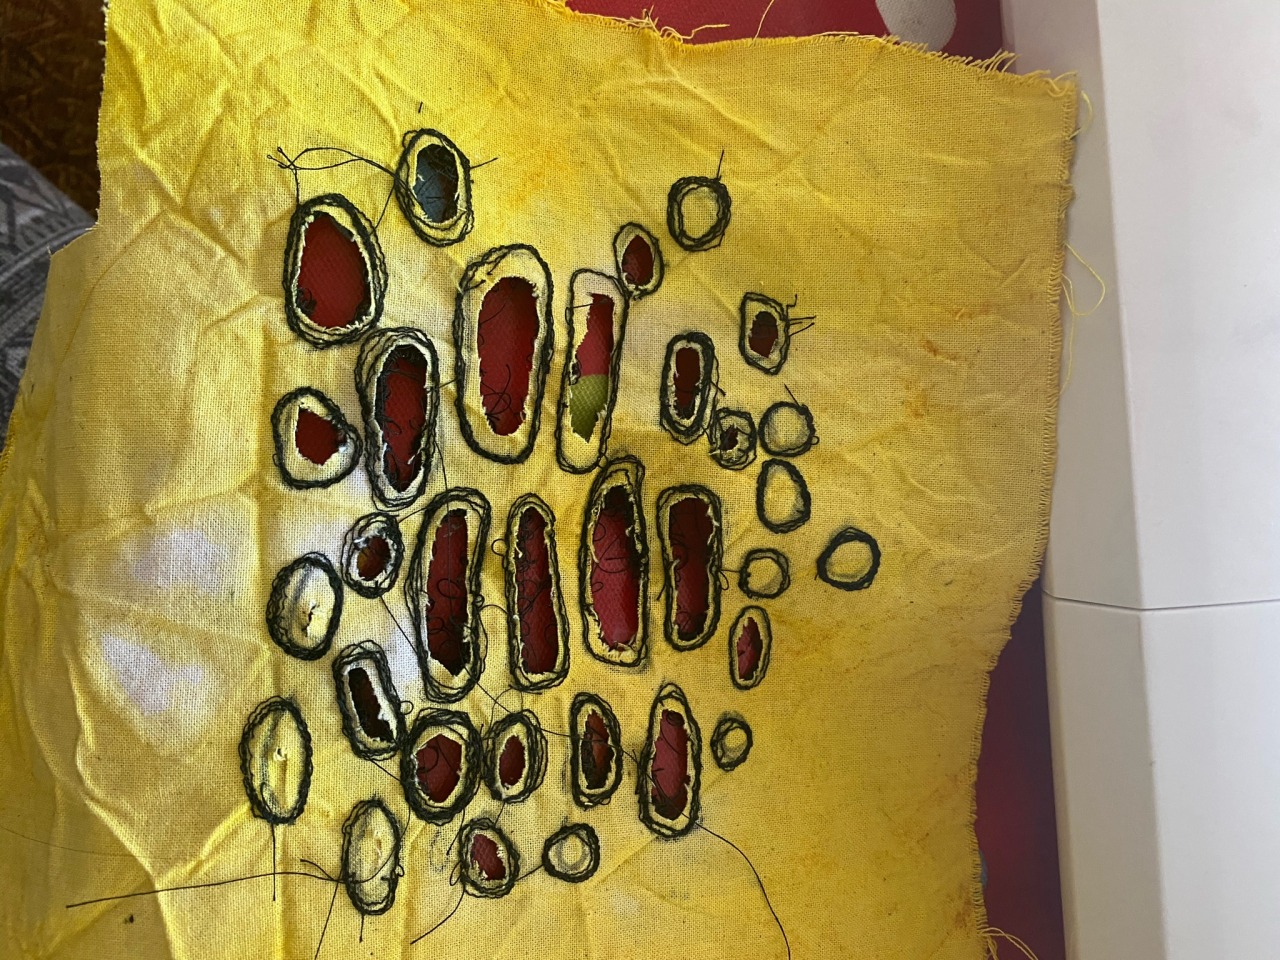
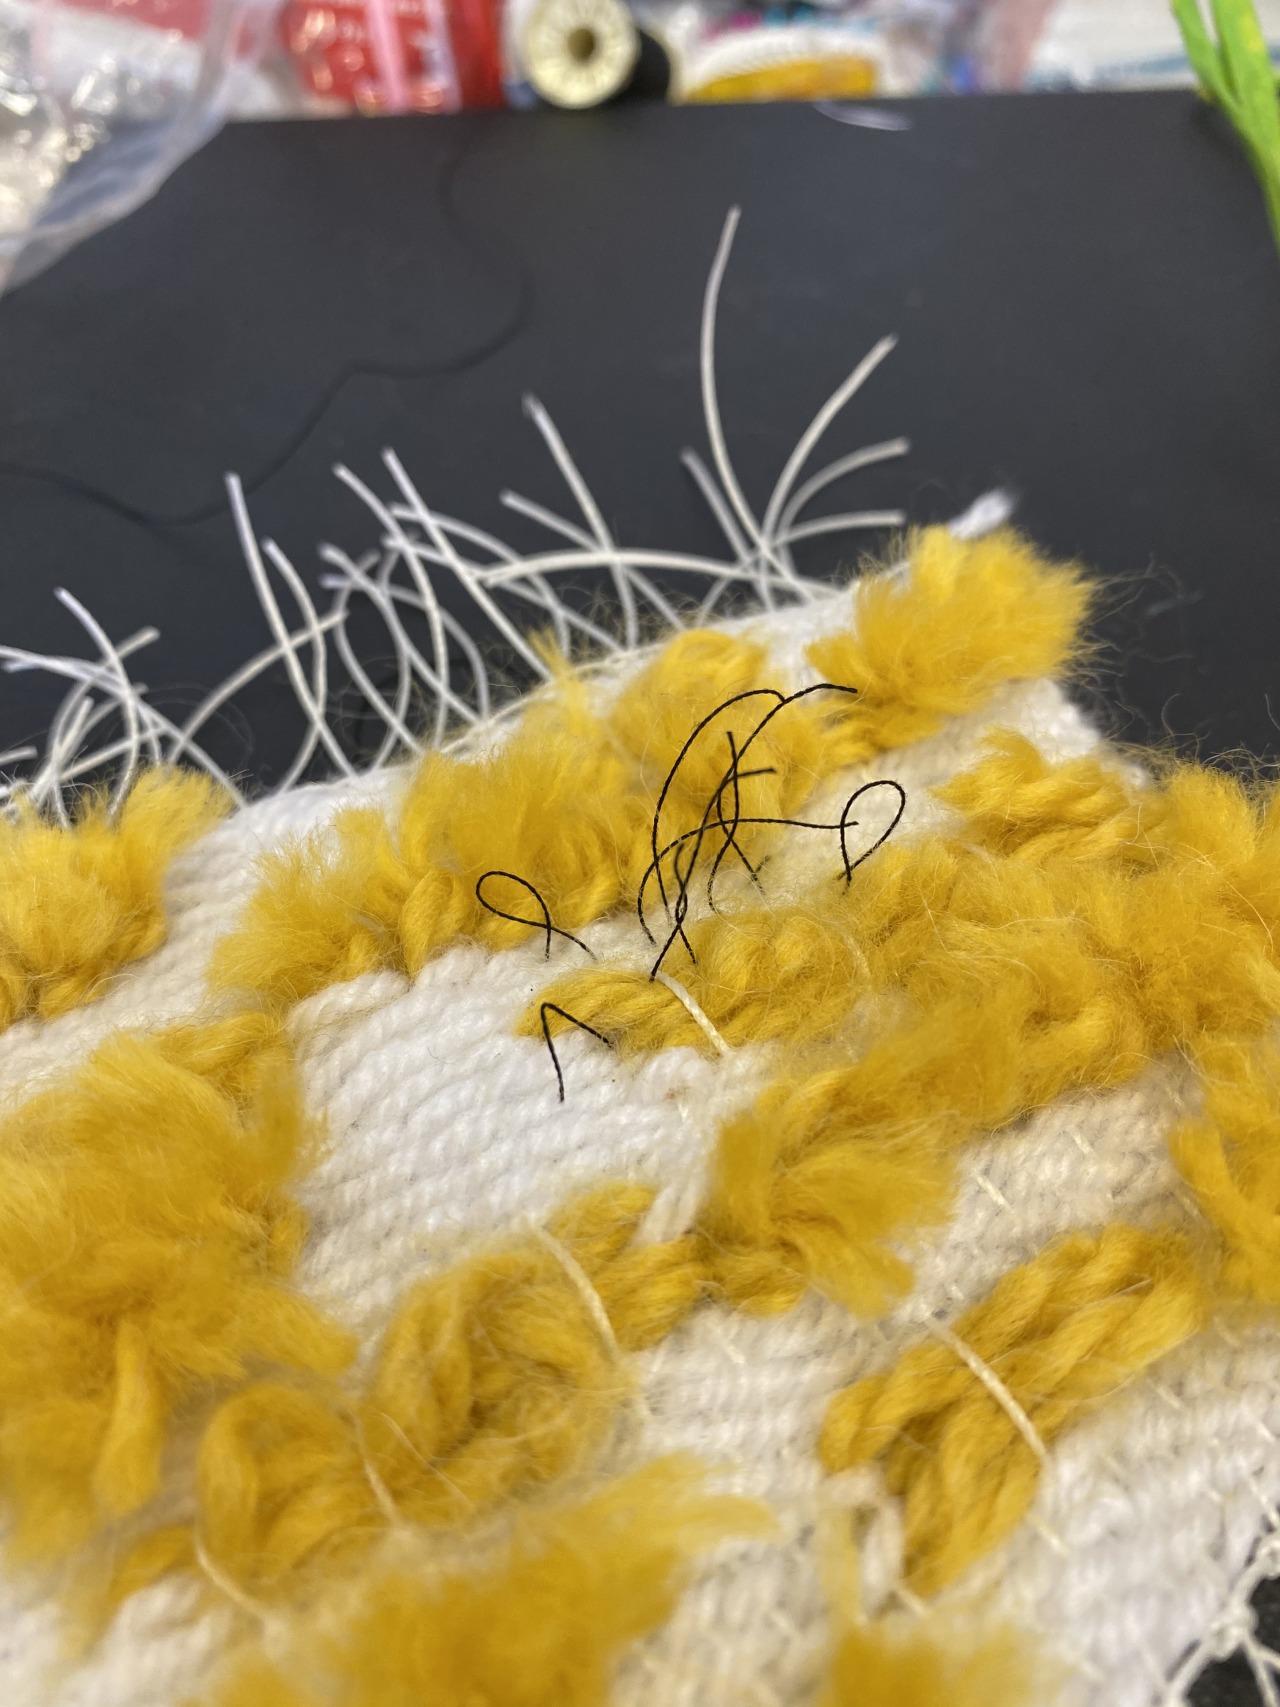
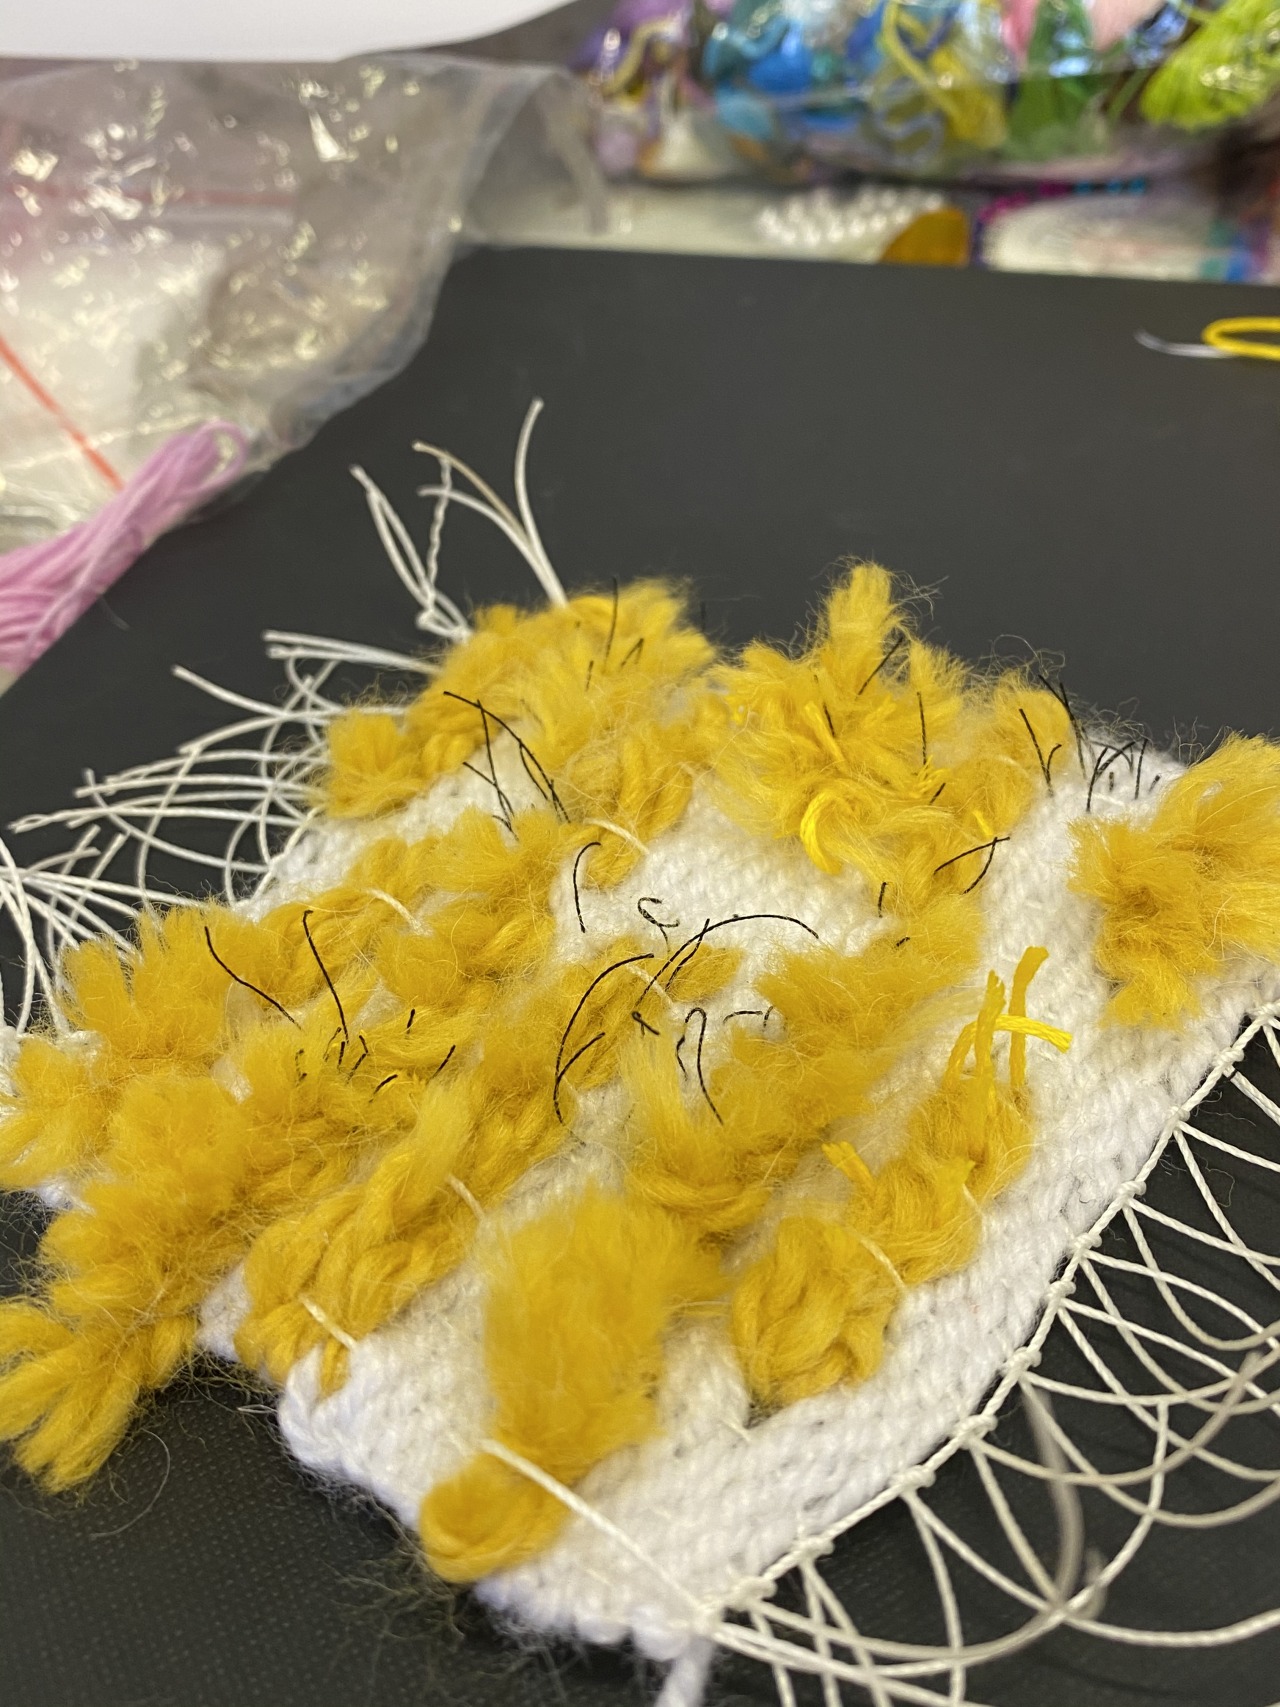
I also embellished this sample by stitching. this was by sewing with the sample faced up as you normally would. Interestingly enough it was this sample that I saw the tufts more. this prompted me to try this on the yellow sample.
I also experimented with stitching on these smaller paper samples.
Reflection 20/03/20 - Part 3 tutorial
Part 3 tutorial
Due to the Coronavirus pandemic our tutorials took place digitally. I sent my tutor my action plan, feedback form and a video where I talked through my sketchbook and my current ideas. Here is my feedback from my tutorial. I’m really happy with the feedback Katie has given me as it’s encouraging that I’m working in the right direction. Her ideas are interesting and definitely something I would like to explore especially the idea of dying fabric to create this architectural print. I’m going to research further into shibori.
Reflection 16/03/20
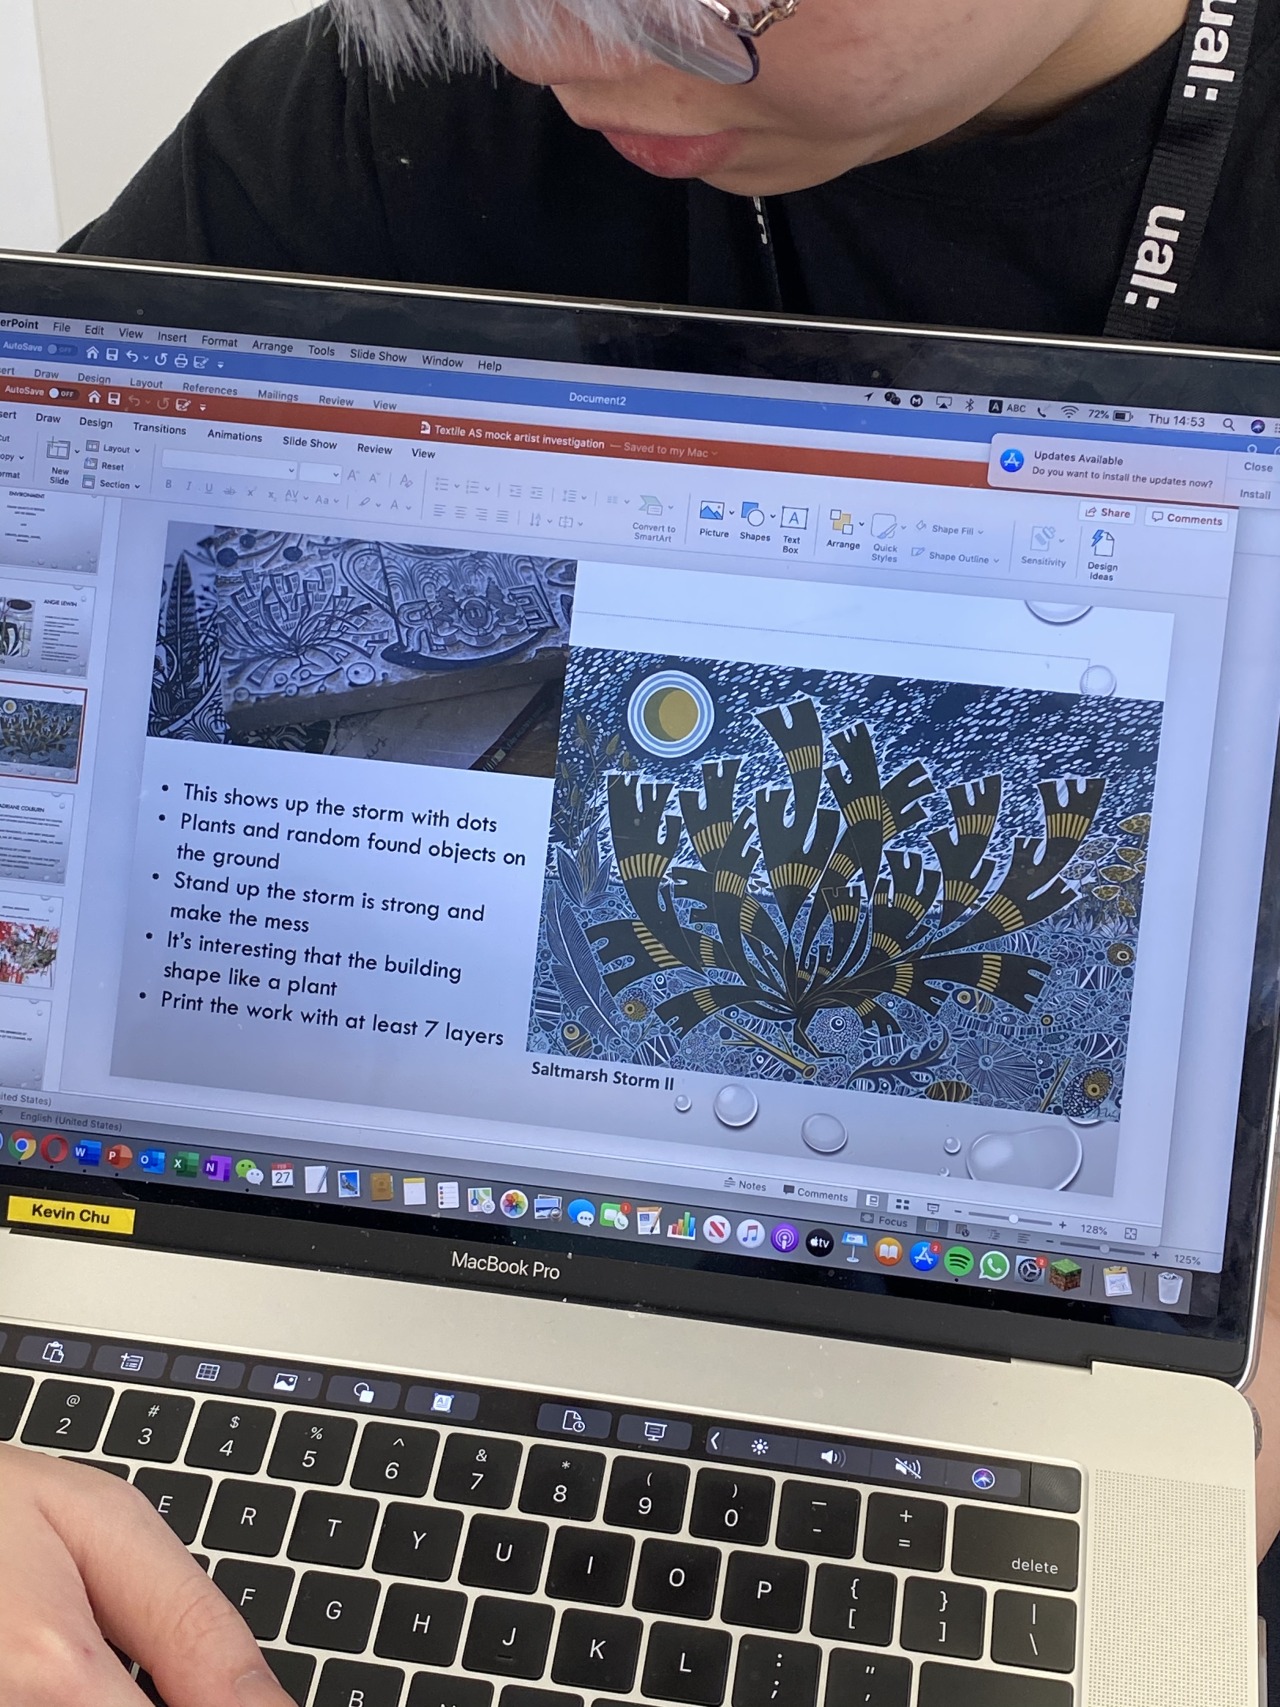
After speaking with Shane and sicgmone they highlighted to me that I need more drawings to illustrate my ideas more. We also came up with some ideas where I can encorporate ideas from earlier on in the project such as the relationship between humans and nature and working that in within my work. There are two different paths of this and I can look at both. One is the positive relationship where humans work with nature and work to better it and help instead of harm. The other is the negative which is humans vs nature where we destroy nature for human gain. Also things such as natural disasters and the Coronavirus which is a natural spread onto humans. to pottery these ideas I could use different imagery within my prints and use ideas of constraint over constructed textiles or the idea of growth together weaving the two in combination. Another idea I had was inspired by an image I took at Kew in one of the conservatories. Here you can see the nature within a man made architectural structure which is the conservatory. I would like to print these man made lines below my printing. Today I focused on working with collage to display this idea in my sketchbook so that the narrative flows better and you can see how my ideas progress within my sketchbook.
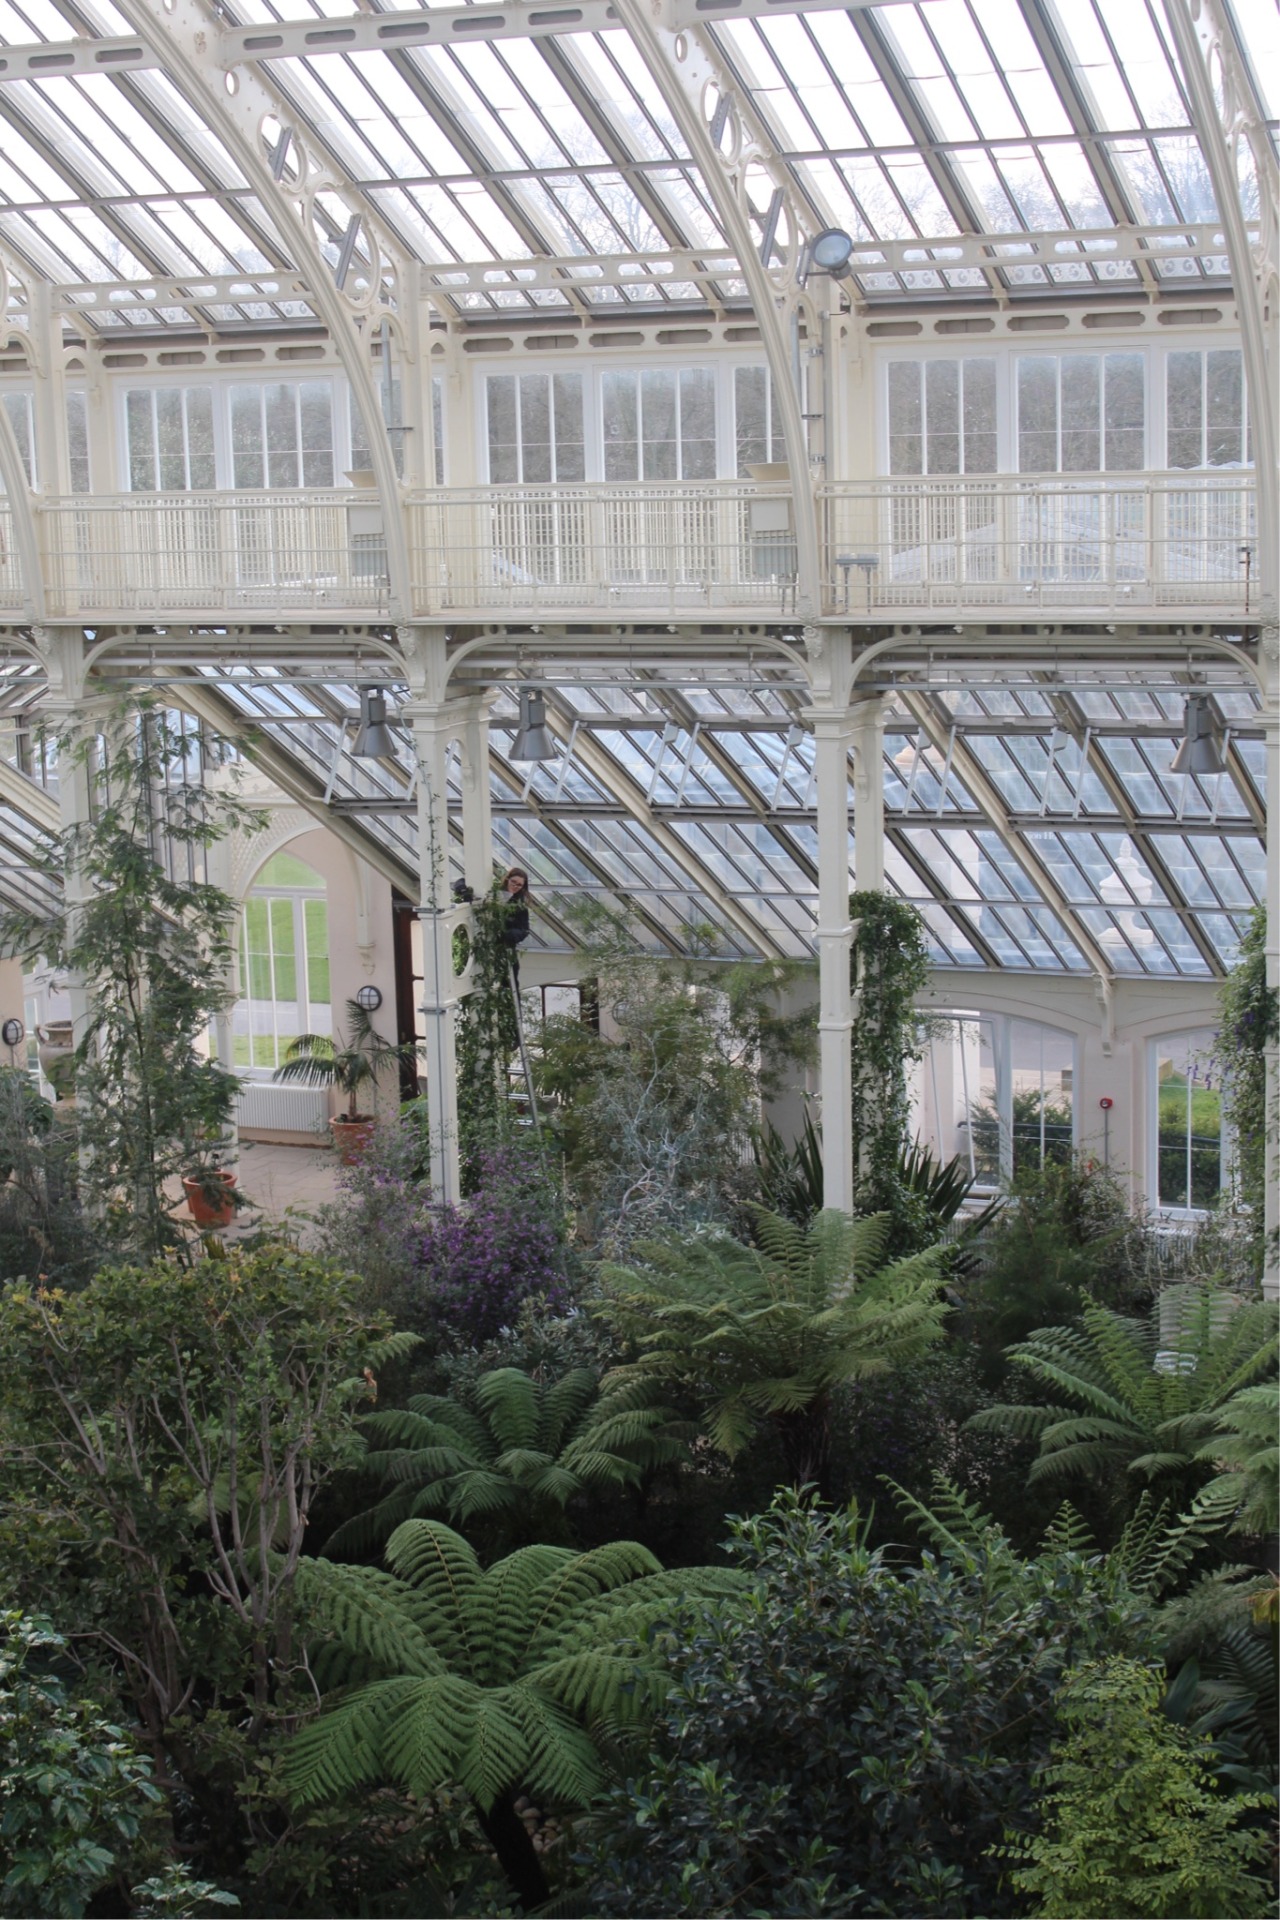
Human working with nature in a man made structure, Kew Gardens.
Beginning to draw man made structures and combining with collage.
I am going to go to the library to find some books on architecture which may contain some drawings I could use to print on.
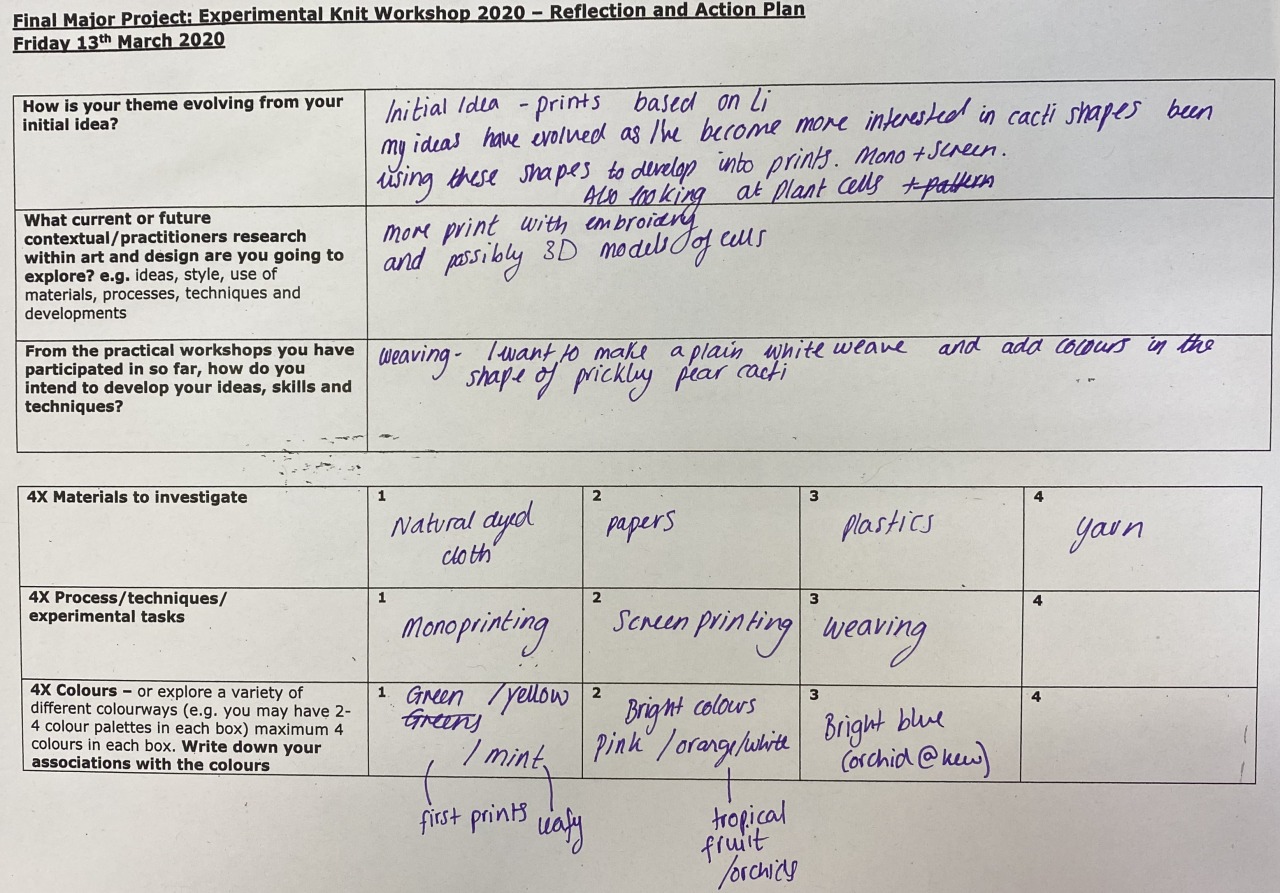
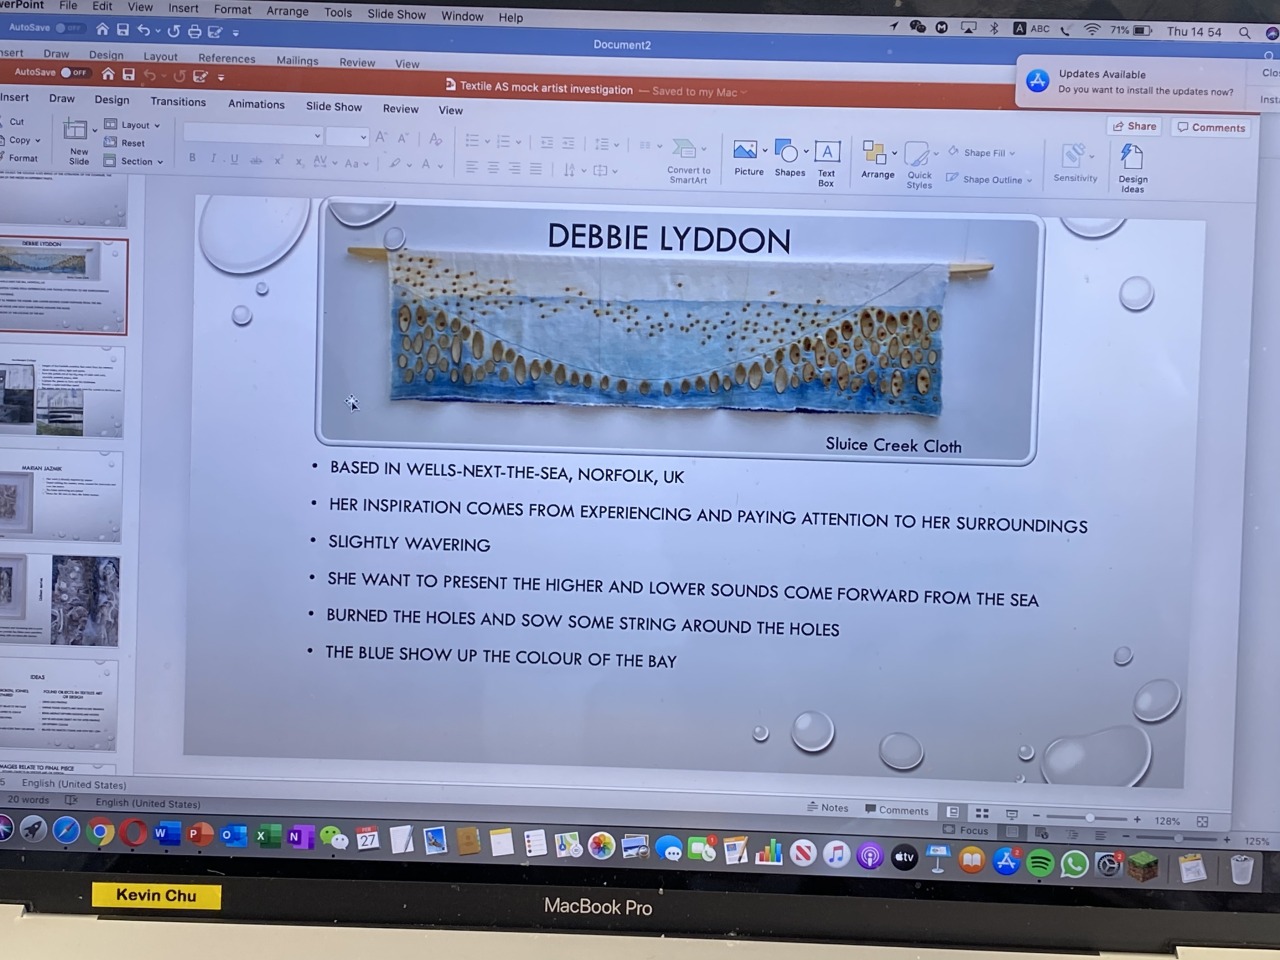
Reflection 13/03/20
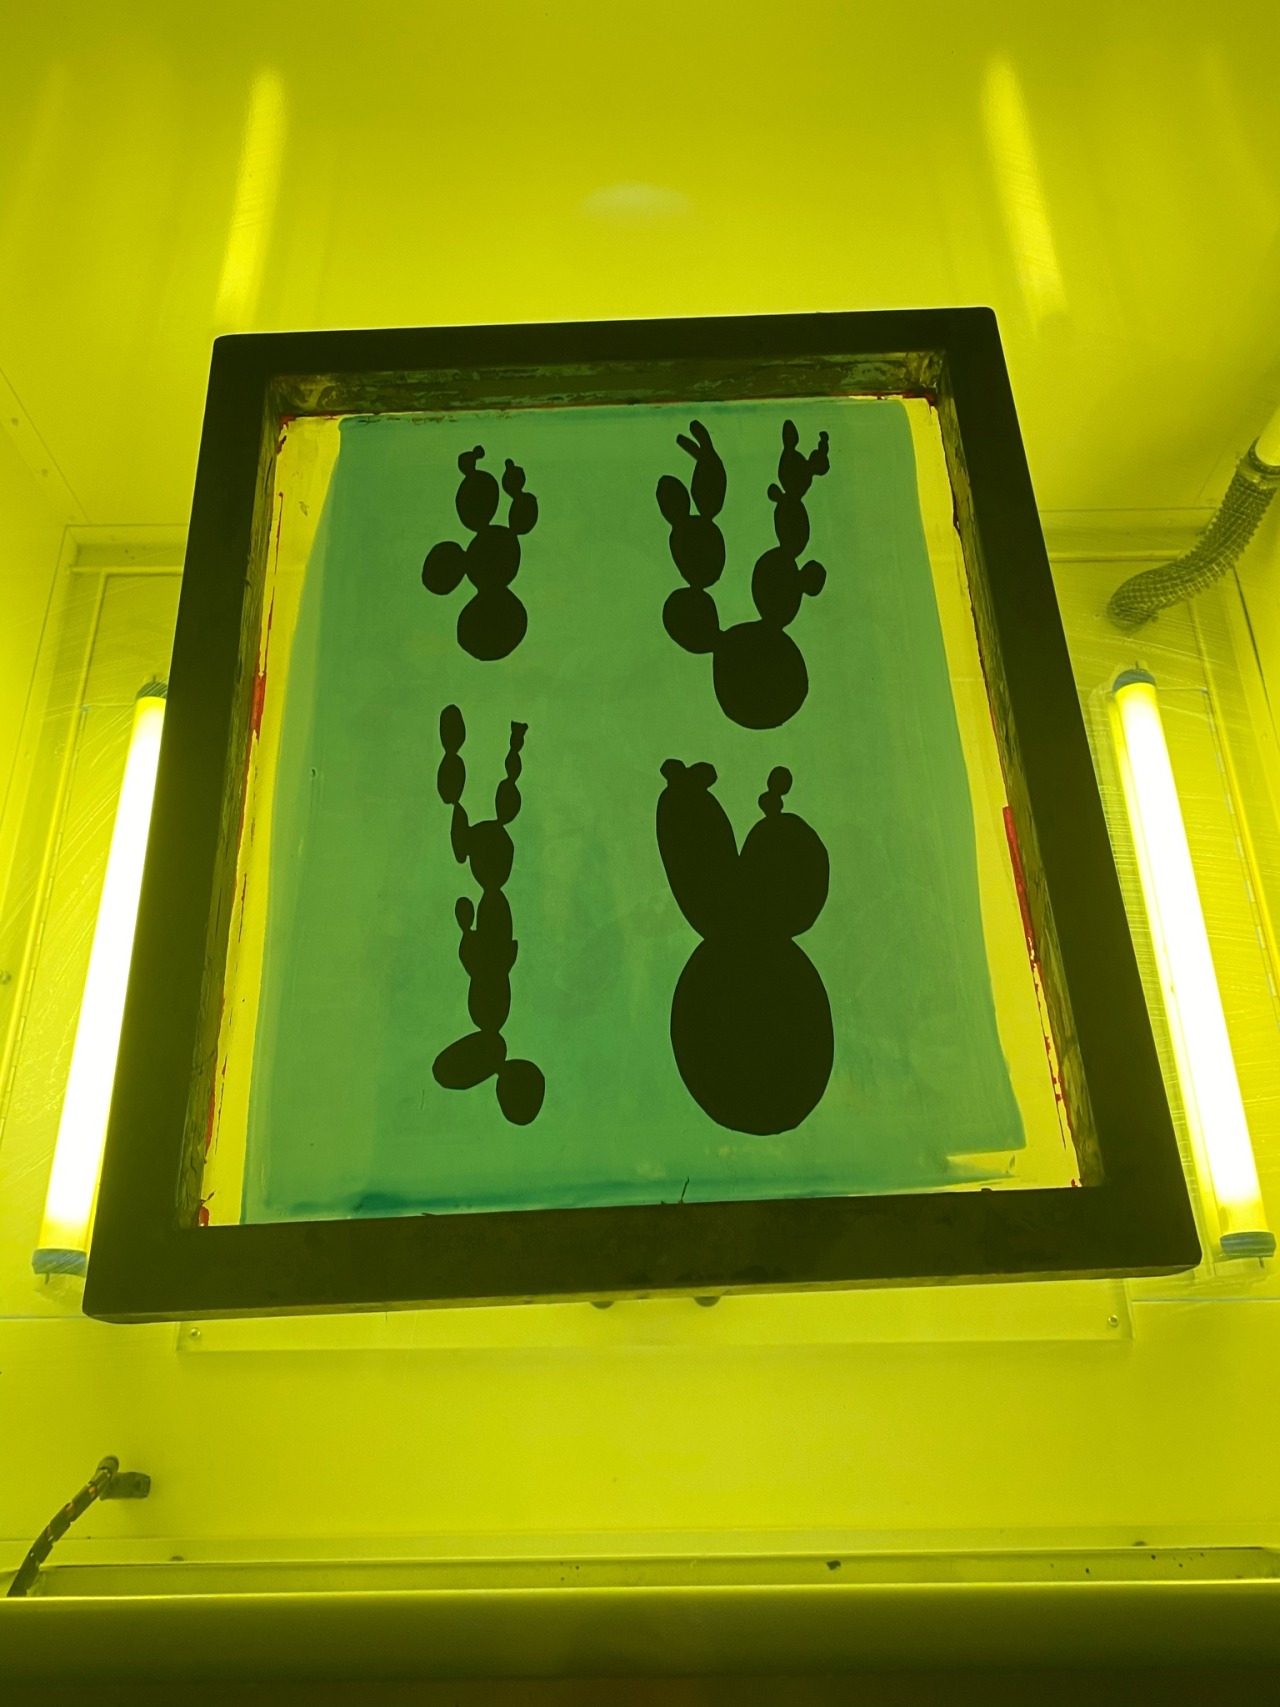
Today we got the opportunity to learn some knew knitting skills with Francis. We learnt how to create button holes and knit stitches. This was useful to me as I’ve been looking at cactus cells and I noticed I could use these stitching techniques to create a similar mesh pattern. I would like to develop these further to imitate the cactus cells. Possibly by stretching them on an embroidery hoop to expose the cellular patterns. I also had the idea of using these to create a pattern for a print by screen printing the knit. I would have to work out a way to stretch it out enough so that it covered the screen. Before creating the knit I created a drawing of some cactus cells. I’ve scanned this drawing in and inverted it so I can expose it onto a screen.
Reflection 11/03/20
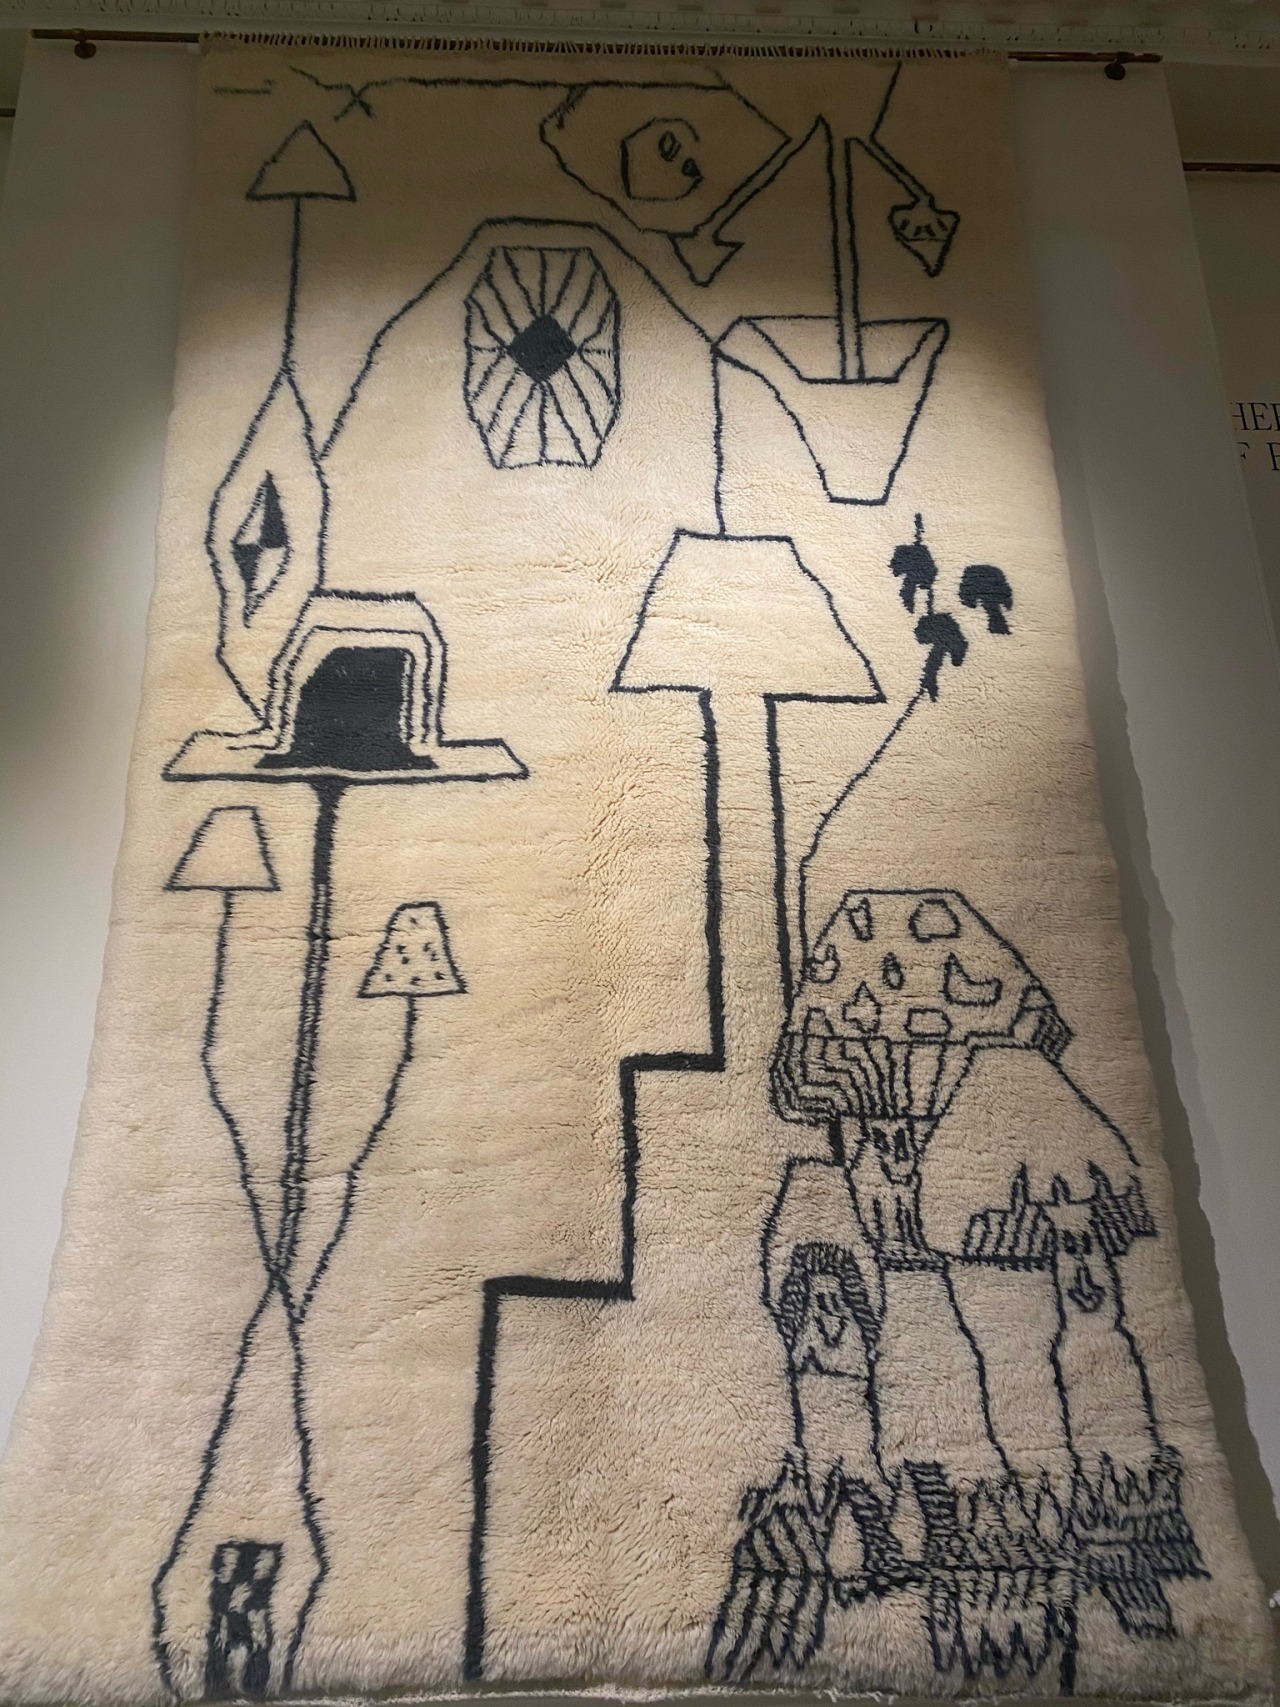
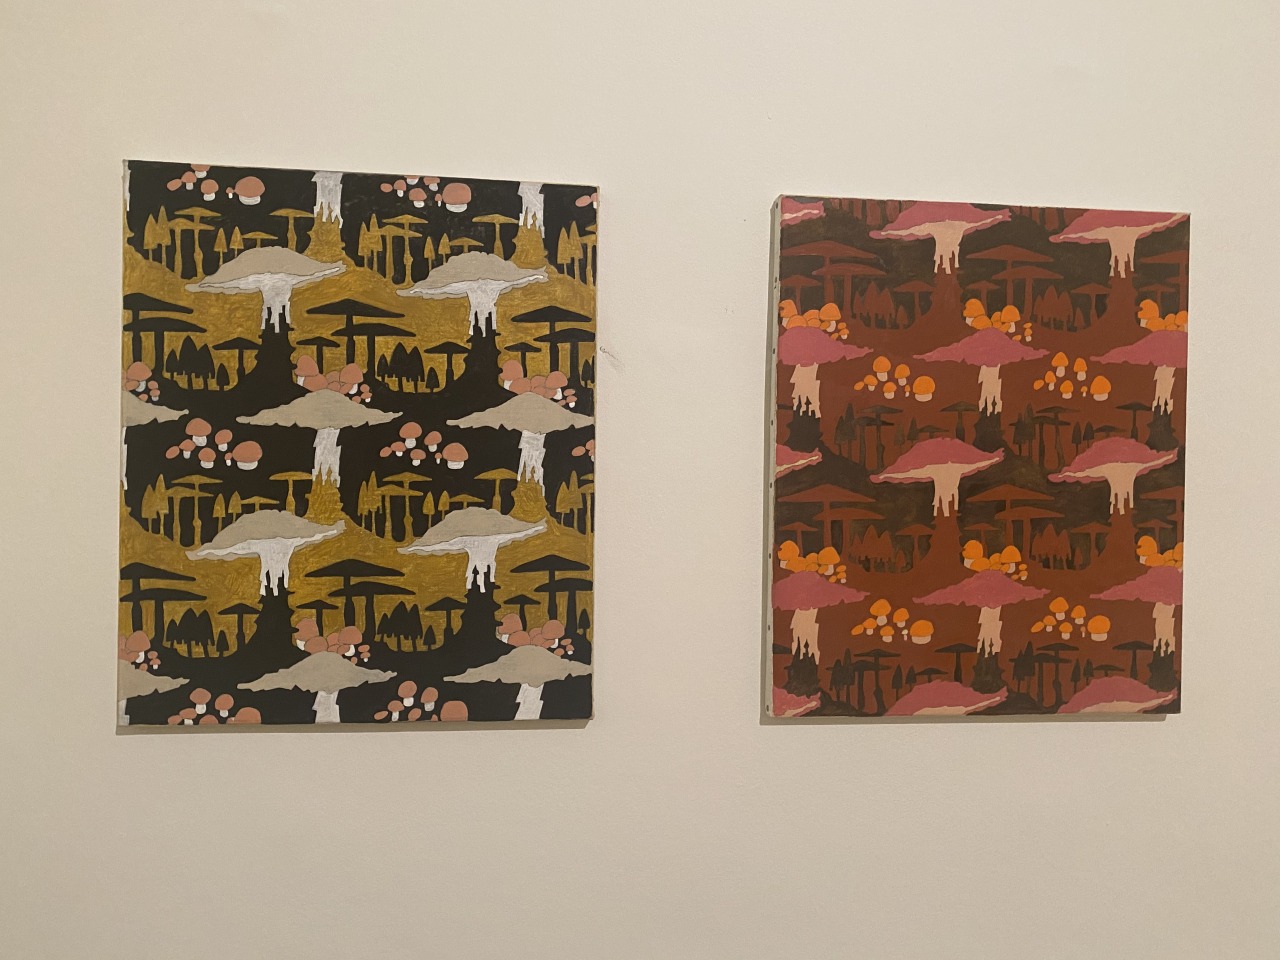
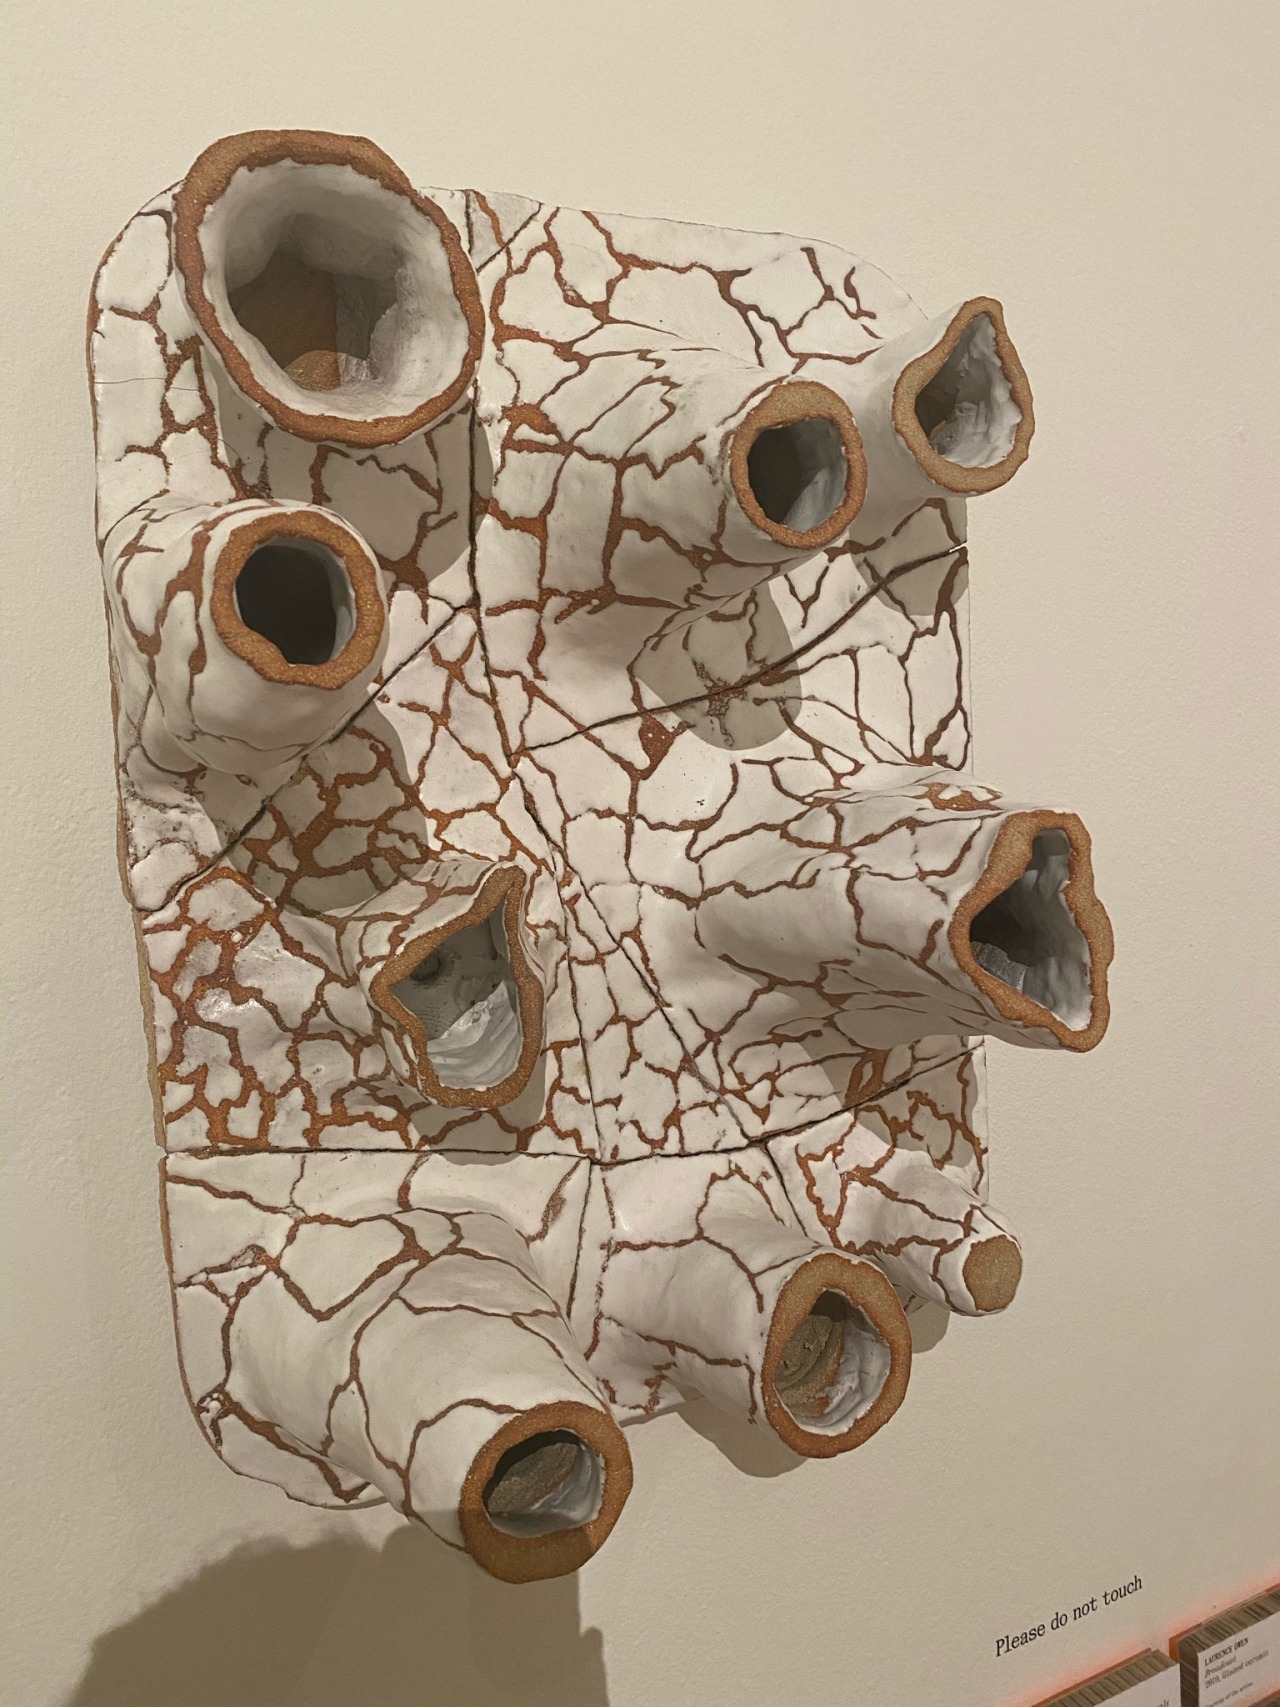
Today I went to the future of fungi exhibition at Somerset House. I thought this would be an interesting exhibition to see as it contains patterns found in nature from fungi as well as forms. There were a couple of artists that stuck out to me such as Laurence Owens ceramic pieces which mimic the spores of fungi. Another was P.A.M’s rug which displayed mushroom shapes. The exhibition highlighted the importance of fungi to all life forms and how other life wouldn’t survive without this unique natural group of specimen.
Reflection 06/03/20
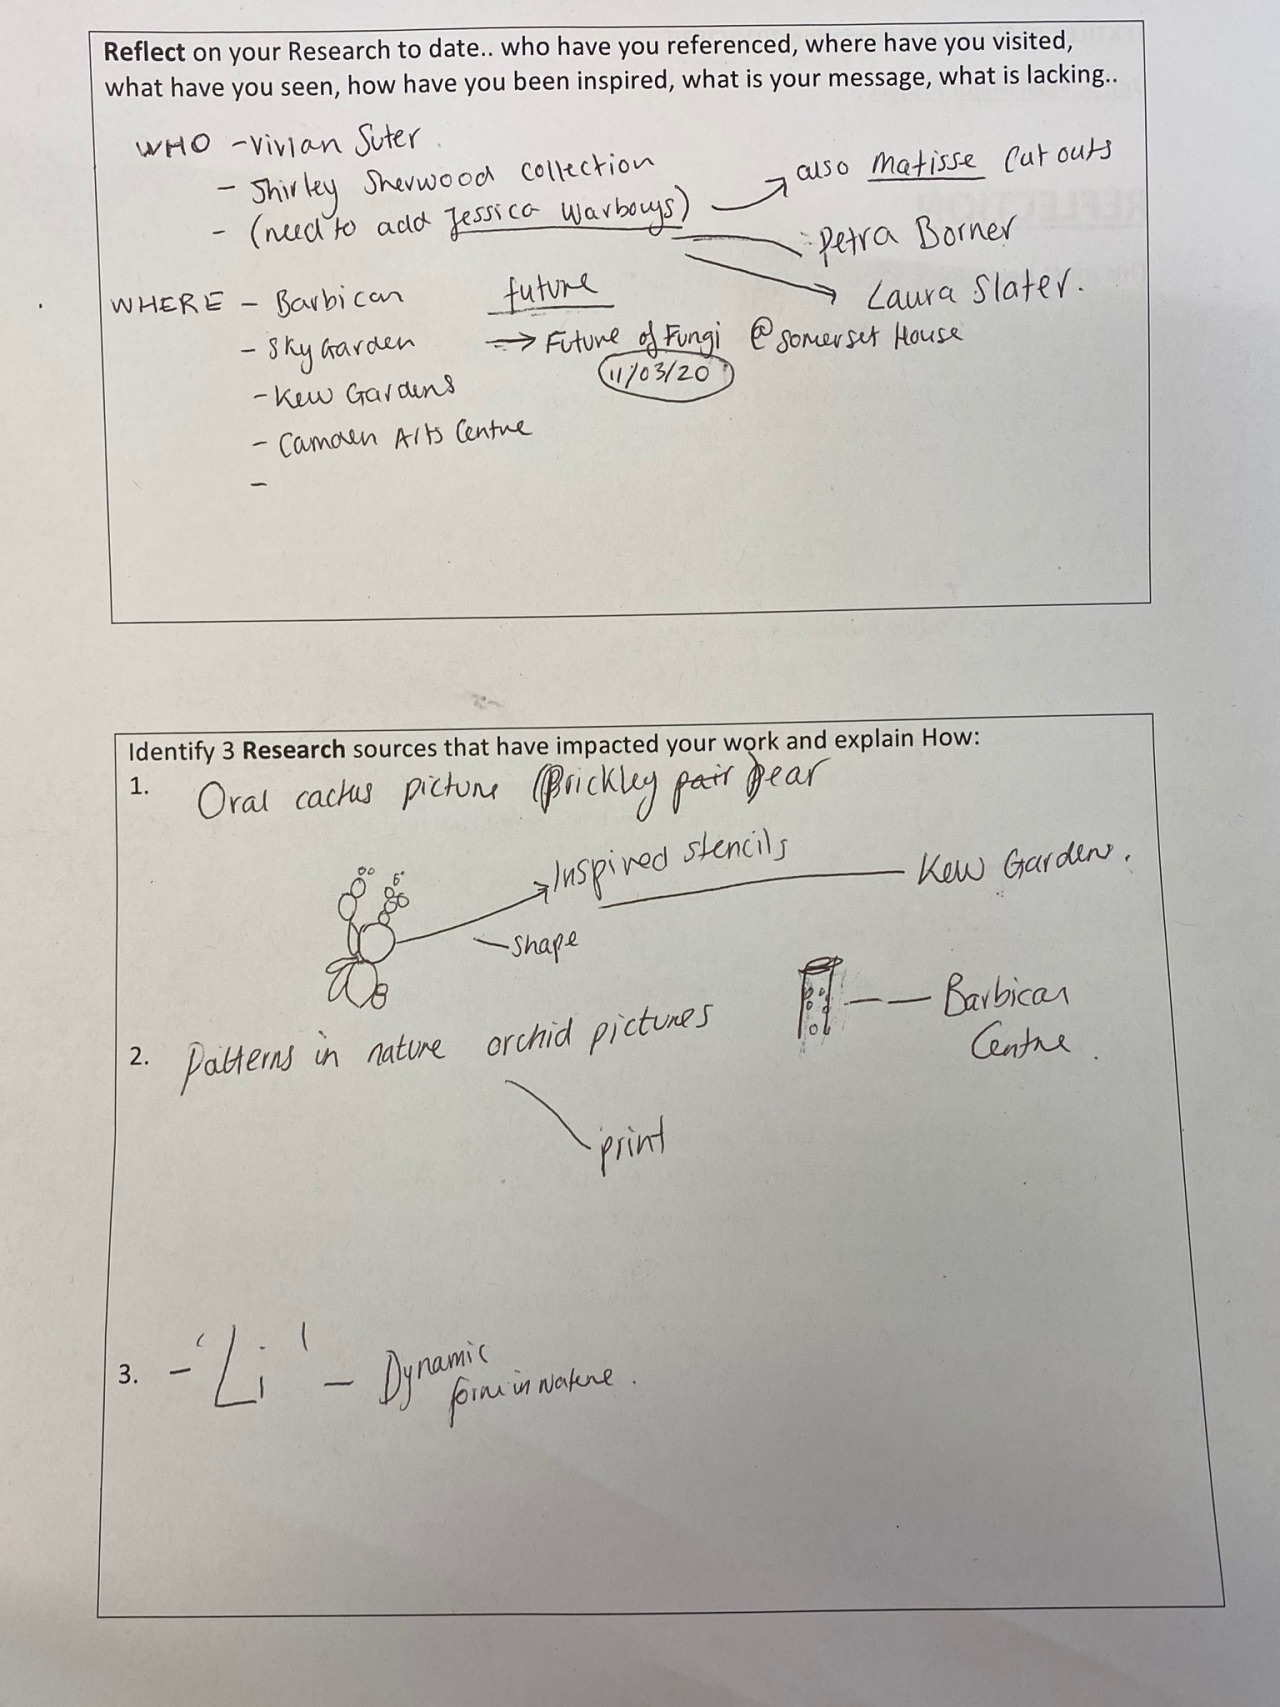
Today we looked at each others workflows and analysed what resources we want to take forward. Mine were the prickly pear cactus which I plan to use for a screen print design. The doors and patterns in one of the flowers I took a picture of at the Barbican centre. ‘Li - Dynamic Form in Nature’ as the patterns in this book inspire me for prints.
Reflection 05/03/20
Today we had a research based workshop with sicgmone where we learnt how to use collage to tell a story and how we can change the narrative of our stories with the change of a word or image. This workshop was useful and displayed the idea that we can change the narrative of our stories with small changes. I also spoke with Katie and she helped me decipher what exactly I’m pursuing moving forward as I feel like I was getting stuck in the research phase and not pursuing a particular route in the topic of patterns and forms. I’m going to create some stencils on black card which I will be exposing into a screen and using to screen print. I think I need to continue with research through out the project but now I’m at the point where I can begin making and experimenting with different printing techniques to produce samples.
Reflection 04/03/20
Today I went to the Vivian Suter exhibition at the Camden arts centre this morning. This exhibition is made up of works Sutter created until a rainstorm in 2005 flooded her studio which ‘ruined’ her pieces. Suter decided to work in conjunction with nature and embrace the natural role that nature took in shaping her work. The exhibition was exciting to see as a textiles student as it uses bright colours and shapes resembling forms that could be developed into prints. Although these works are paintings alone I could take influence from these painting to create prints
Reflection 02/03/20 - Kew gardens
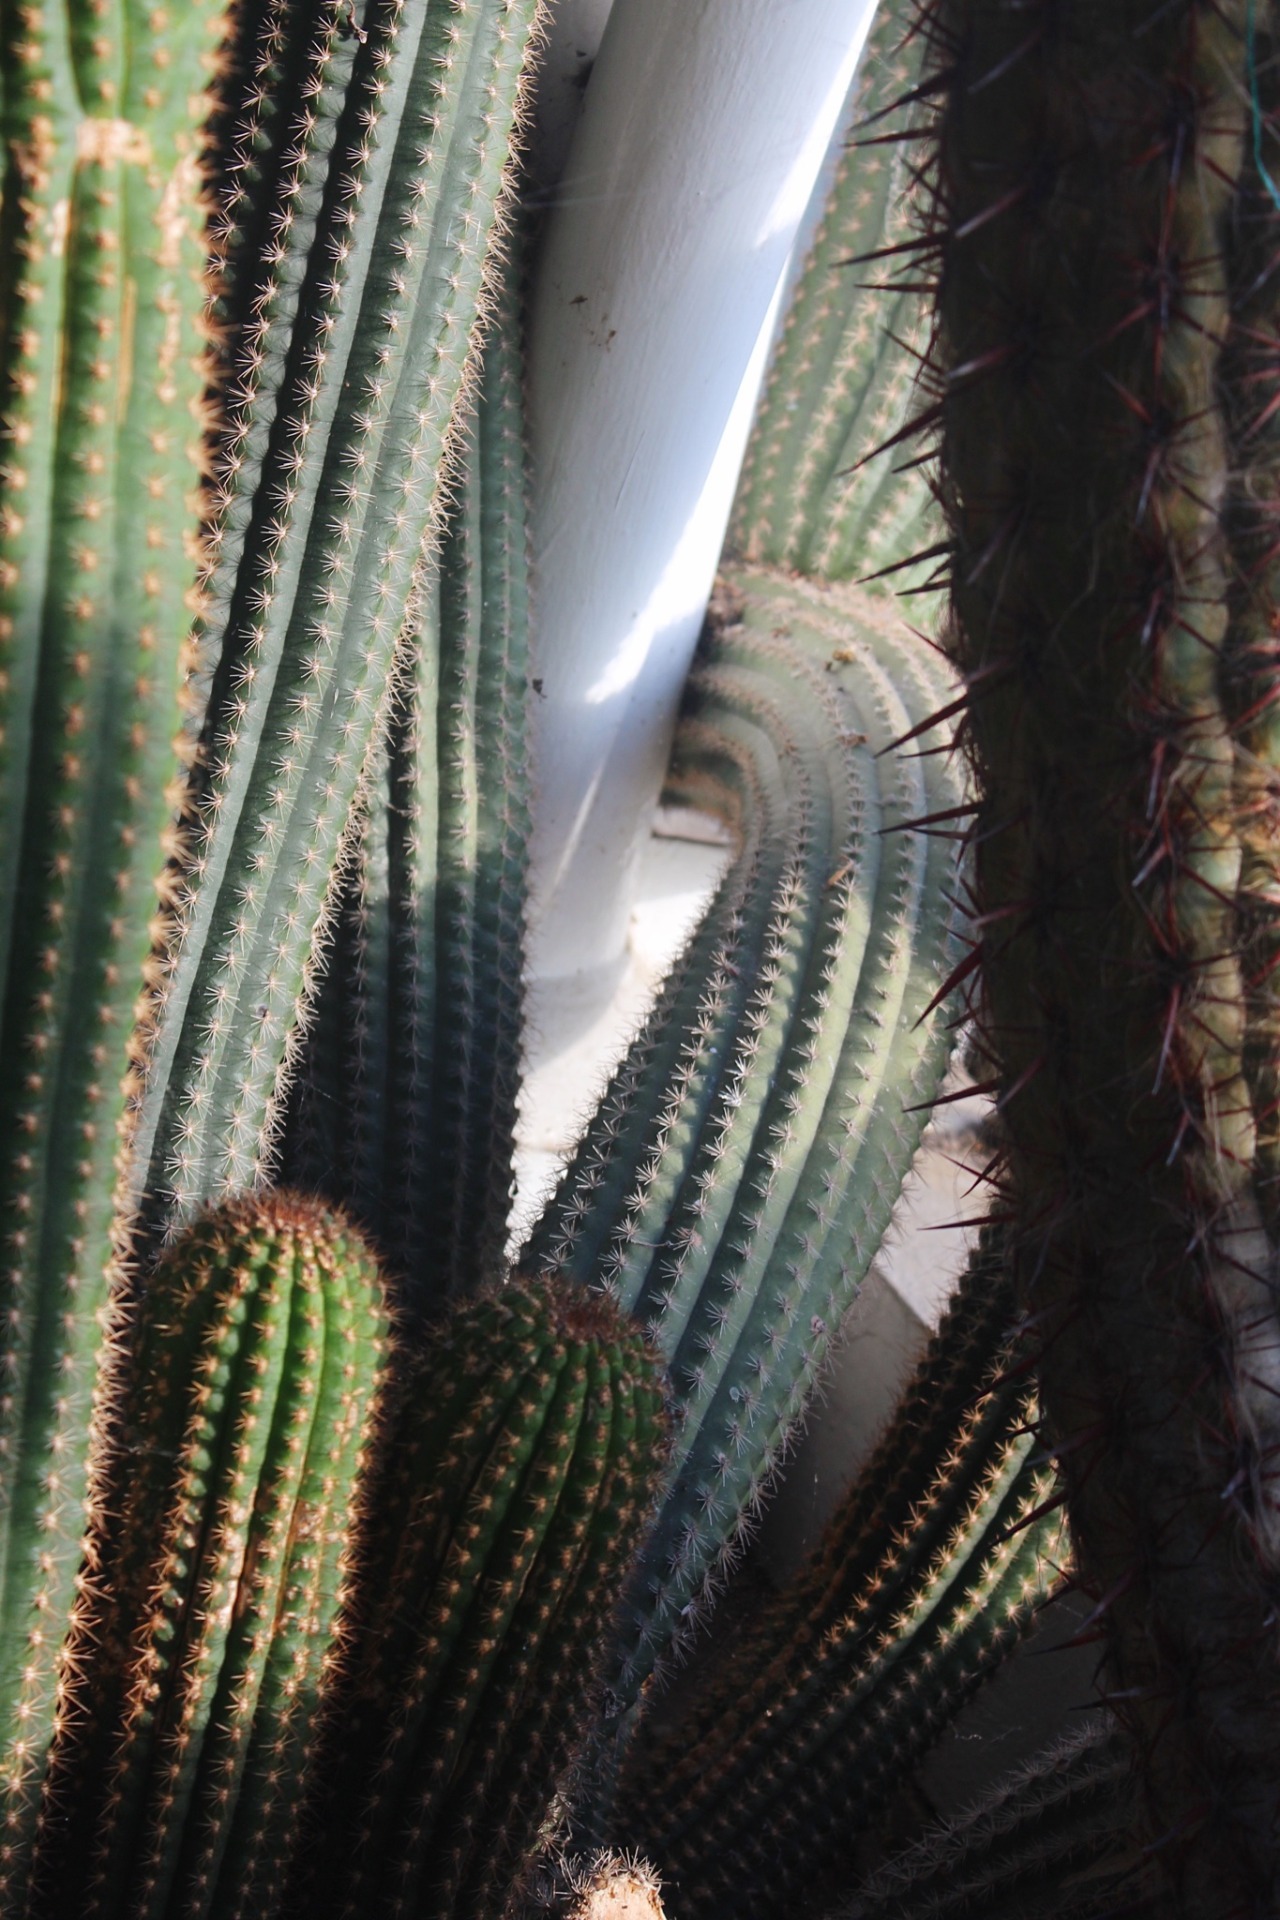
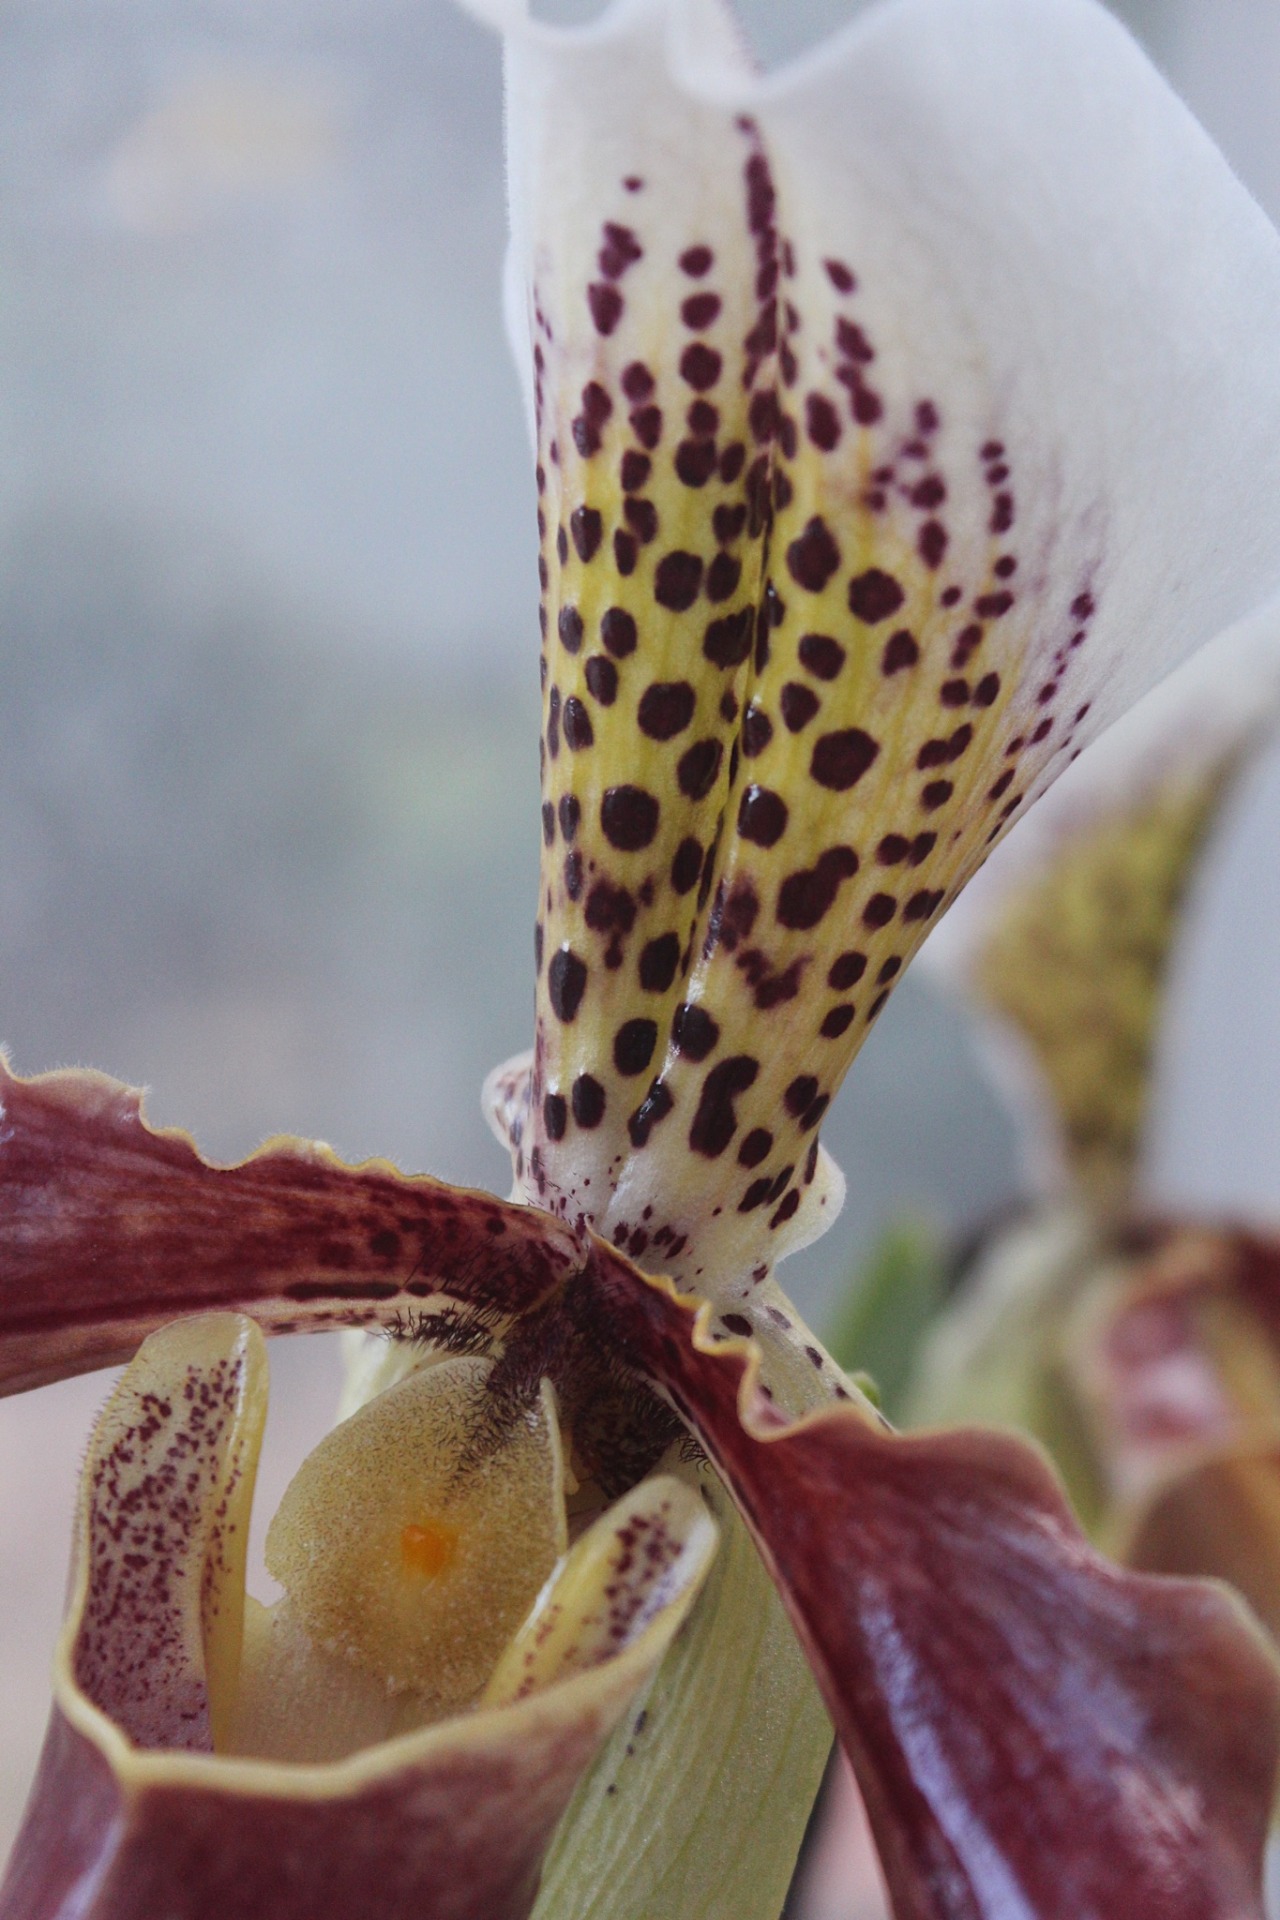
Today I went to Kew Gardens for a research trip. This trip was very successful and I had an amazing time. Kew Gardens has the largest collection of plants in the UK and there was so much to see in terms of plant diversity and patterns I could find. I took my camera and sketch book capturing images of patterns and plants I found interesting. I went to the orchid exhibition where I saw a saturated blue rare Indonesian orchid which I made sure to take pictures of. At the orchid exhibition there was many different orchids and flowers. Before I hadn’t considered flowers so much as I was more focused on leaf vascular patterns and patterns seen on leaves but the colour of the flowers was eye catching so I’ve included this in my research as it may inspire my colour pallet later down the line. At the orchid exhibition I found a spot to sit where there were some cactus plants where I sketched. There was on that interested me due to its shape and formation. It’s built up of oval shaped disks stacked on top of eachother which hold an unusual what would seem as unstable shape but holds itself together well.
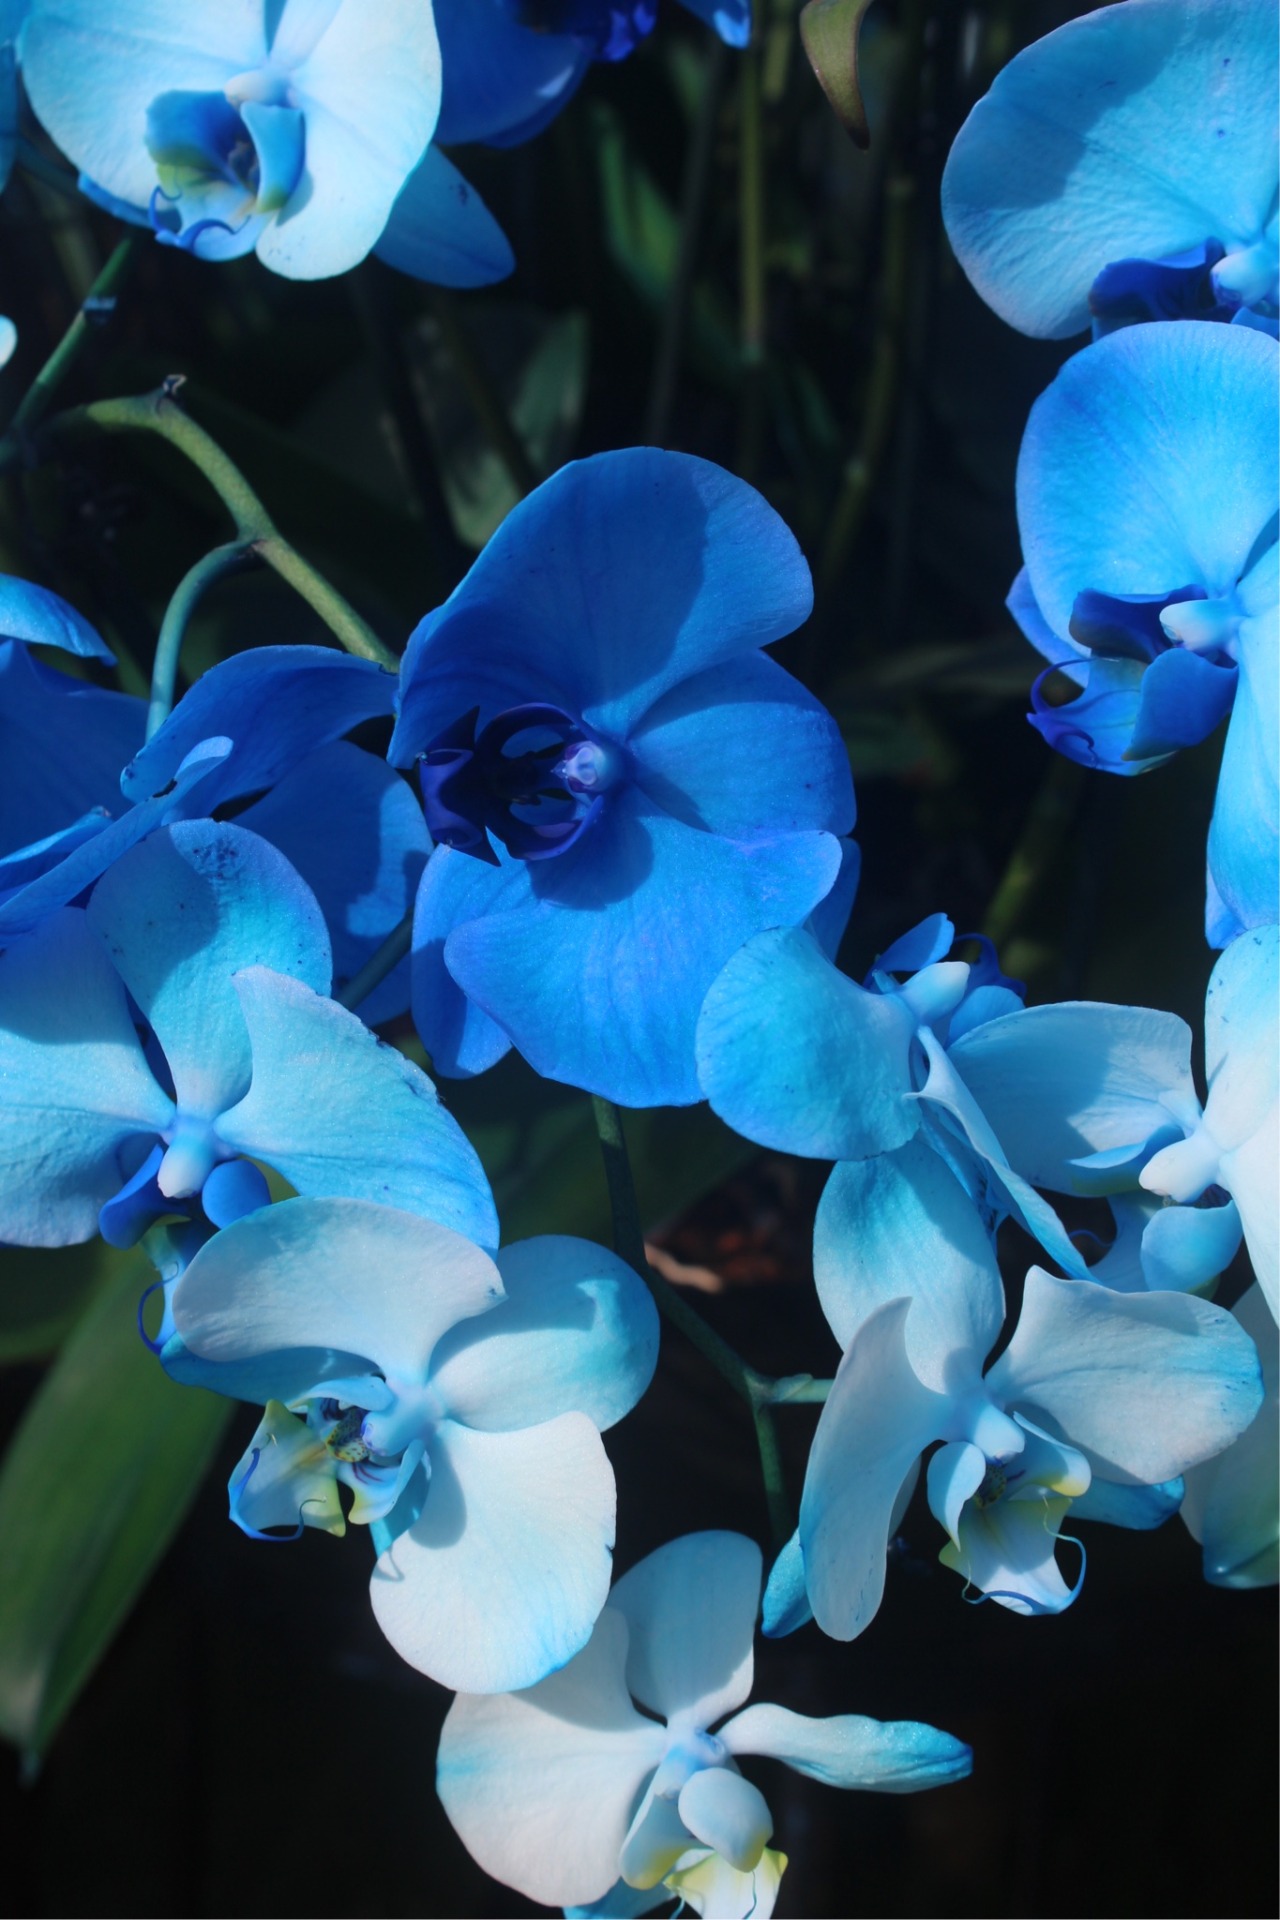
Indonesian Orchid
I went to the palm house where there were many tropical plants similar to rainforest plants. There was a walk way at the top of the conservatory which you could go up to and view the conservatory from above. This reminded me of being above the canopy level in a tropical rainforest. The environment was humid and hot even my glasses and camera lense fogged up as I went in. This house at Kew was great to see huge leaves and widespread jungle plants.
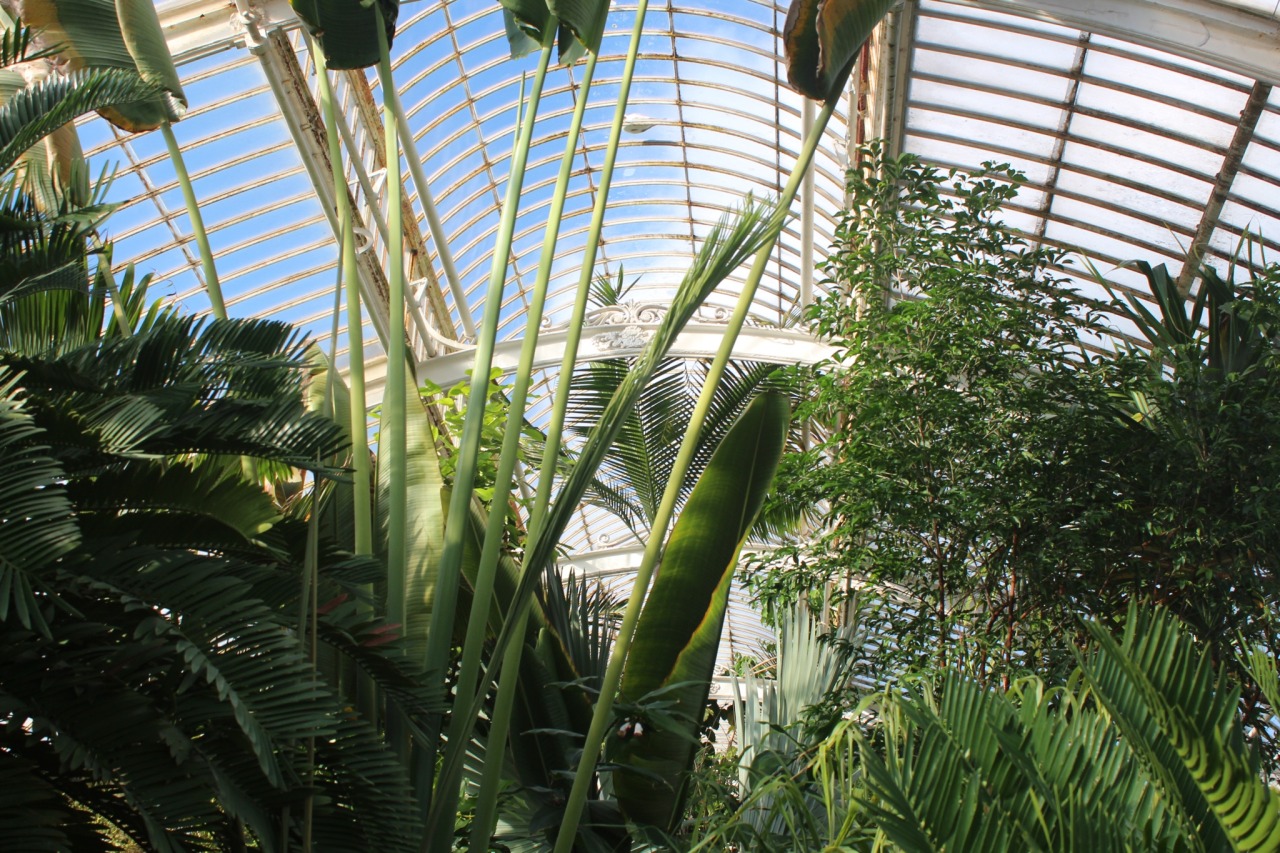
Palm house
Following the palm house I visited the temperate house which had plants found in a temperate climate. Here there were more smaller plants with smaller leaves.
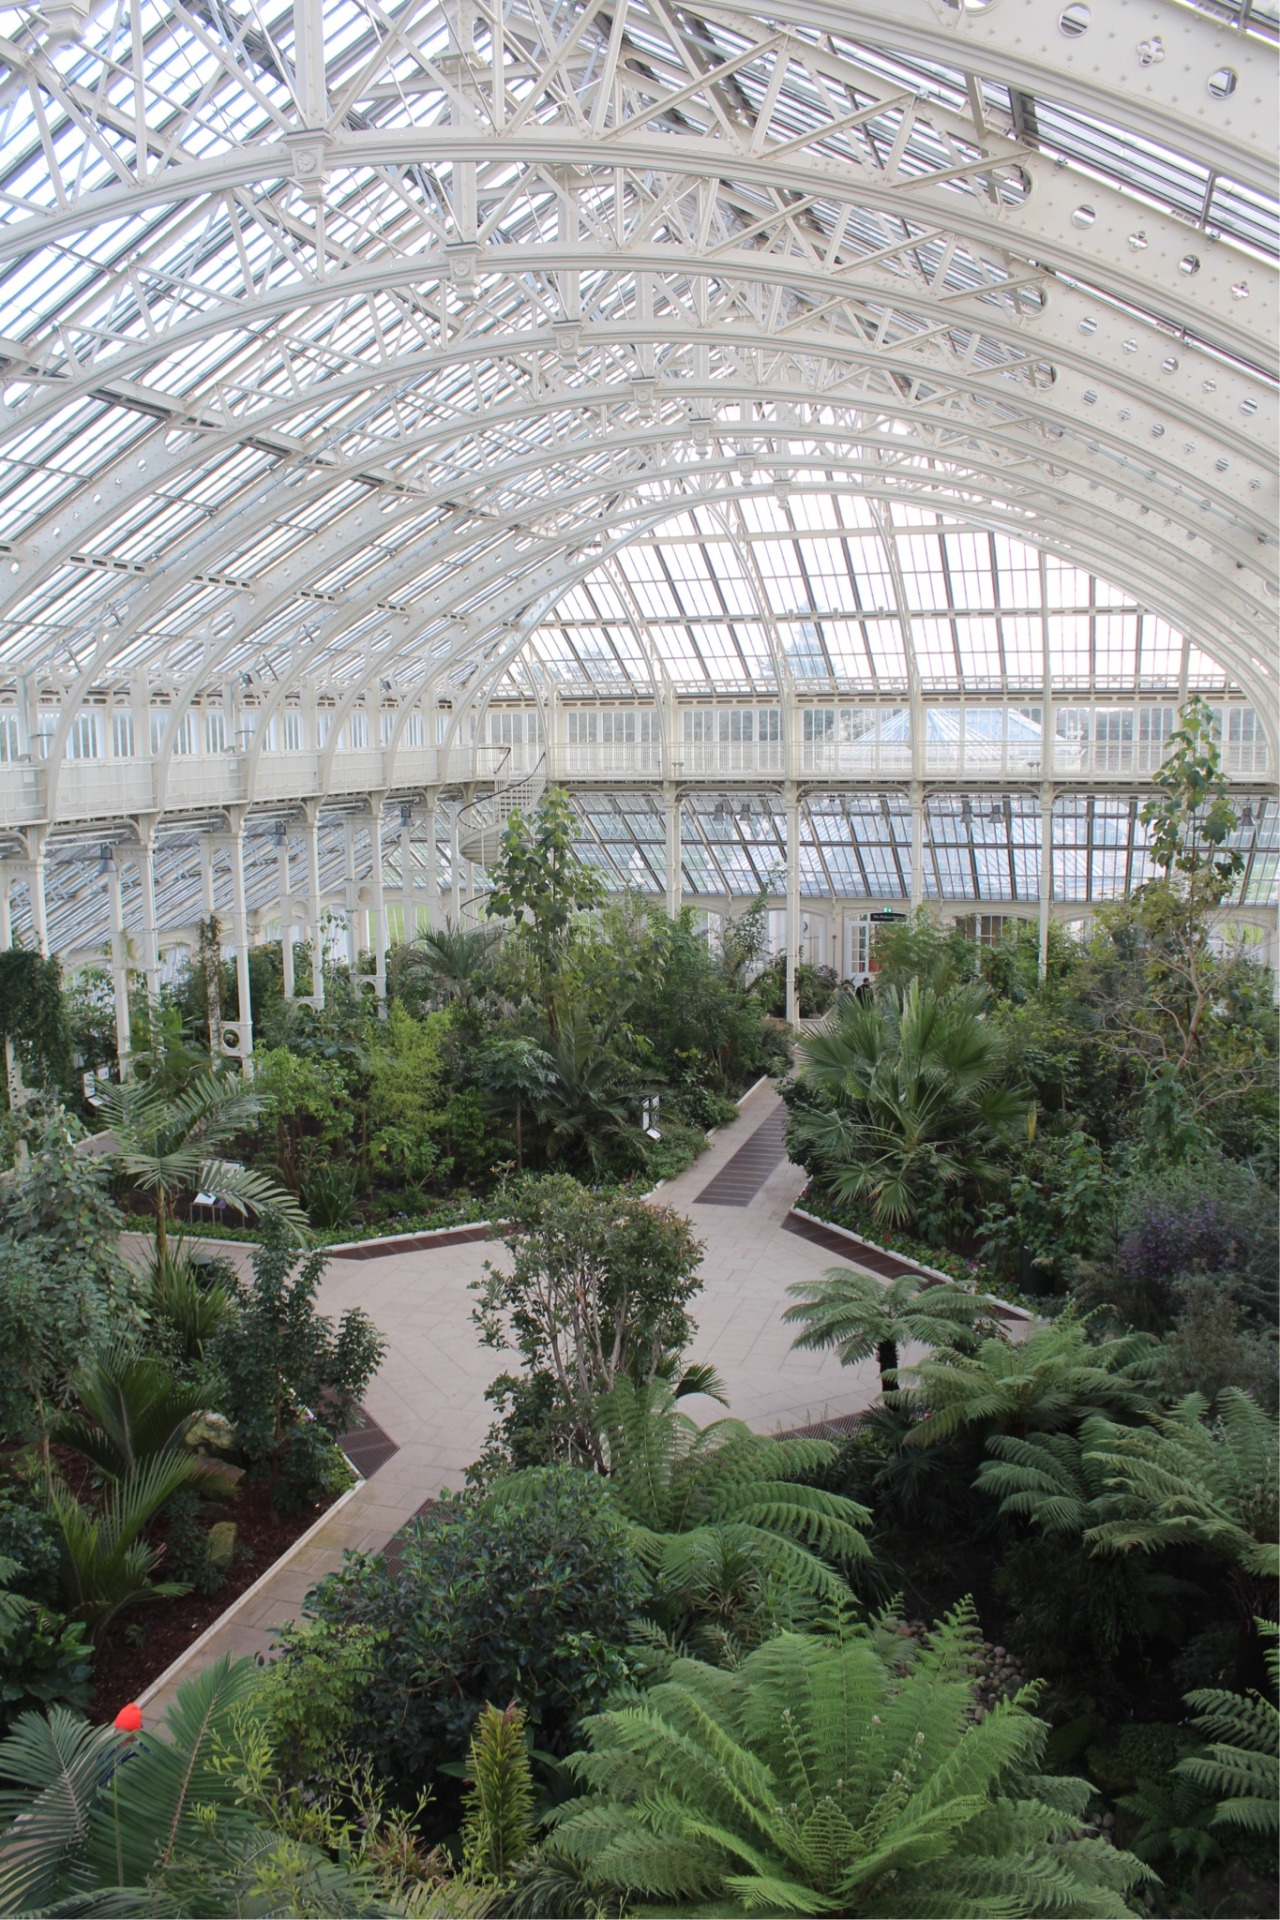
Temperate House
I also went to the Australian section and did some sketches of a plant with hard waxy long leaves branching off in different directions. I looked at the shadows this plant cast on the page as well.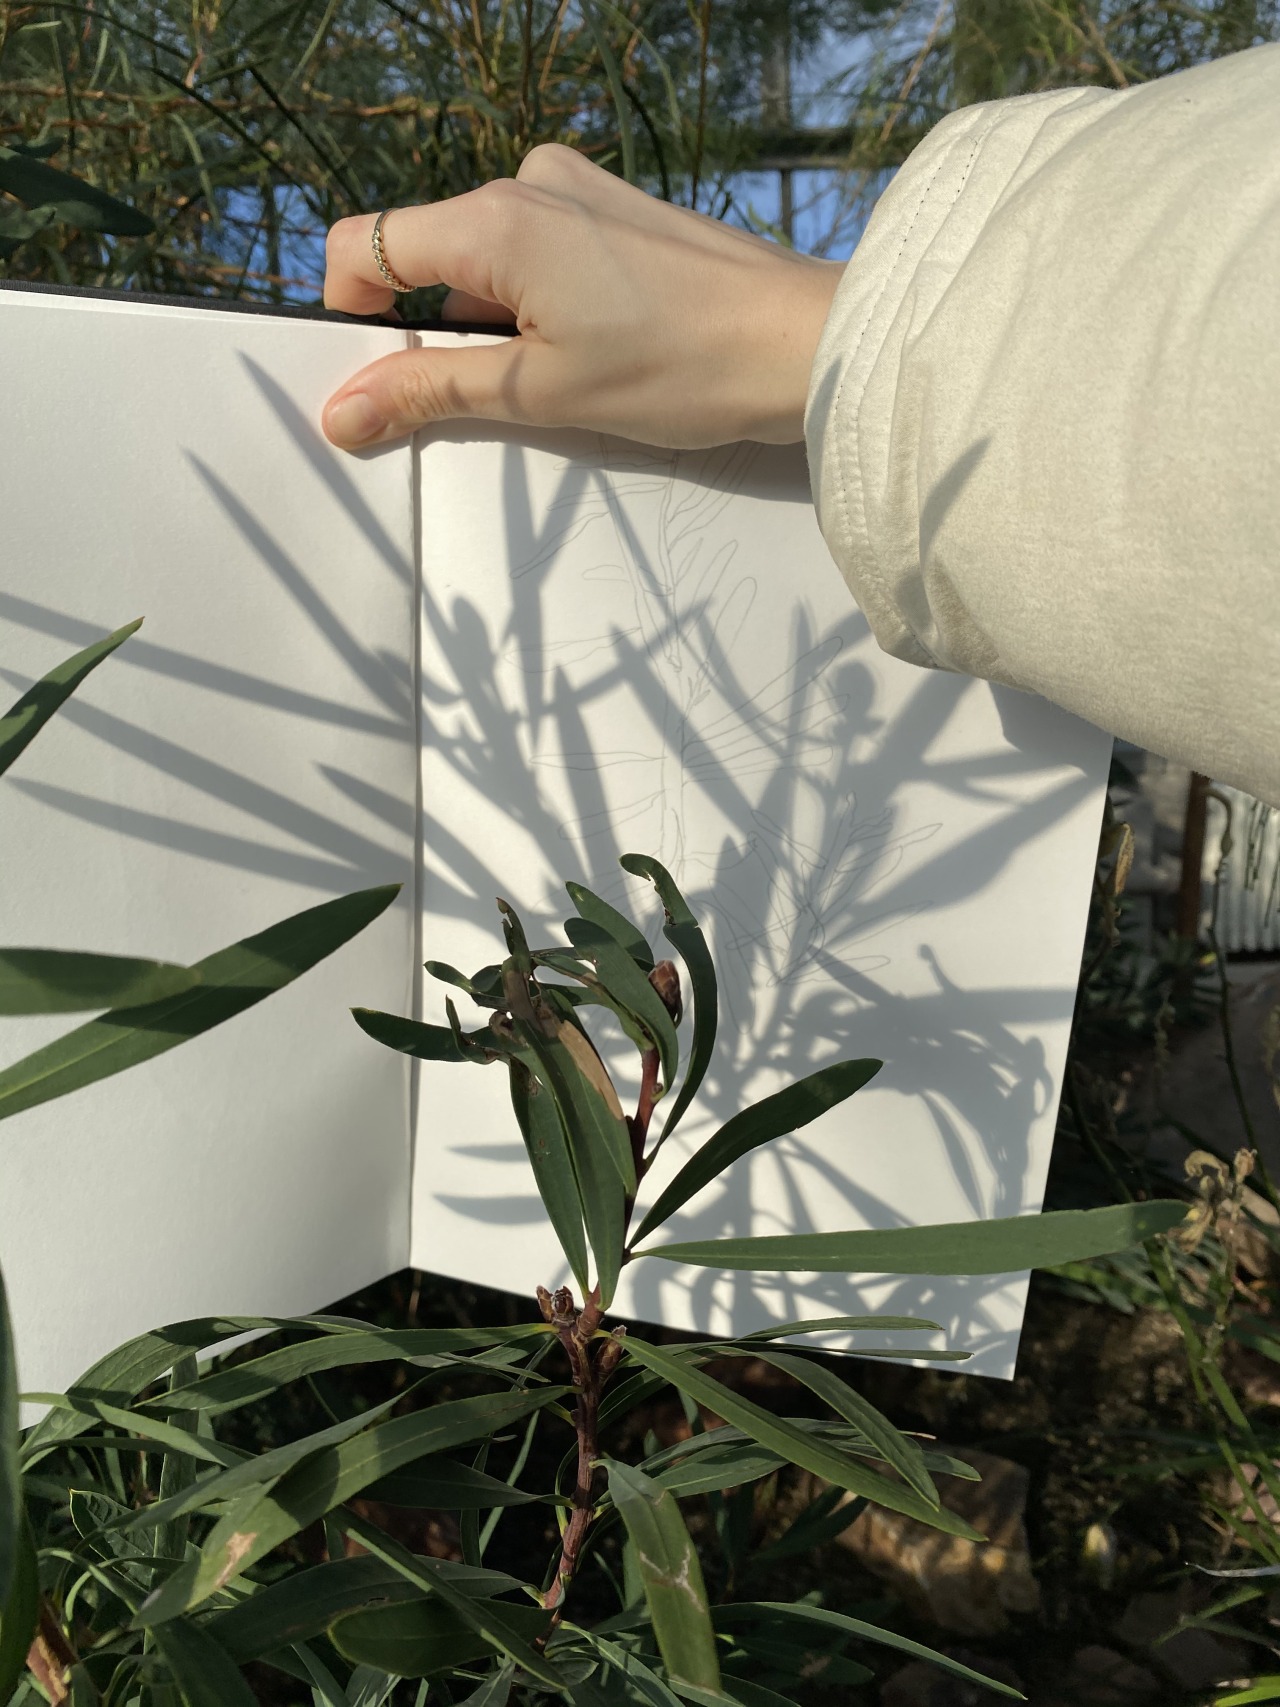 I
I
I walked all around the grounds of Kew, went up the tree top walk way where I got a view of the park and some of the London skyline, this view I imagine would be better in spring or summer where you were above leaves and not twigs.
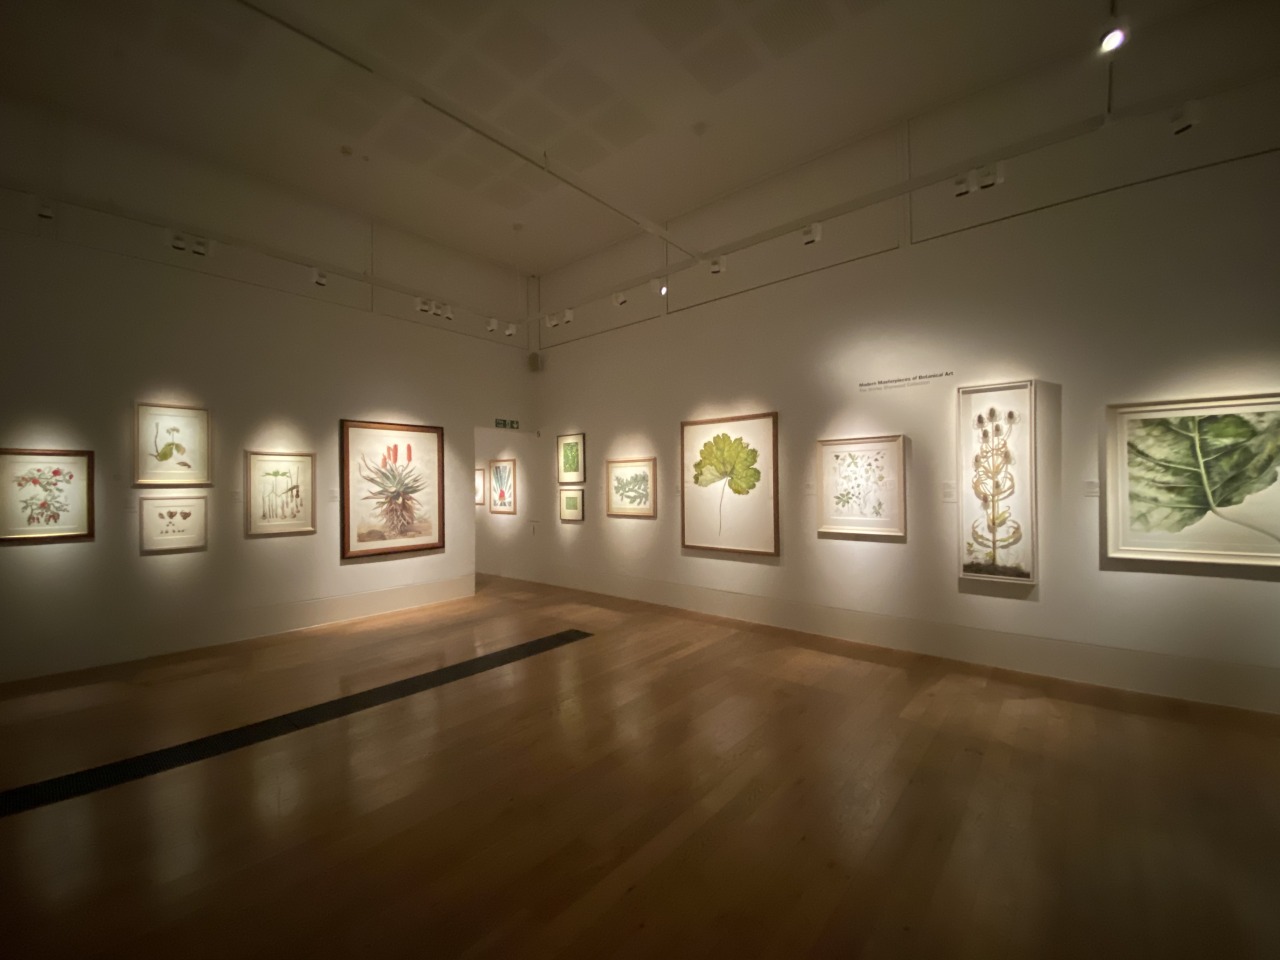
I also went to the Shirley sherwood collection botanical illustration exhibition while I was there. Here I saw a large variety of botanical illustrations, I could see the detail of the plants in these drawings and paintings which was interesting to see the ‘Li’ the drawings were capturing.
 t
t
Shirley Sherwood Collection
This trip was probably the most beneficial to my research as I got the most research done and had a lot of time to reflect on my findings and think about my project while I walked around. The gardens displayed many forms of Li, from plants, leaves, flowers, trees, vines to fish. There were countless examples of patterns I could be using within this project and the whole day stimulated my thinking for this project and has given me the research needed to drive my ideas forward. I will definitely be returning to Kew I’m the spring or summer when the rather is warmer.
Reflection 03/03/20
Today we had a mono printing workshop with Esther, Here are some of my prints using paper stencils for esthers monoprinting workshop. We used the same technique as previous monoprinting workshops but we introduced colour and paper stencils. I created a stencil in the shape of one of the cacti I drew at Kew Gardens yesterday. I really like the shape this cactus takes as it’s formed of oval shapes stacked on top of eachother. I experimented with hand printing by applying pressure with my hands as well as printing using the roller press which creates more clean cut sharp prints. I would like to work on to these prints by drawing as well as possibly using stitch to create the spikes and bring the image to life more.


Reflection 01/03/20 - Barbican Centre
This Sunday I decided to head to the Barbican centre conservatory to continue my drawing research. Last week I went to the sky garden where I began my research. I felt that the sky garden was quite man made and didn’t have the huge variety of different plants I was looking for. This makes sense as it’s a man made garden curated for aesthetics. The Barbican centre however had a larger variety of plants and flowers especially cacti. I brought my camera with me so I could capture some higher quality and macro pictures of the plants. I also found places to sit and draw from life. Taking pictures was valuable because they serve as research themselves and I can draw from them later. When taking pictures I focused in on plants where I could see ‘Li’ and took macro shots of these. I also wanted to capture images of other forms such as whole leaves.
Sheet to reflect on project, action plan for future
Reflection 28/02/20
I spent today in the studio working on my sketchbook whilst furthering my research. I used today’s studio day to continue drawing from my images of plants at the sky garden and make sure I was making the links that are in my head between the plants I’d seen and the book ‘Li’ on paper so that my ideas are clear. I did some research on ferns as well as leaf vascular pattern formation. My ideas so far are developing and I’m beginning to have ideas of how I could represent patterms through texture and print either by embroidery or different materials such as using bubble wrap as spores seen on the underside of a fern. I’m conscious that I’m still very early on in the research days and want to continue researching and learning before I begin making, but it’s good to get drawings of my ideas down and to record ideas on work flow.
Something I would like to experiment with in the future is printing with bubbles. I could do this by using water, washing up liquid and ink. I could use paper to capture the bubble marks. I would also like to print with ferns and see if I can capture the spore markings in the ink.
Reflection 27/02/20
I spent today in the studio where I had my group tutorial. We each spoke for around 10 minutes about our projects and received feedback from the rest of our group. This was helpful as I got ideas from other students as well as the tutors. Kevin gave me some references which combined the two human and nature.
Renora one of the tutors gave me the idea about how these city conservatories such as the sky garden and the Barbican centre are human made gardens much like many of the parks in London where human intervention has created ponds planted trees etc. This is another interesting link between humans and nature and the need for nature in the city.
Shane also gave me the idea of researching further into the communication of trees called mycorrhiza. I’m certain this will crop up in the book they hidden life of trees’ which I’m planning to read as a part of my research.
Learning Objectives & Mark Scheme
Going through the mark scheme and learning objectives in tutor groups was beneficial as it made us read through all the criteria we need to include for our project to be successful. Lots of it was the same throughout but the main lesson I took from this was the importance of documentation of all my work and the importance of recording all my ideas. We also need to make sure the work is relevant throughout and the techniques we’ve chosen have been thought about and chosen specifically or adapted for that idea.
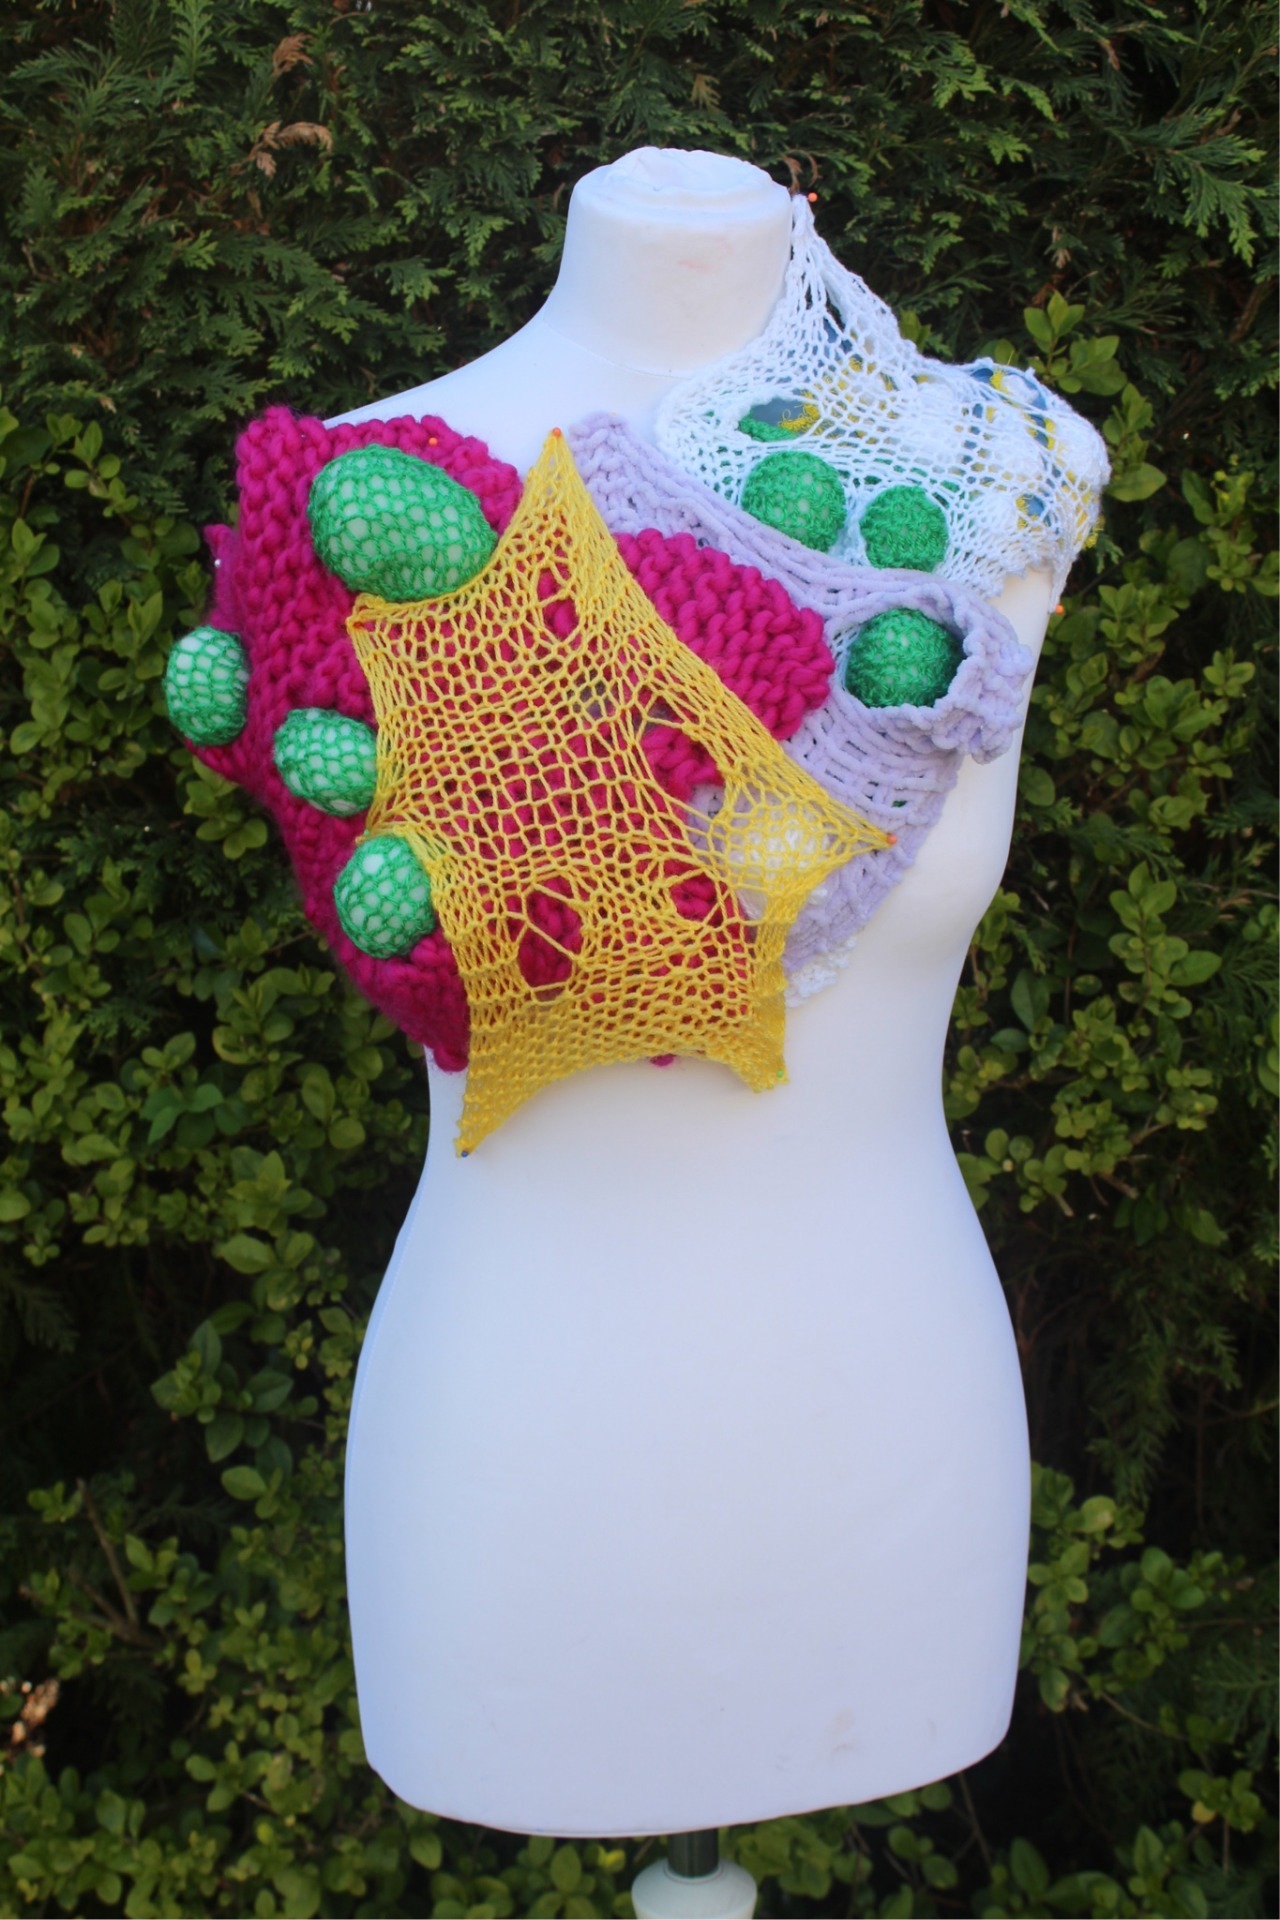
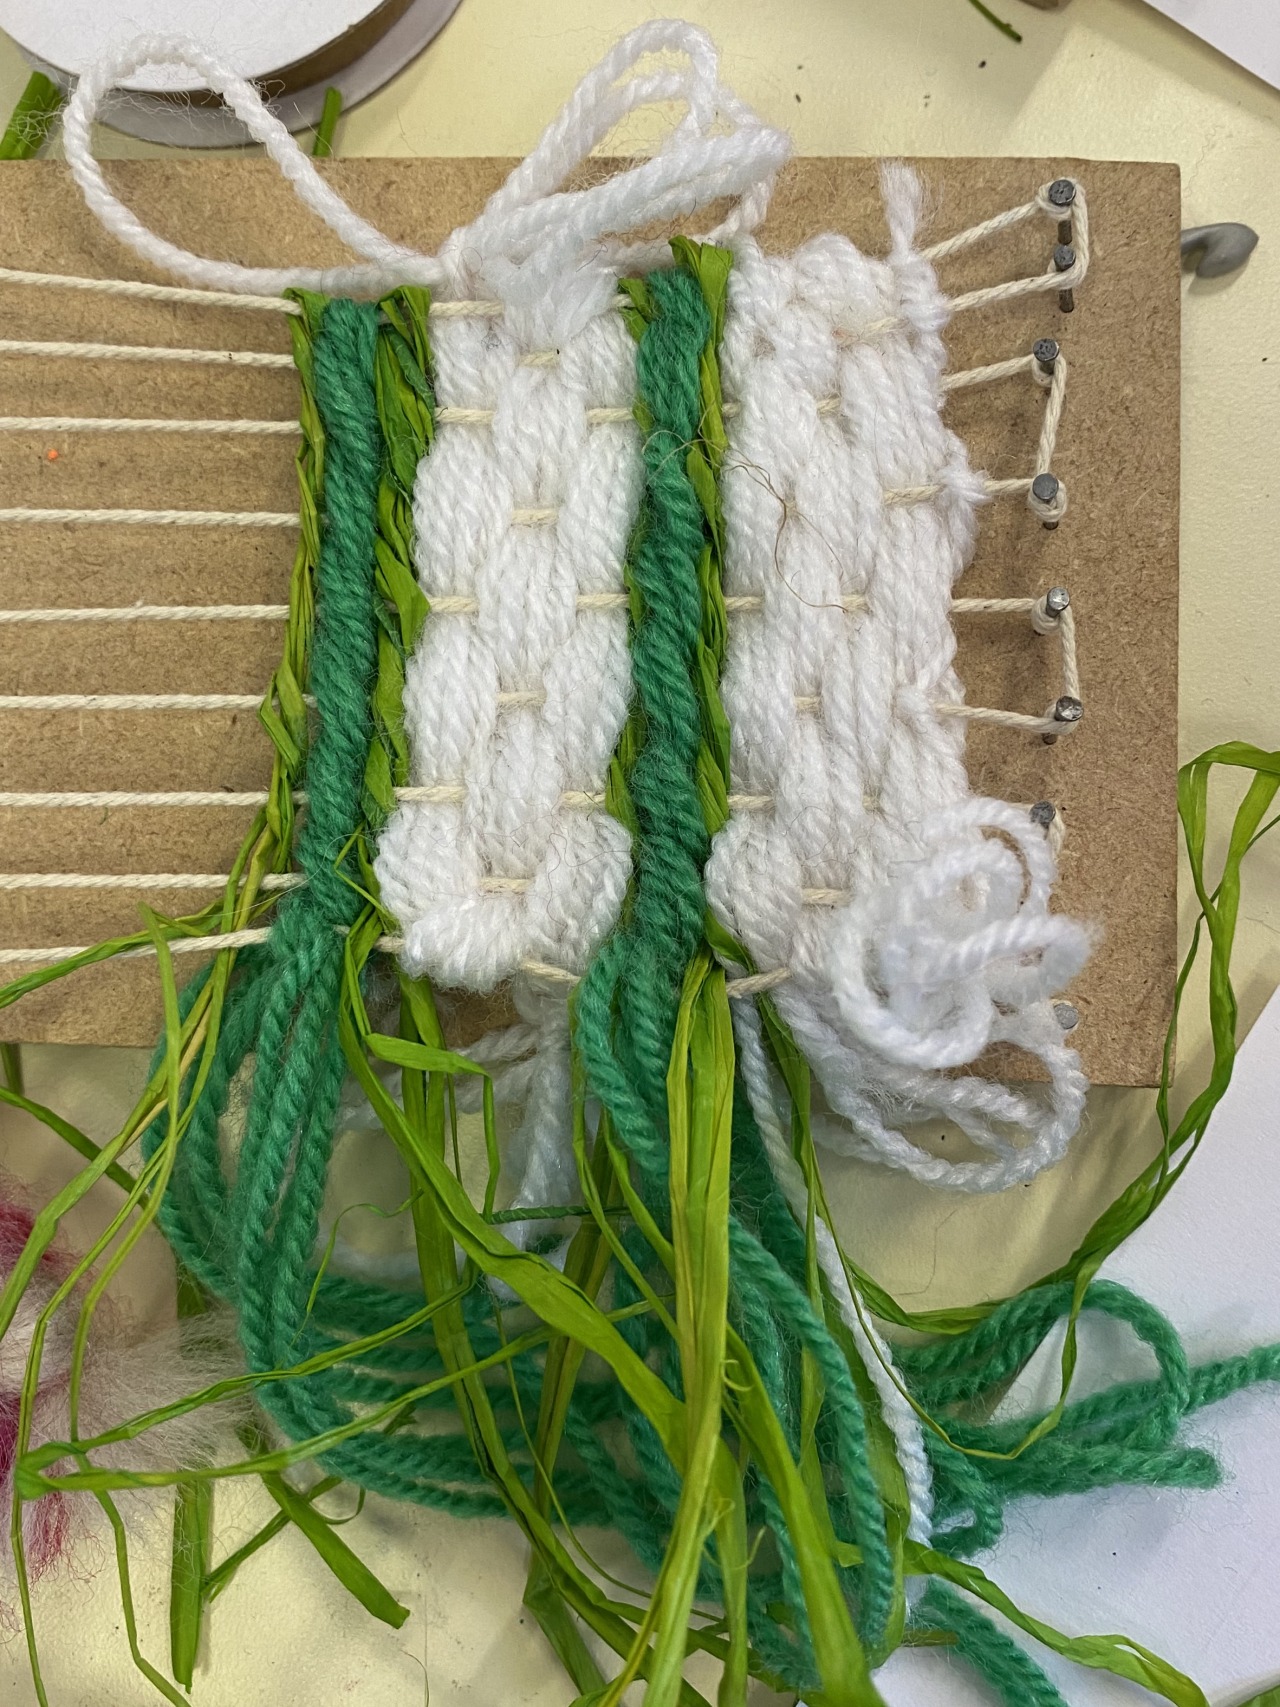
Reflection 14/04/20 - Layering knitted samples
Over the last few days I've been working on combining my knitted samples on the body by stretching them out over one another. I wanted to focus on highlighting this cell shape by stretching the knits. This brought me back to the source of my ideas since the original cell shapes were inspired by knitted samples. I wanted to keep the piece bright and expressive. Throughout this project I haven't had one particular colour scheme which looking back at would of brought more coherence to my project and is something I'd of done differently if I had this time again. I think the main reason for this being that I didn't have the freedom to source materials in the colours I would of chosen and I had to use what I had at home which was a pretty bright mixture of yarns, thread and left over materials from my A level studies.
Reflection 13/04/20
Here I am using the green knitted sample underneath the white sample I made using the two button hole techniques. I used pillow stuffing under the green knit to create a raised nodule. I like the contrast between the plain white and bright green, this makes the green stand out more. I wanted to place this on the body to contextualise as I think its interesting squishy texture that could be developed into a worn piece. The effect of this bulging green coming out and being exposed under the white sample is an exciting affect, I'm looking to develop this further in a range of different colours with other knitted samples.
Reflection 10/04/20
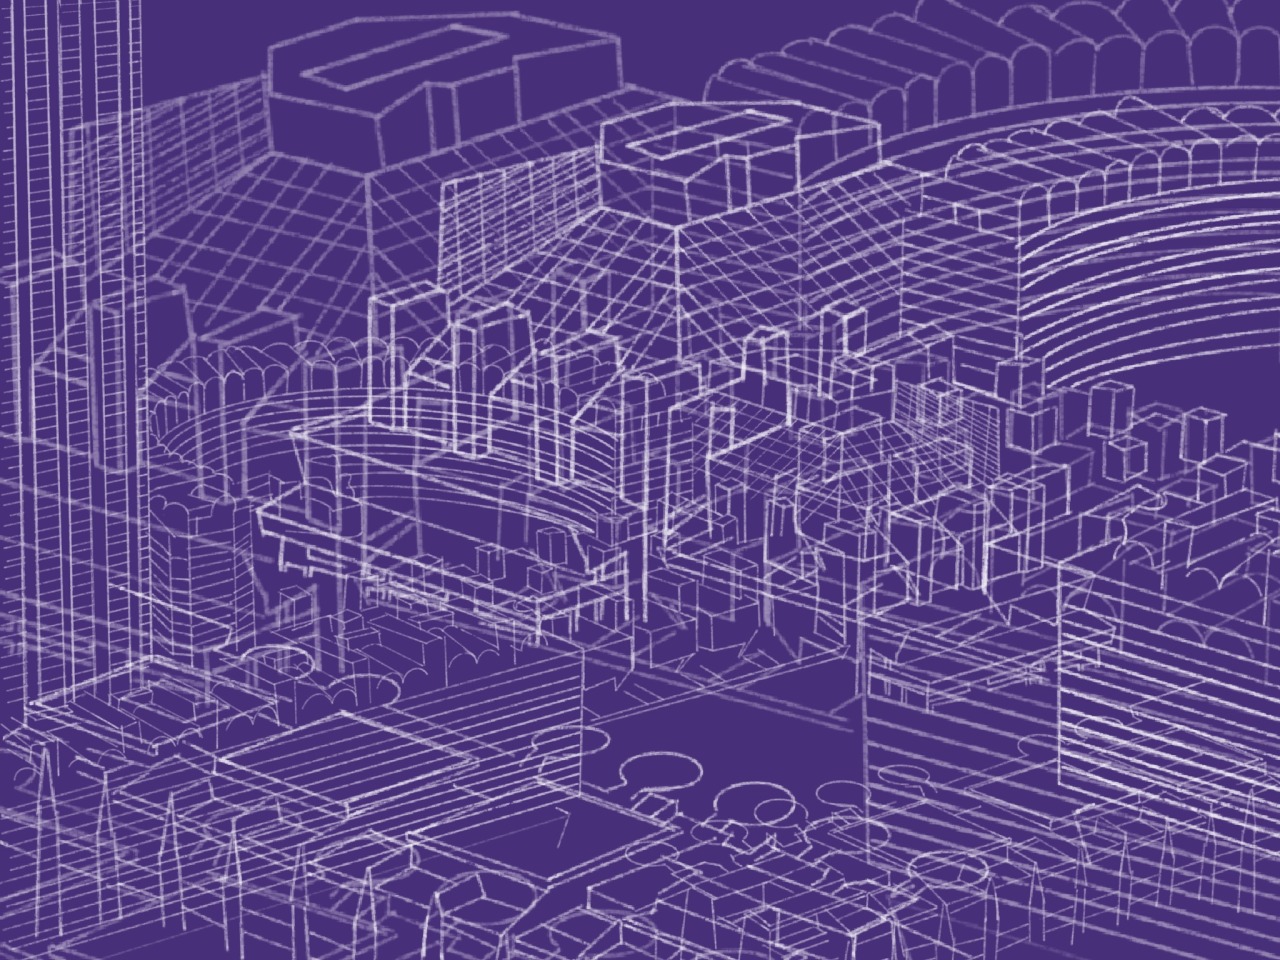
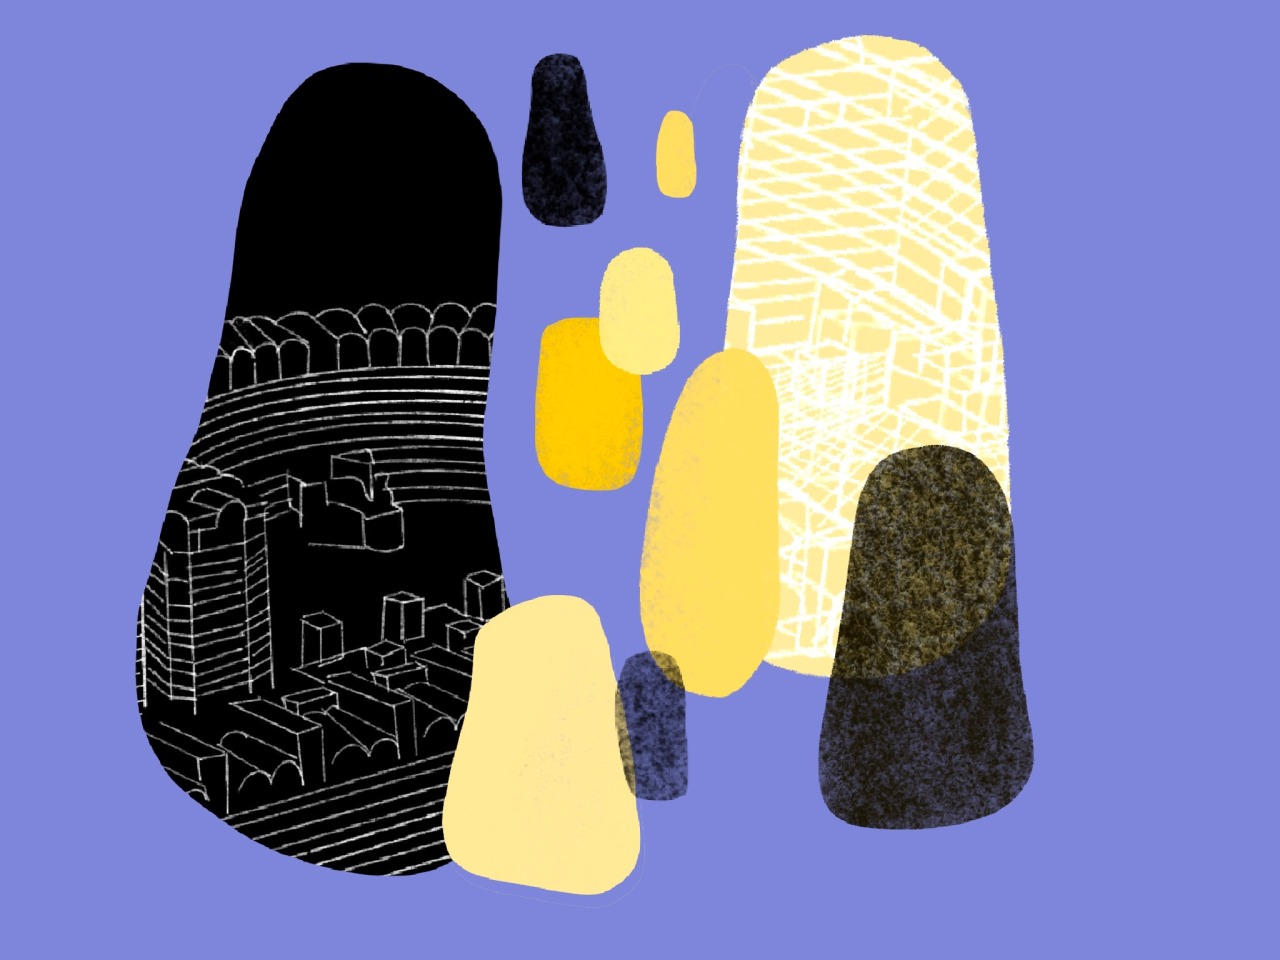
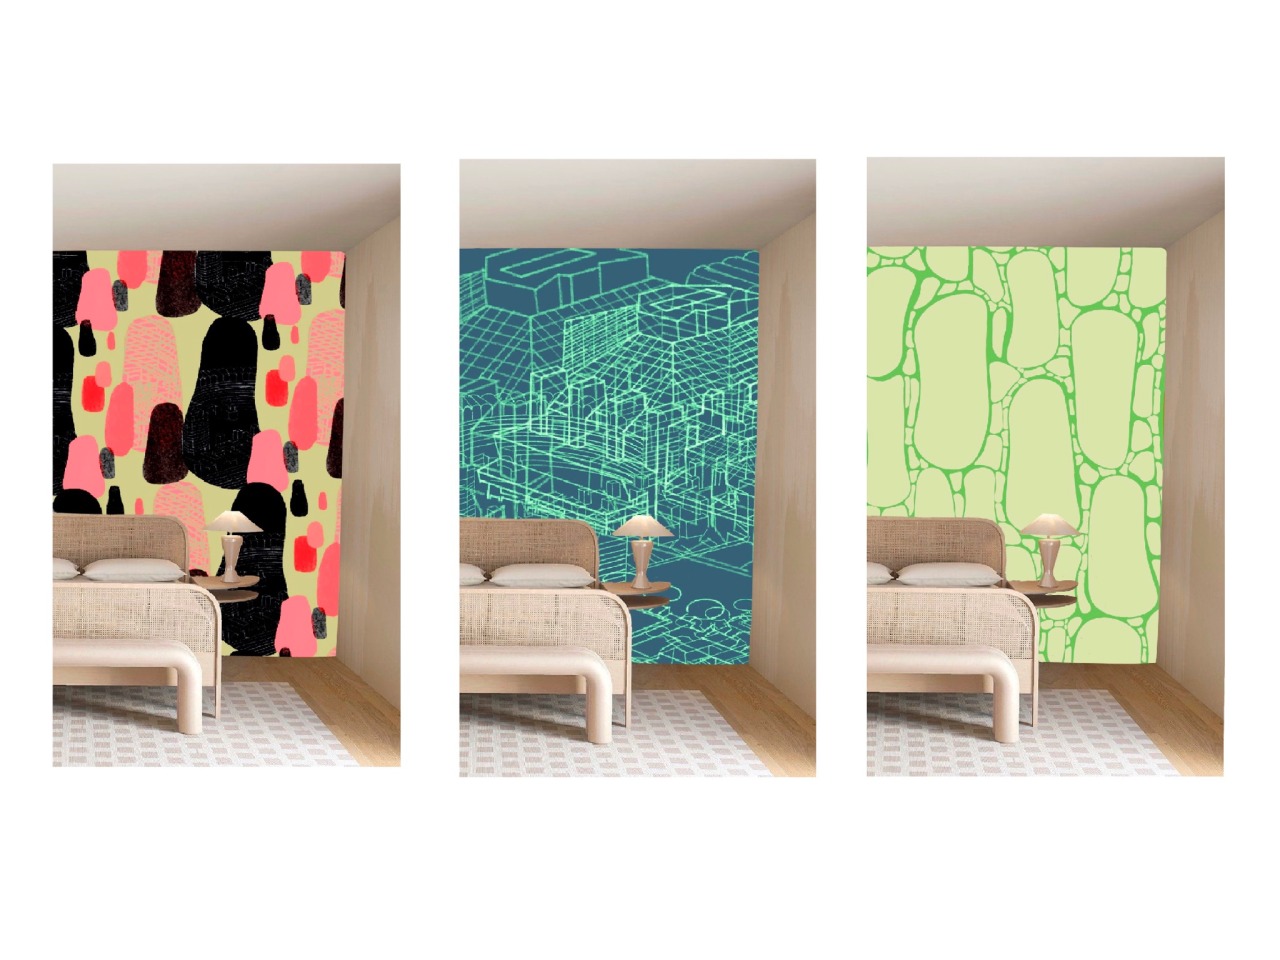
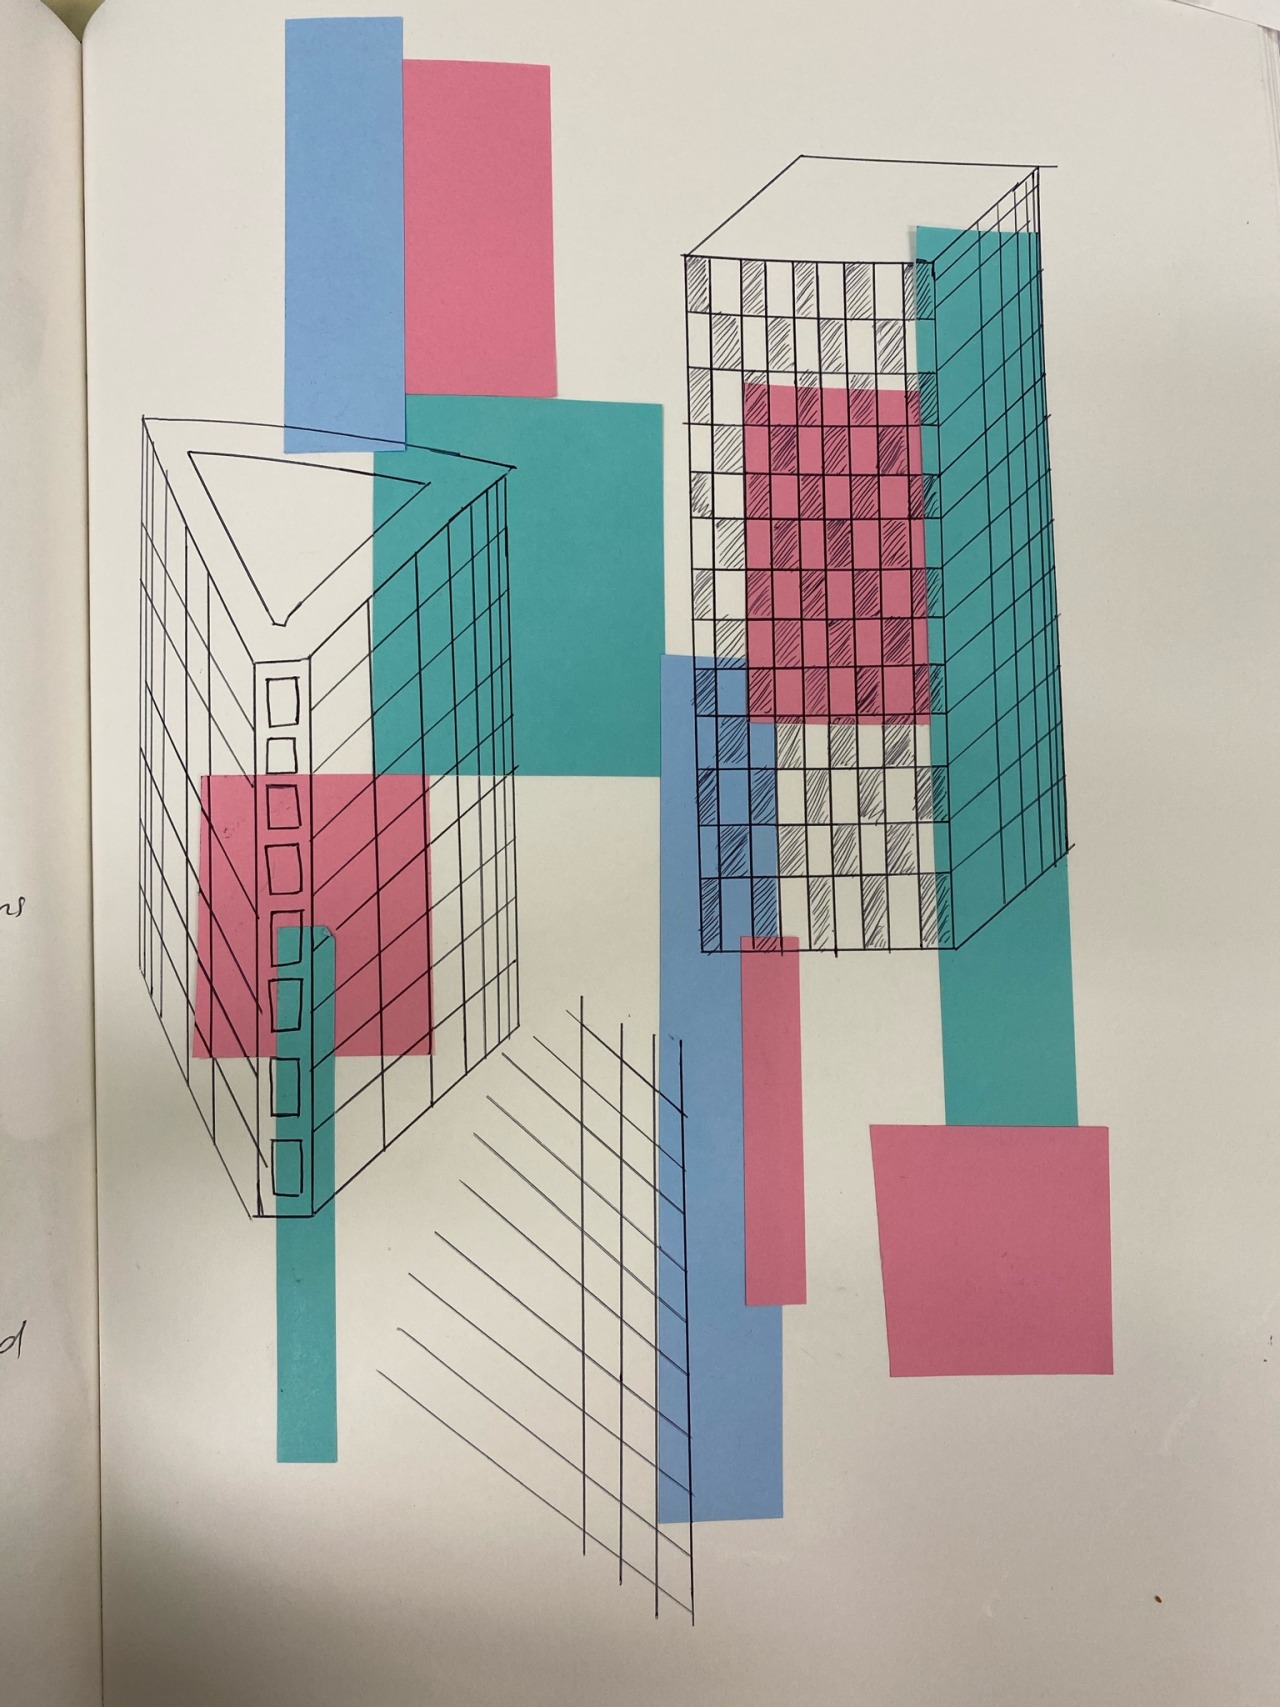
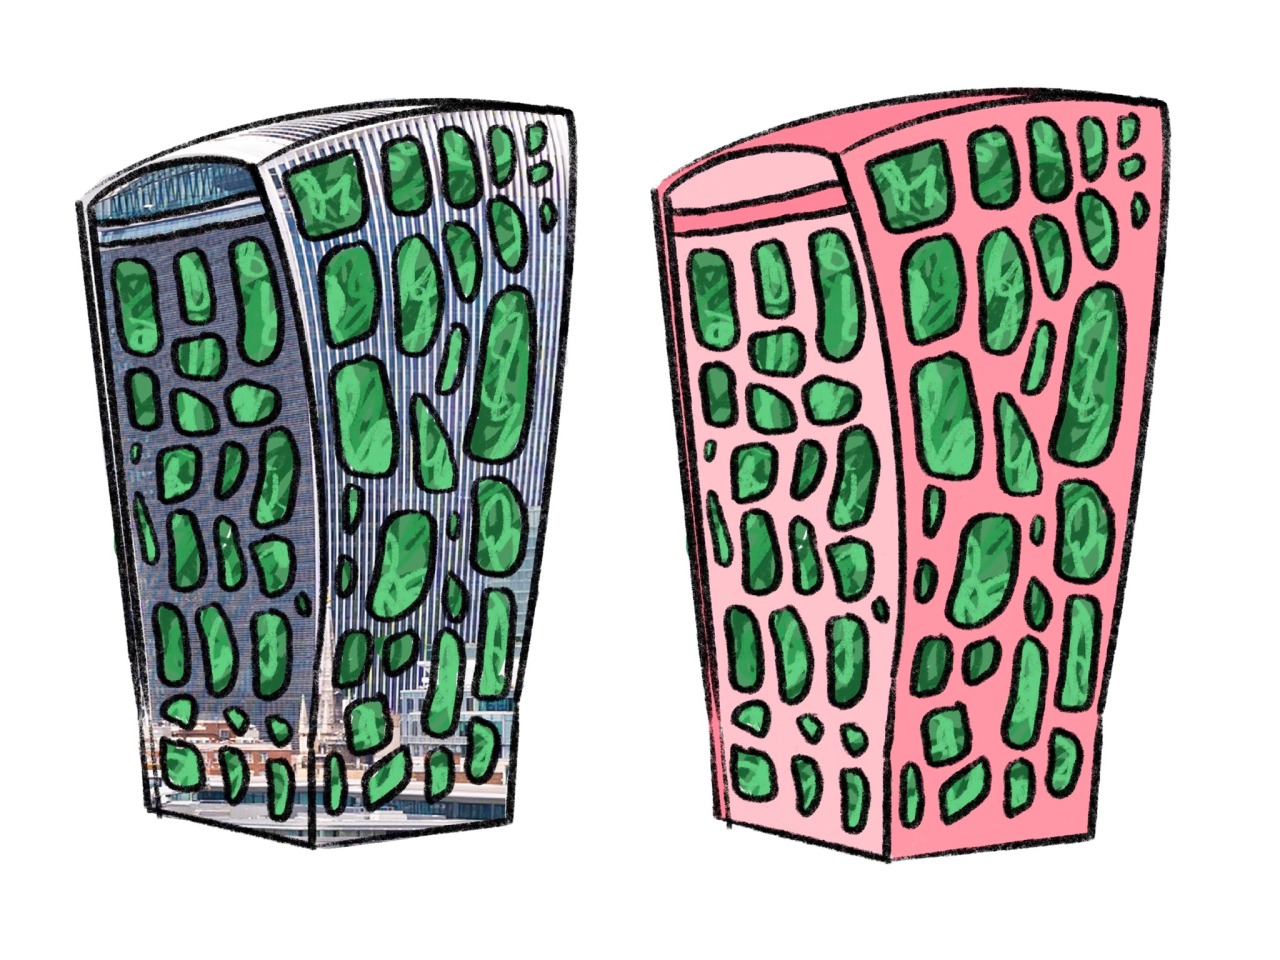
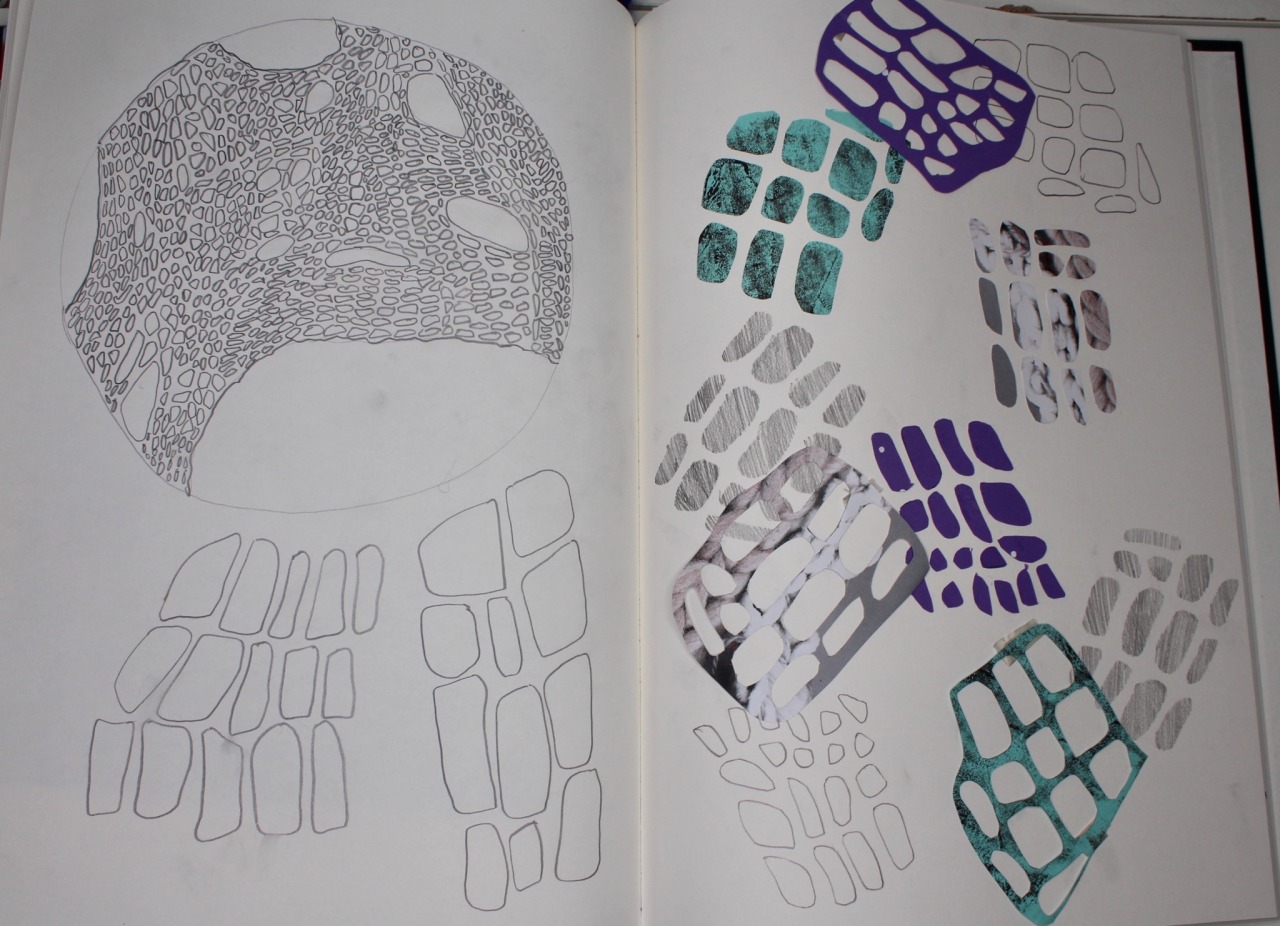
I created architectural cell shapes using my drawing of the barbican centre which houses the barbican centre conservatory which serves as an example of a man made garden. I wanted to create bold coloured prints to display the cell shapes, combining my ideas of architecture and nature. I like the contrast between the man made linear lines and the smooth natural lines of the cell shapes. I experimented with different opacities and layerings of the drawings. I experimented with colour curves, hue and saturation tools to create the desired colour I wanted. I see these shapes on a large scale as a print on a wall for childrens bedroom or even larger painted on a wall of a building. Overall I'm really happy with these outcomes as I feel they express my ideas well in a bright and visually appealing way which can be contextualised in multiple forms.
Reflection 10/04/20
I spent some time today exploring an idea I had last night. I wanted a series of cells in the architectural print standing alone on my workflow page to demonstrate this shape and idea clearly. I started creating more of these cells using the archetypal drawing I'd created of the barbican centre in different colours. I explored different colours using curves. The layout was based on a 9 tile system (3 rows of 3 different cells) around a central cell. I'm happy with these as it demonstrates my ideas clearly. I see these different cells as prints on a wall on a large scale such as on the side of a building or on a smaller scale such as being used on a wall paper or print for a fashion piece.
Reflection 08/04/20
With just under two weeks to go before the FMP deadline I wanted to take step back to look at my work and the direction its headed in. I'm very content with the natural progression of the cell shapes how these have evolved from drawings to prints to textile stitched samples and then to 3D stuffed shapes. I want to reflect on my ideas about using architecture with my work. I feel to take my work to the next level I need to bring significance and a link between nature and architecture.
When writing my project proposal at the start of my project I was more interested in the link between humans and trees. I read the book 'The Hidden Life of Trees' by Peter Wohlleben where I learnt lots about the similarities between trees and humans, how we communicate and how trees transfer energy. As my project developed physically and visually through prints, drawings and ideas, I pursued an interest in cacti plants and worked on developing prints based off of the shapes of their cell structures thus leaving behind the ideas of brining humans in at that point. Brining in the link between humans has been lingering in the back of my mind over the previous 4 weeks but I felt it was more important to focus on developing my constantly new ideas.
I knew that I didn't have to stick precisely to my original ideas and that as I explored the subject of nature my ideas would naturally evolve. This is why I found writing the project proposal difficult because at that point my ideas were in their early stages and I wasn't sure where they would take me over the following 7 weeks. Looking back now I've realised that this is okay and totally normal, all of our ideas at that point were broad and we had to go into our project titles deeper and explore what interested us most then create based off of that.
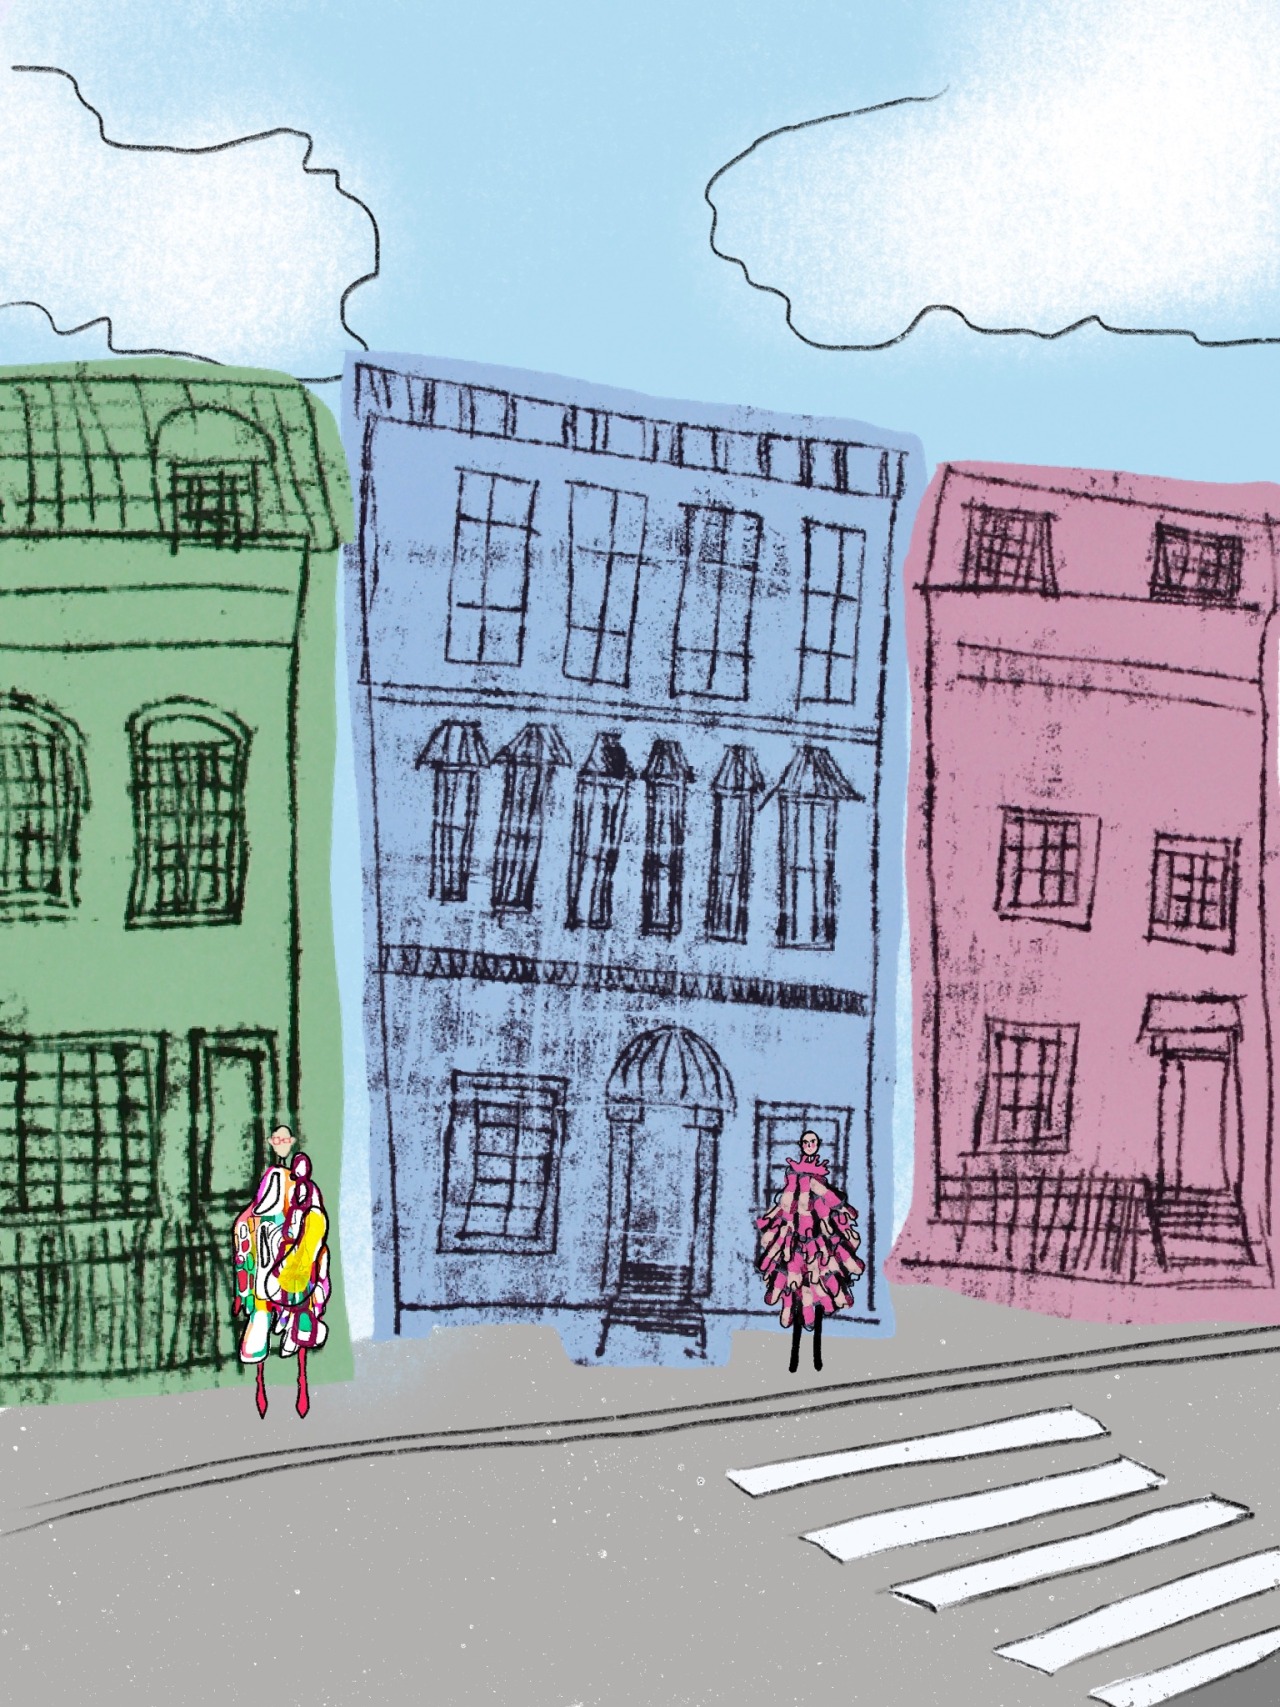
Man made gardens was a topic that interested me after I began visiting gardens in London such as the Sky Garden at the top of the Walkie Talkie building in the City of London. I also visited the Barbican Centre Conservatory and Kew Gardens. Part of my love for these places is due to the fact its an escape from the busy and loud city. I could go visit these places and be transported to a jungle surrounded by huge draping leaves, bright flowers, vines, trees and a warm humid atmosphere. I love the architecture of these buildings as well and the harmony between the man made straight lines and the natural jungles. To me it was seamless and the two although contrasting worked really well together and didn't distract from the nature. My original plan with my work was to create prints onto architectural blue prints and drawings. I would of done this by screen printing the straight man made lines and then monoprinting or screen printing the natural shapes on top. Sadly due to the coronavirus I had to go back to Devon to complete my project meaning I didn't have access to these facilities. As my work developed I focused more on printing the cell shapes with monoprinting and didn't explore the ideas of architecture as I otherwise may of done if I were still at Camberwell.
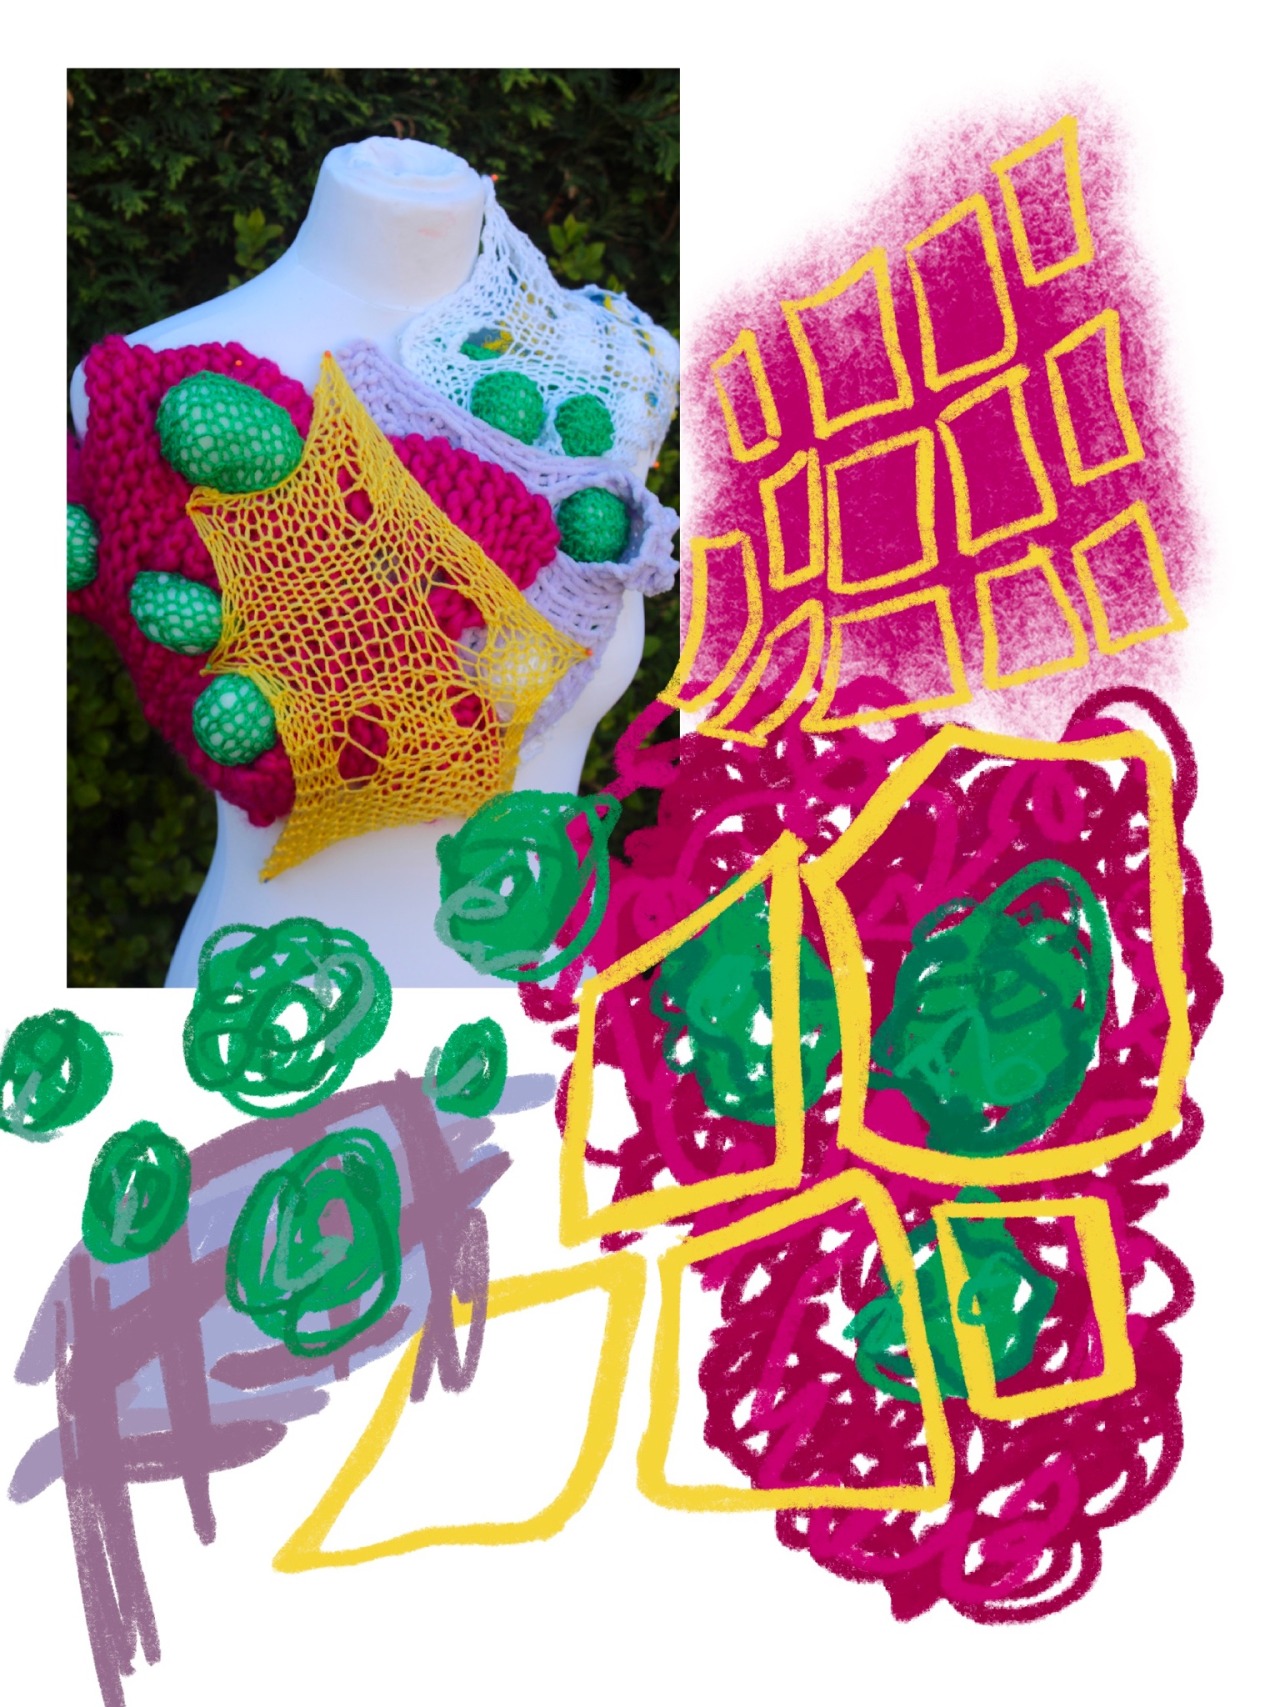
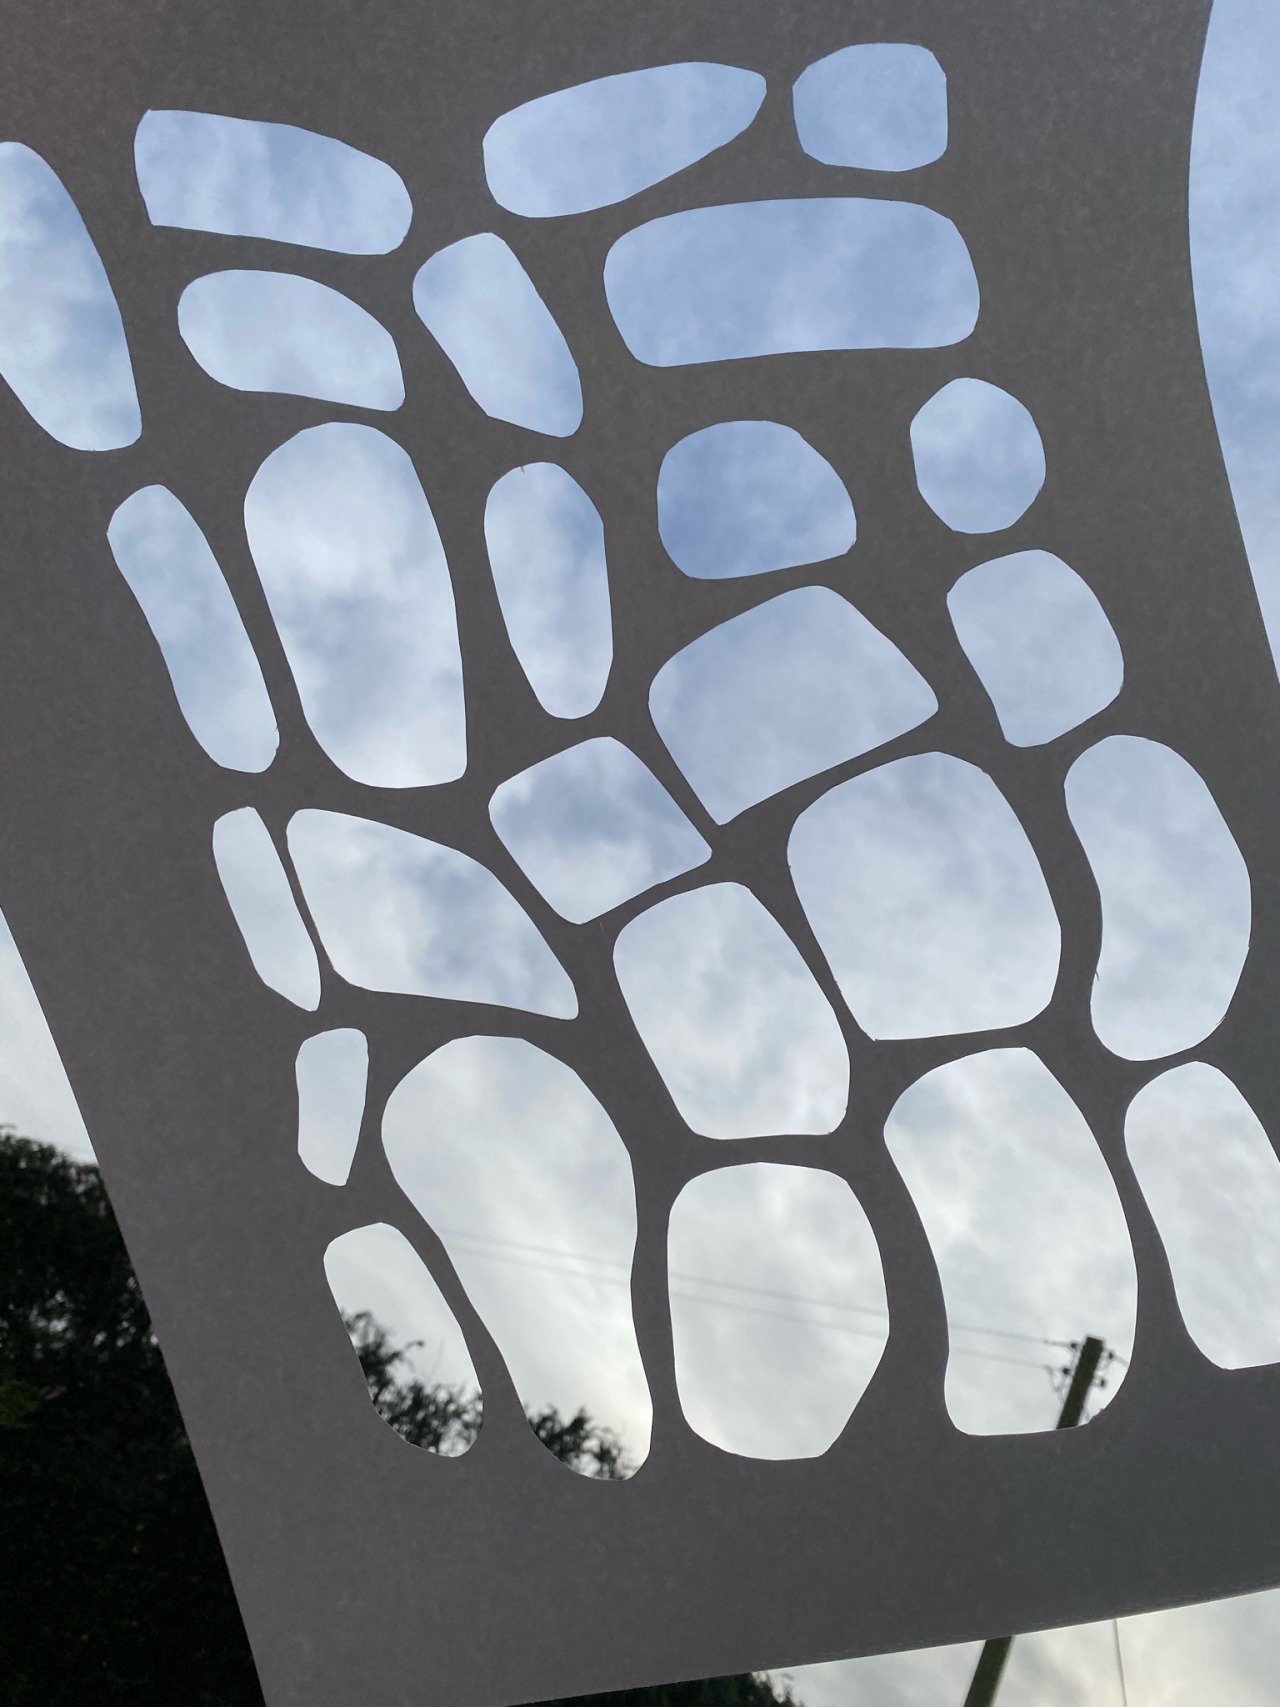
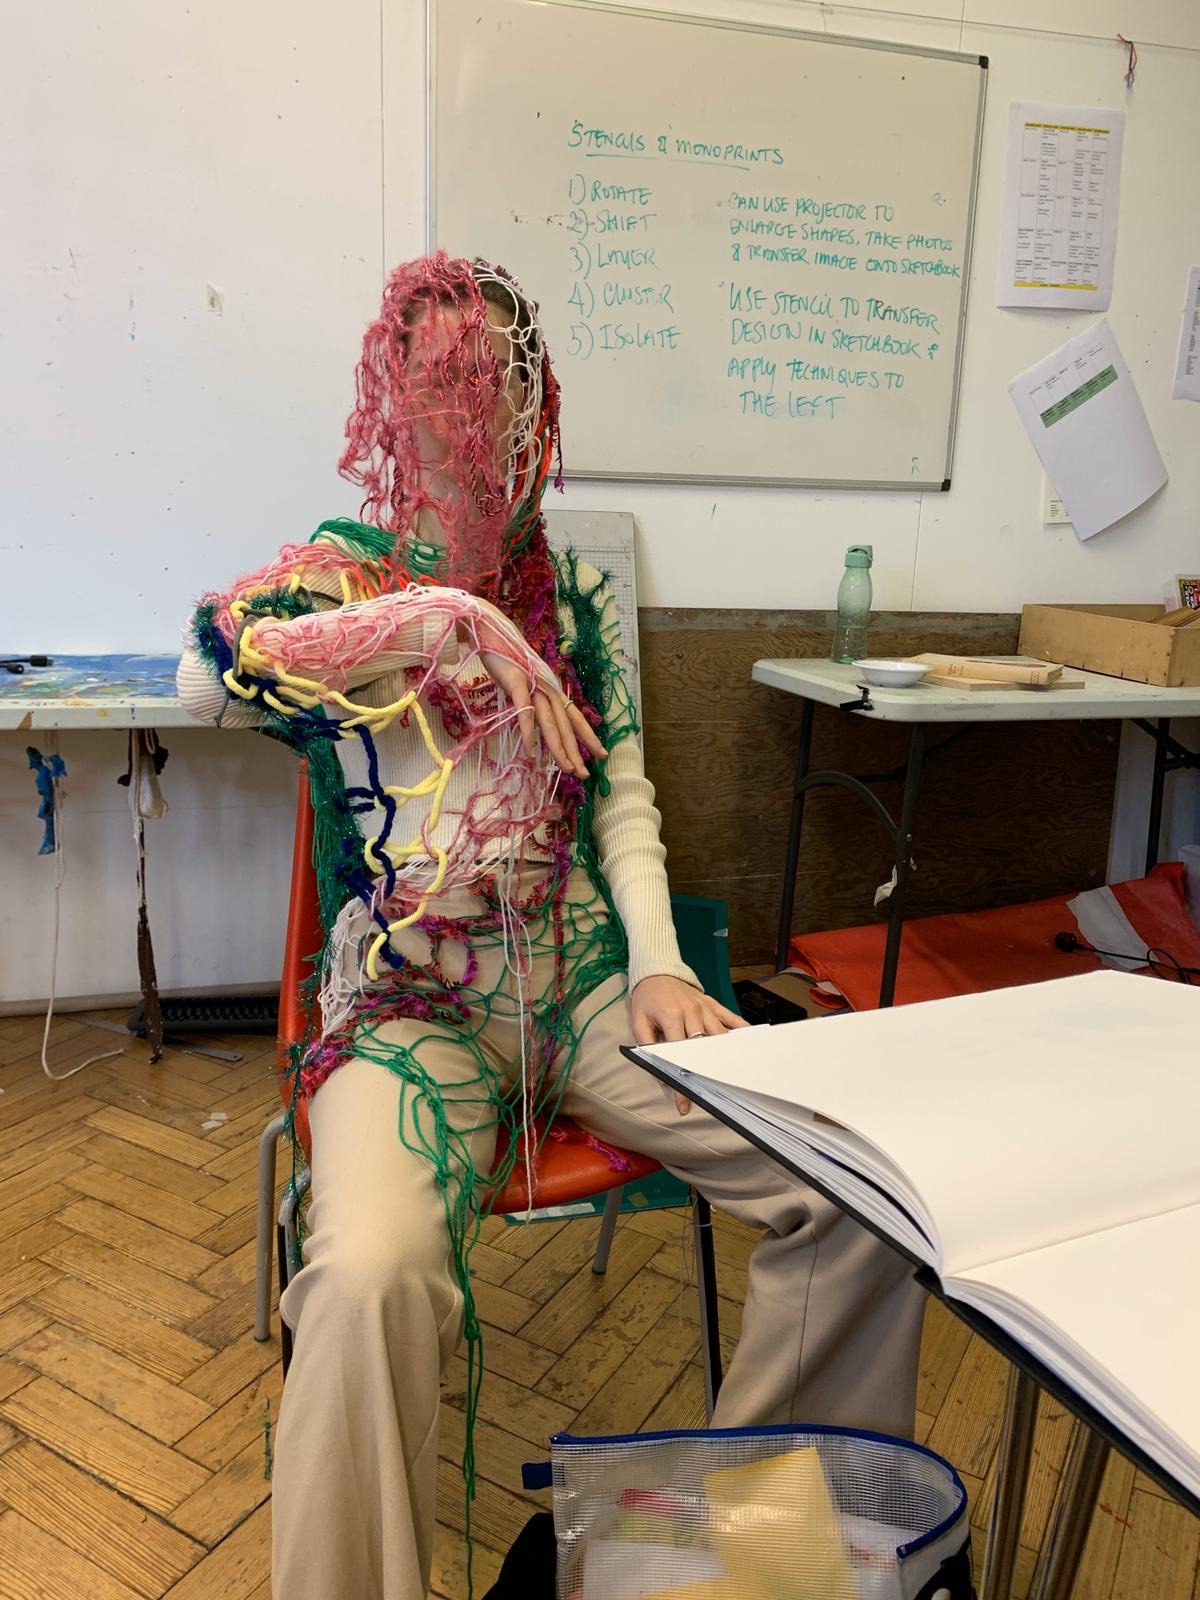
In the last couple of days Ive been reflecting on the current circumstances we've all found ourselves in, isolation and being forced into our homes. I created some collages using mono prints and paper with news headlines about the virus. At the forefront of my mind I was thinking about Italy and the tall building with people singing or performing from their balconies. This gives me a strong sense of community, unity and solidarity in these incredibly difficult times. As I was thinking about this I was thinking about words such as trapped, contain, stuck, caged and captured. I tried to reflect this visually by creating a cage / building cut out holding back some white organza. to me this reflected the people and their lives that are still continuing indoors.
I face timed one of my class mates to discuss our ideas and help each other with our projects so we could give a different perspective and help lift some of that 'stuckness' we were both experiencing. Being cooped up inside and focusing mainly on my project leads me to getting carried away or finding it difficult to move forwards with my ideas. She thought of how I could possibly layer my samples to show this idea of life behind the walls of a house. I was thinking about this and how I could represent this caged feeling many people are experiencing. I then realised a link between us as humans and the imagery of the man made gardens. In my head I was imagining the green plants behind this structure that I've created which is the cell structure. This structure was originally focused on the cell shapes themselves. naturally as I explored this my samples included the cell shape being cut open exposing space. throughout the project ive been drawing this cell shape and the lines remind me of the outline of the walkie talkie building, I was thinking about this shape and plants being trapped behind this structure.
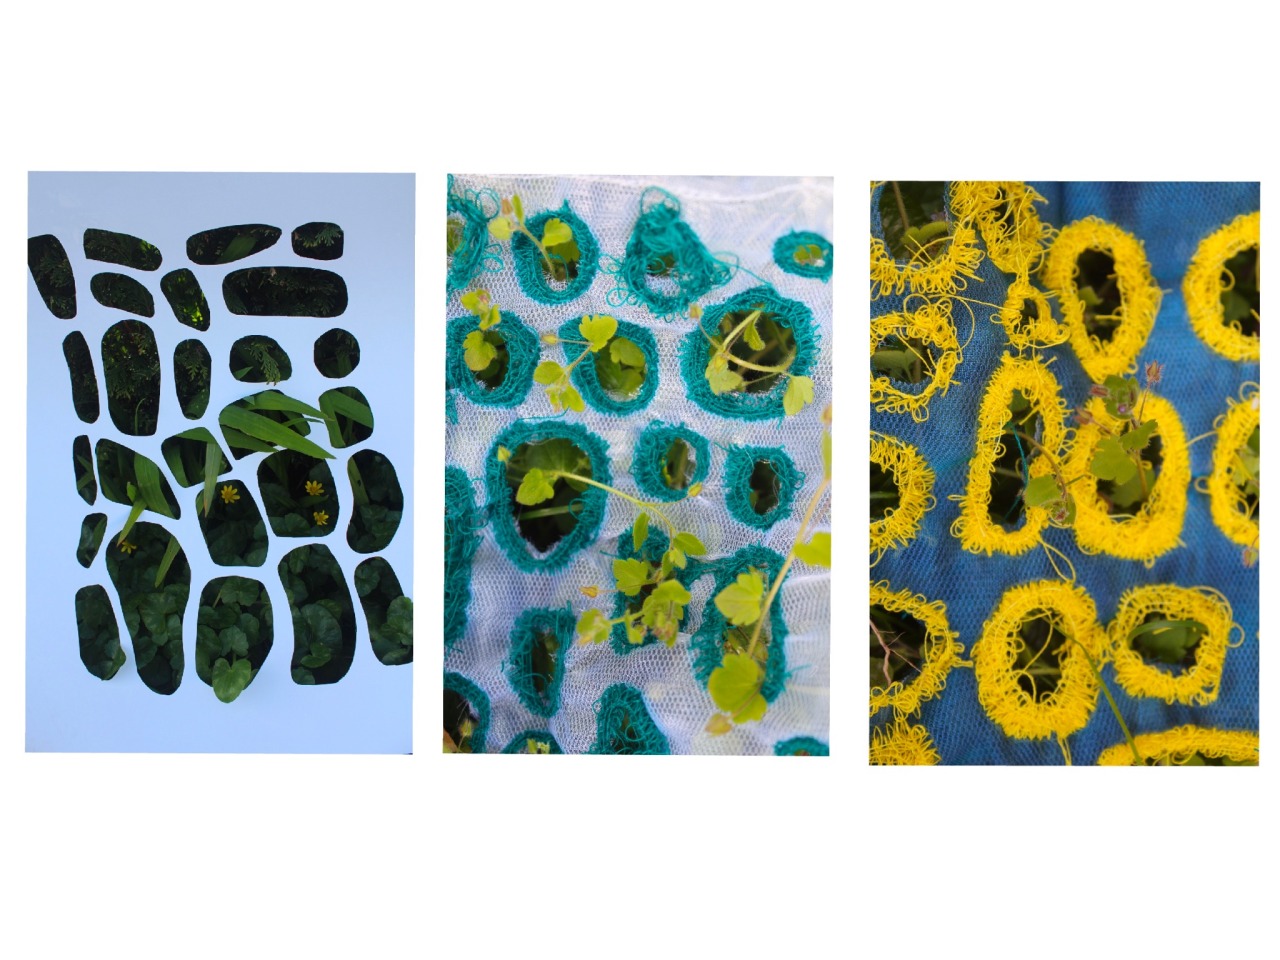
I went outside to take pictures of my samples with leaves, flowers and grass poking through the holes to demonstrate this. I used my textile samples and some paper cut samples one large one I'd made previously and a small mono printed structure. Here are a couple of these images:
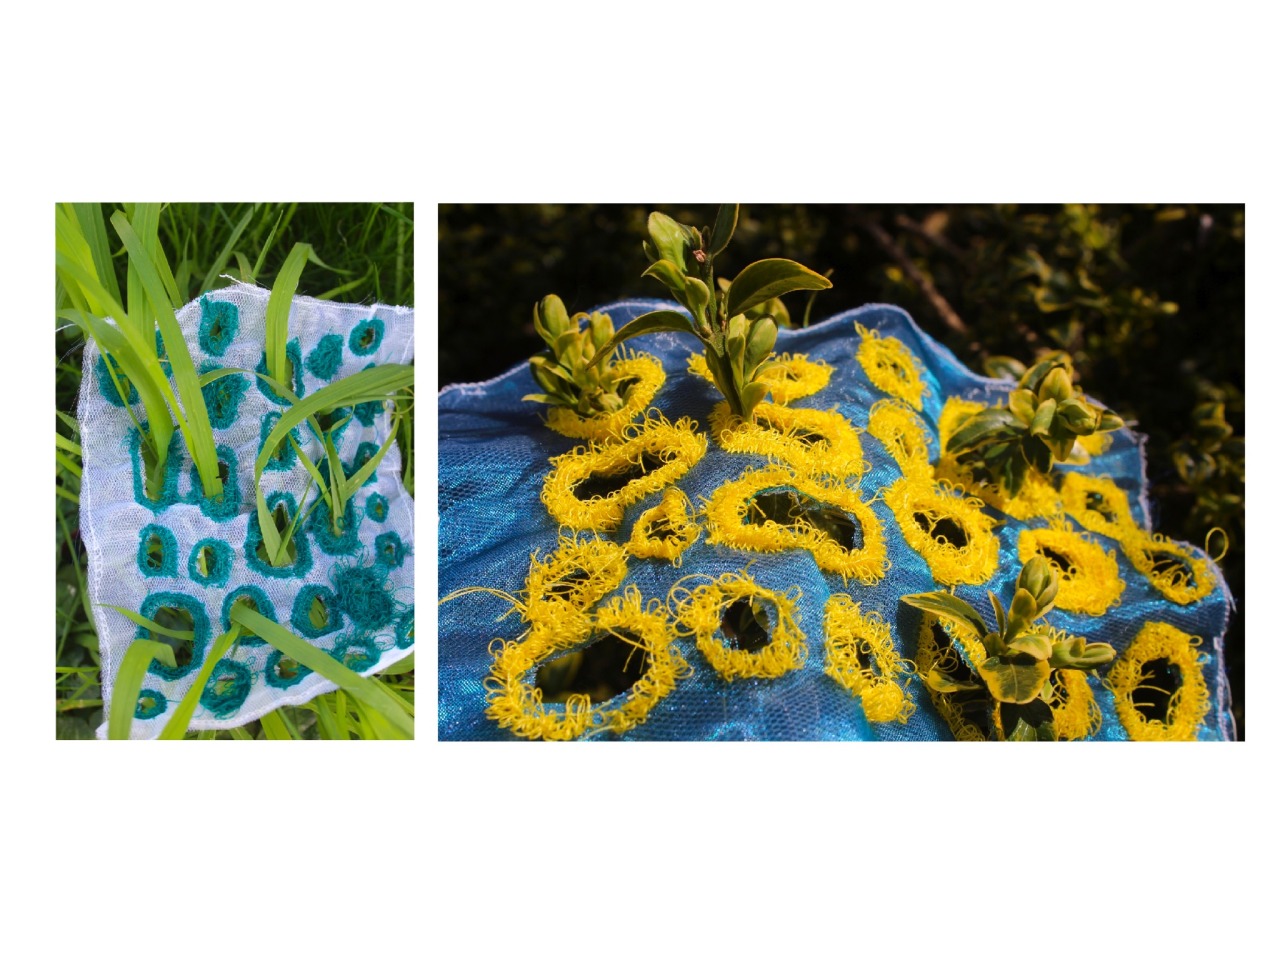
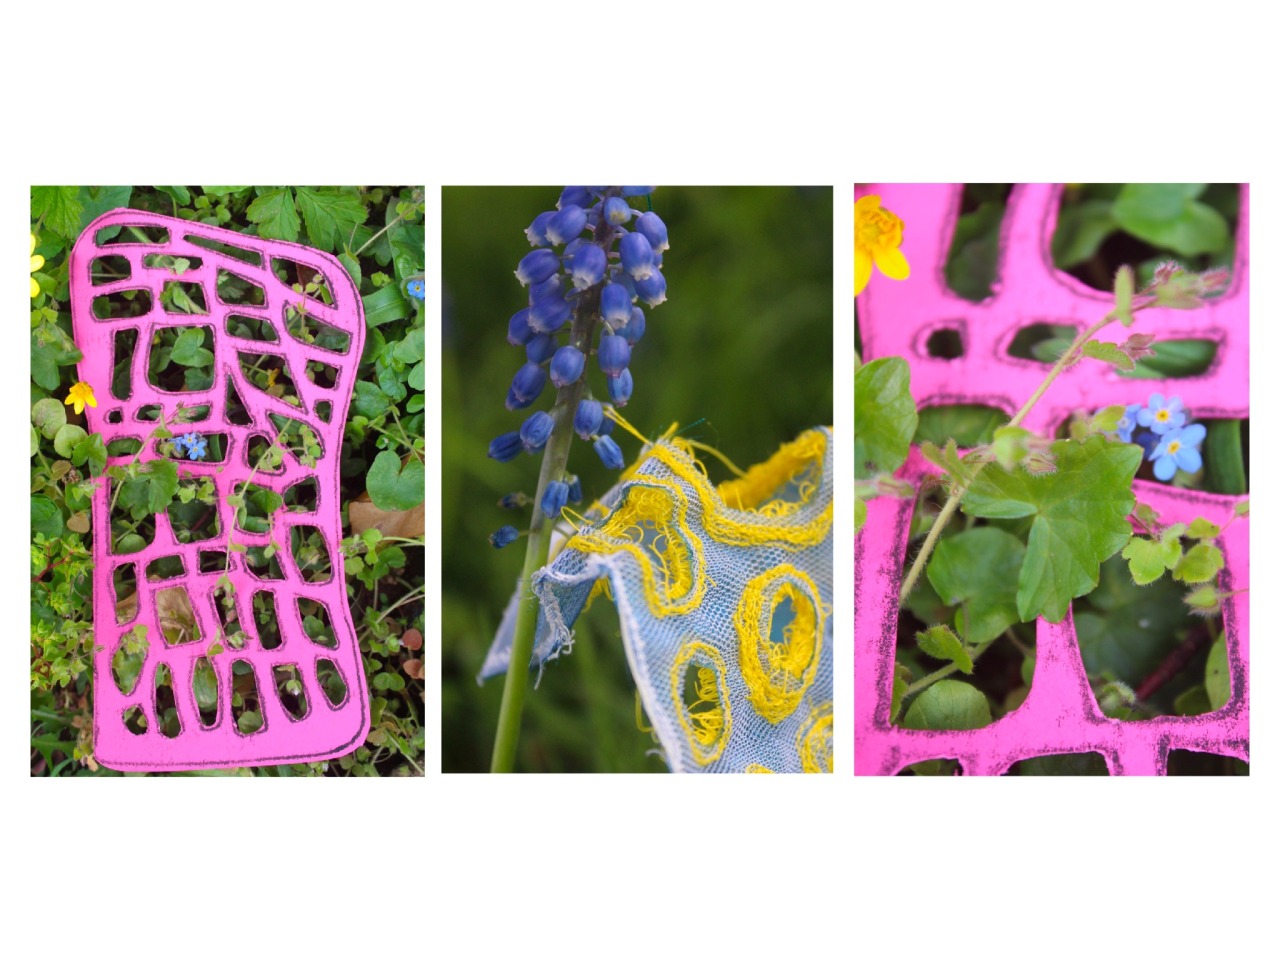
Here I also illustrated my ideas of the building being seen as the same structure holding back the nature
Reflection 04/04/20
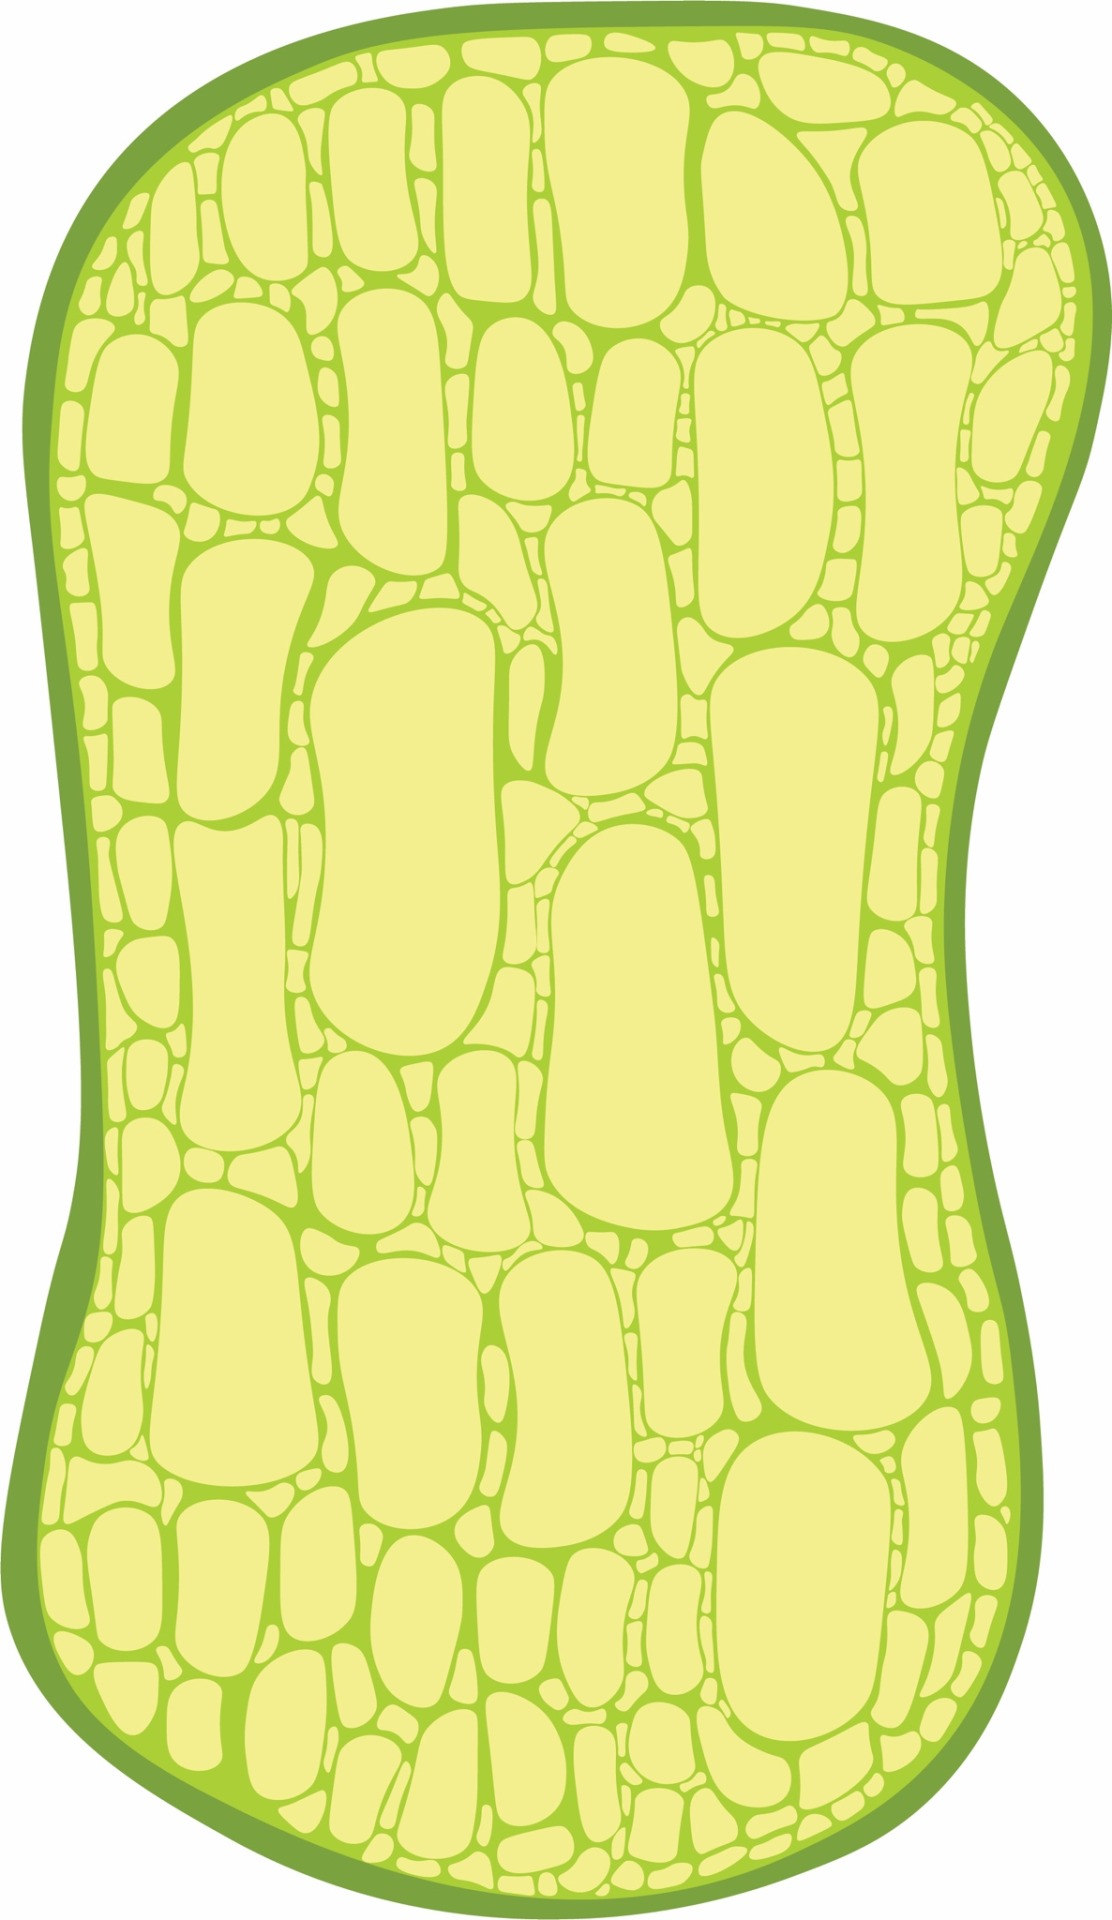
During the current times and being cooped up in my house I want to make the most of this time to learn new things. This weekend I thought I would take the opportunity to learn some basic skills on adobe illustrator as we’ve been given home access to the software. Photoshop and illustrator are very unfamiliar to me as I was ever taught these skills at school. On Saturday I created a cell design on illustrator mostly using the curvature tool. Here are my outcomes.
Reflection 26/03/20
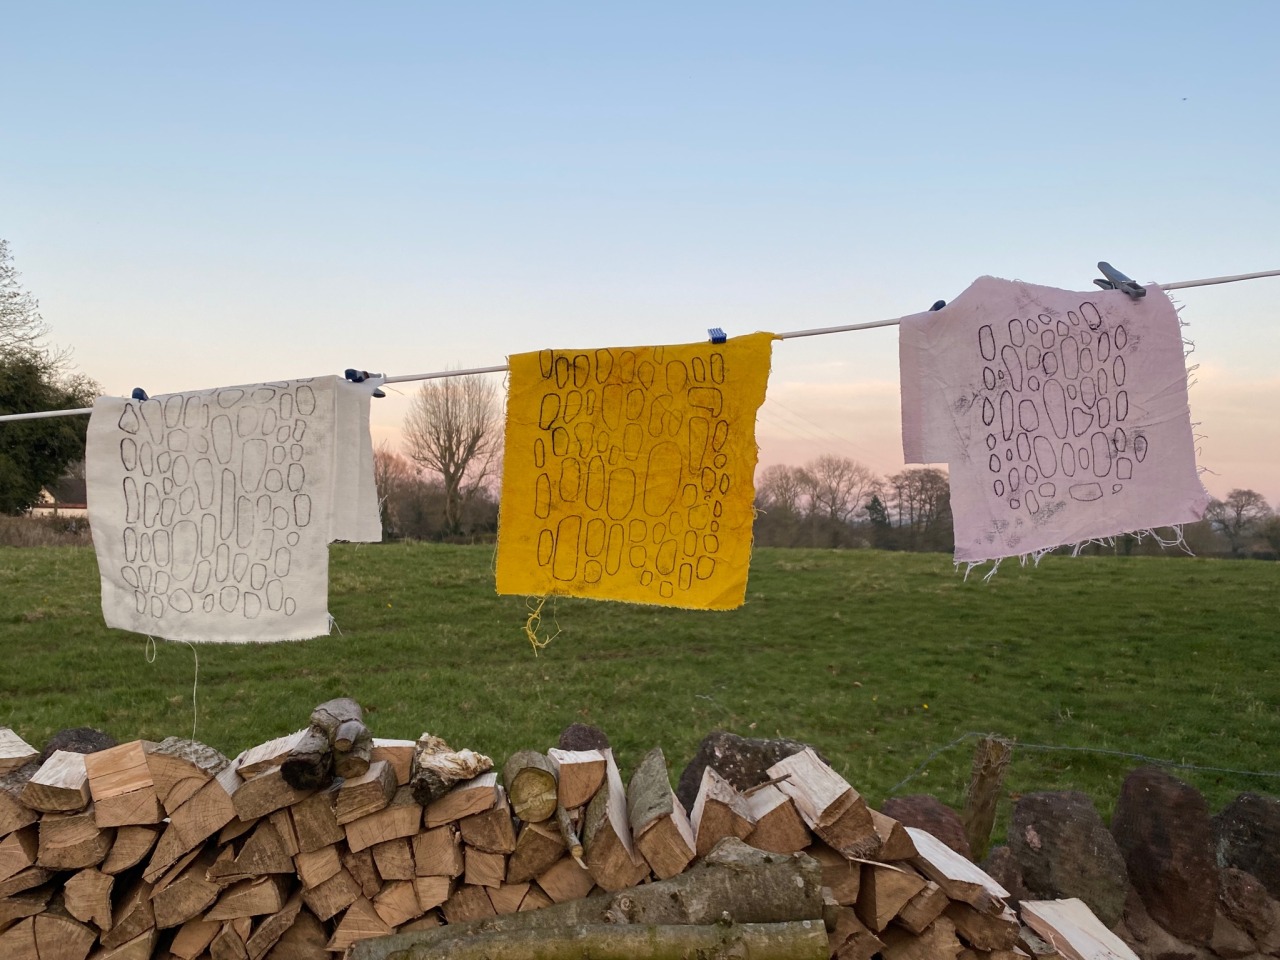
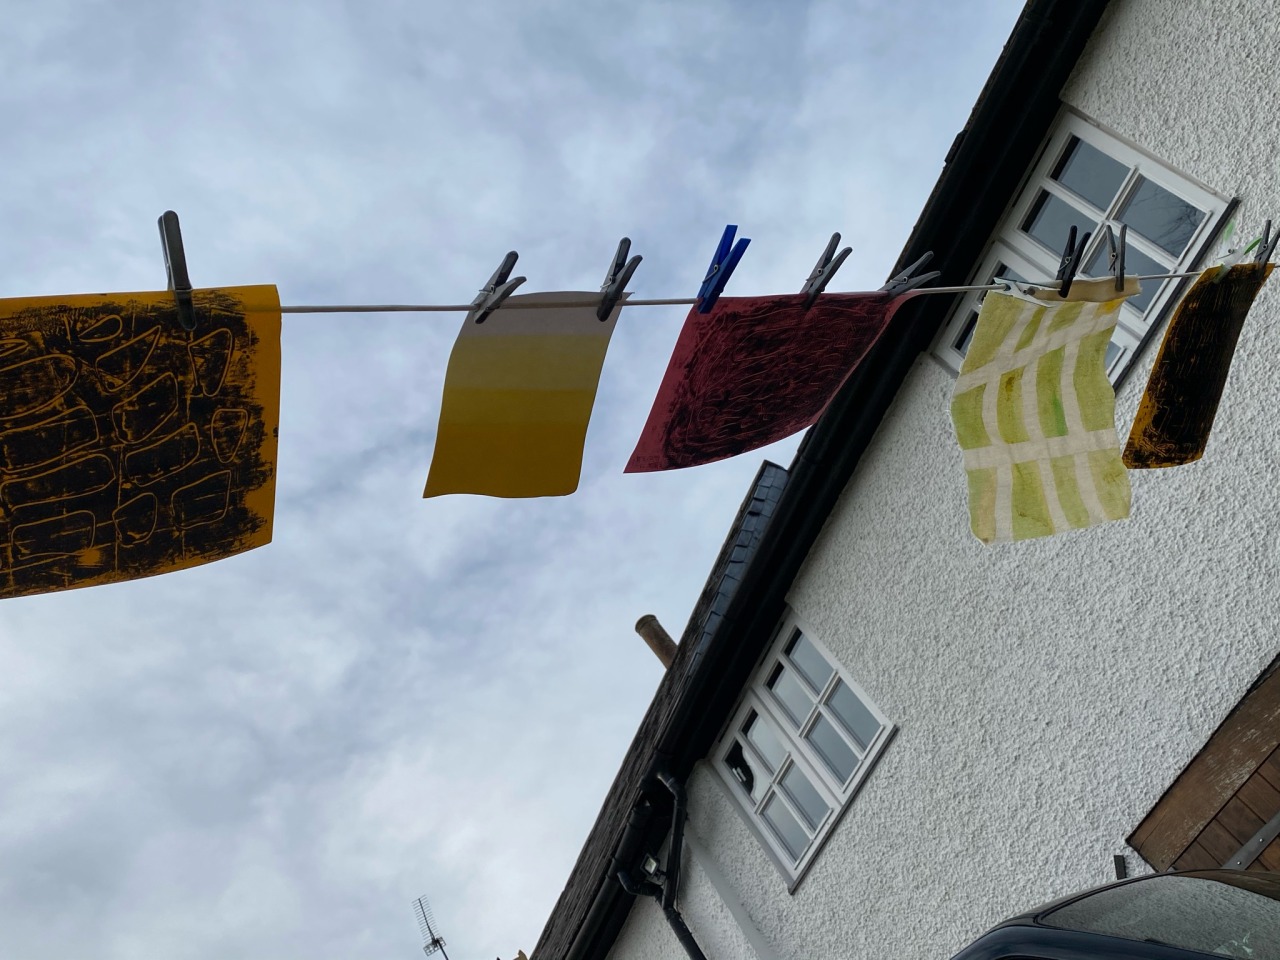
Today I worked on creating these samples. The first image is of some prints I made on natural dyed fabric drying outside. I’m going to work onto these with embroidery. I may dye the plain white sample (fat left) with pink ink.
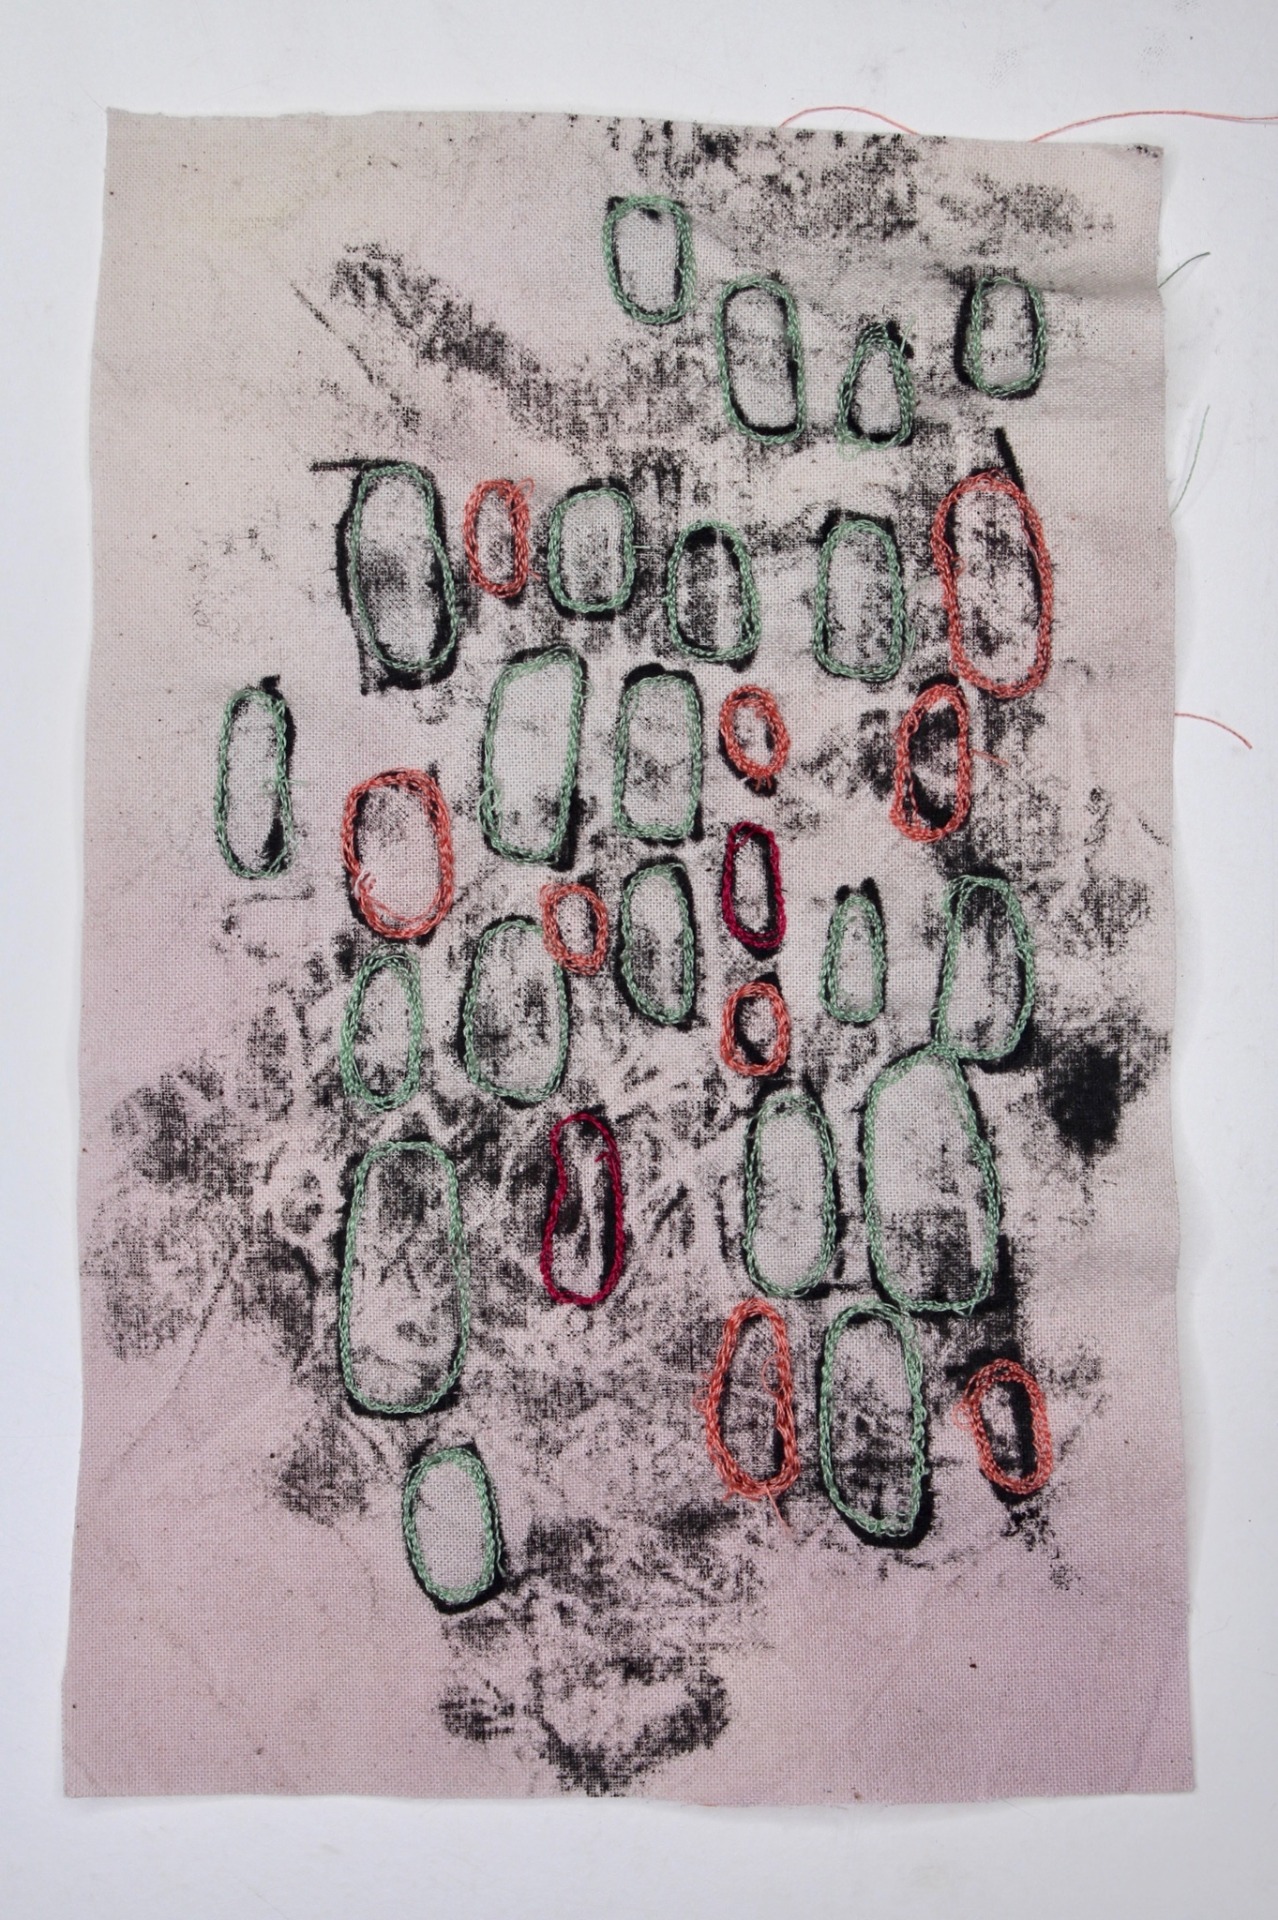
The video is of a sample I created where I layered net and organza fabric then stitching the cell shapes into them and cutting out the inside of the holes. I really like the affect of these on the layered thinner fabrics as it gives a more interesting affect which I prefer to working into the calico (the yellow sample I made yesterday)
The final image is of a sample I started making doing the same technique but with net and two different shades of blue organza. I used yellow thread as I really wanted the cells to pop! This was very affective and I really like how it’s turned out. I hadn’t cut into the holes yet at this point as I wanted to cover the whole sample in cells first.
I’m happy with how these experiments are going and I’m imagining them on the body in my head. I want to experiment with weaving to create a similar affect. These samples have taken a turn to my ideas last week where I was going to combine human and nature by printing onto architectural drawings and blue prints but I’ve decided to follow my natural process and develop my ideas which I feel I’ve done successfully this week. From starting with a knitted sample of button holes stretched out onto an embroidery to developing 2D prints using different mono printing techniques to making smaller scaled down printed samples to then a textured piece. I feel it’s a natural development of my ideas but I am worried they’re not combining my ideas of human and nature. They have all however used a process of the same rules to be produced which is similar to the constraints and set rules nature follows when its forms are taking shape. By working towards making these samples for the body could be a way of tying together humans and nature. I think I need to worry less about making the samples so literal (eg using the shape of the prickly pear cactus) which would be very obviously linked to nature and just keep developing these ideas naturally and let them take from and come into their own.
Reflection 25/03/20- Digital feedback form from part 3 tutorial
Digital Feedback Form from my Part 3 tutorial with Katie
Reflection 24/03/20
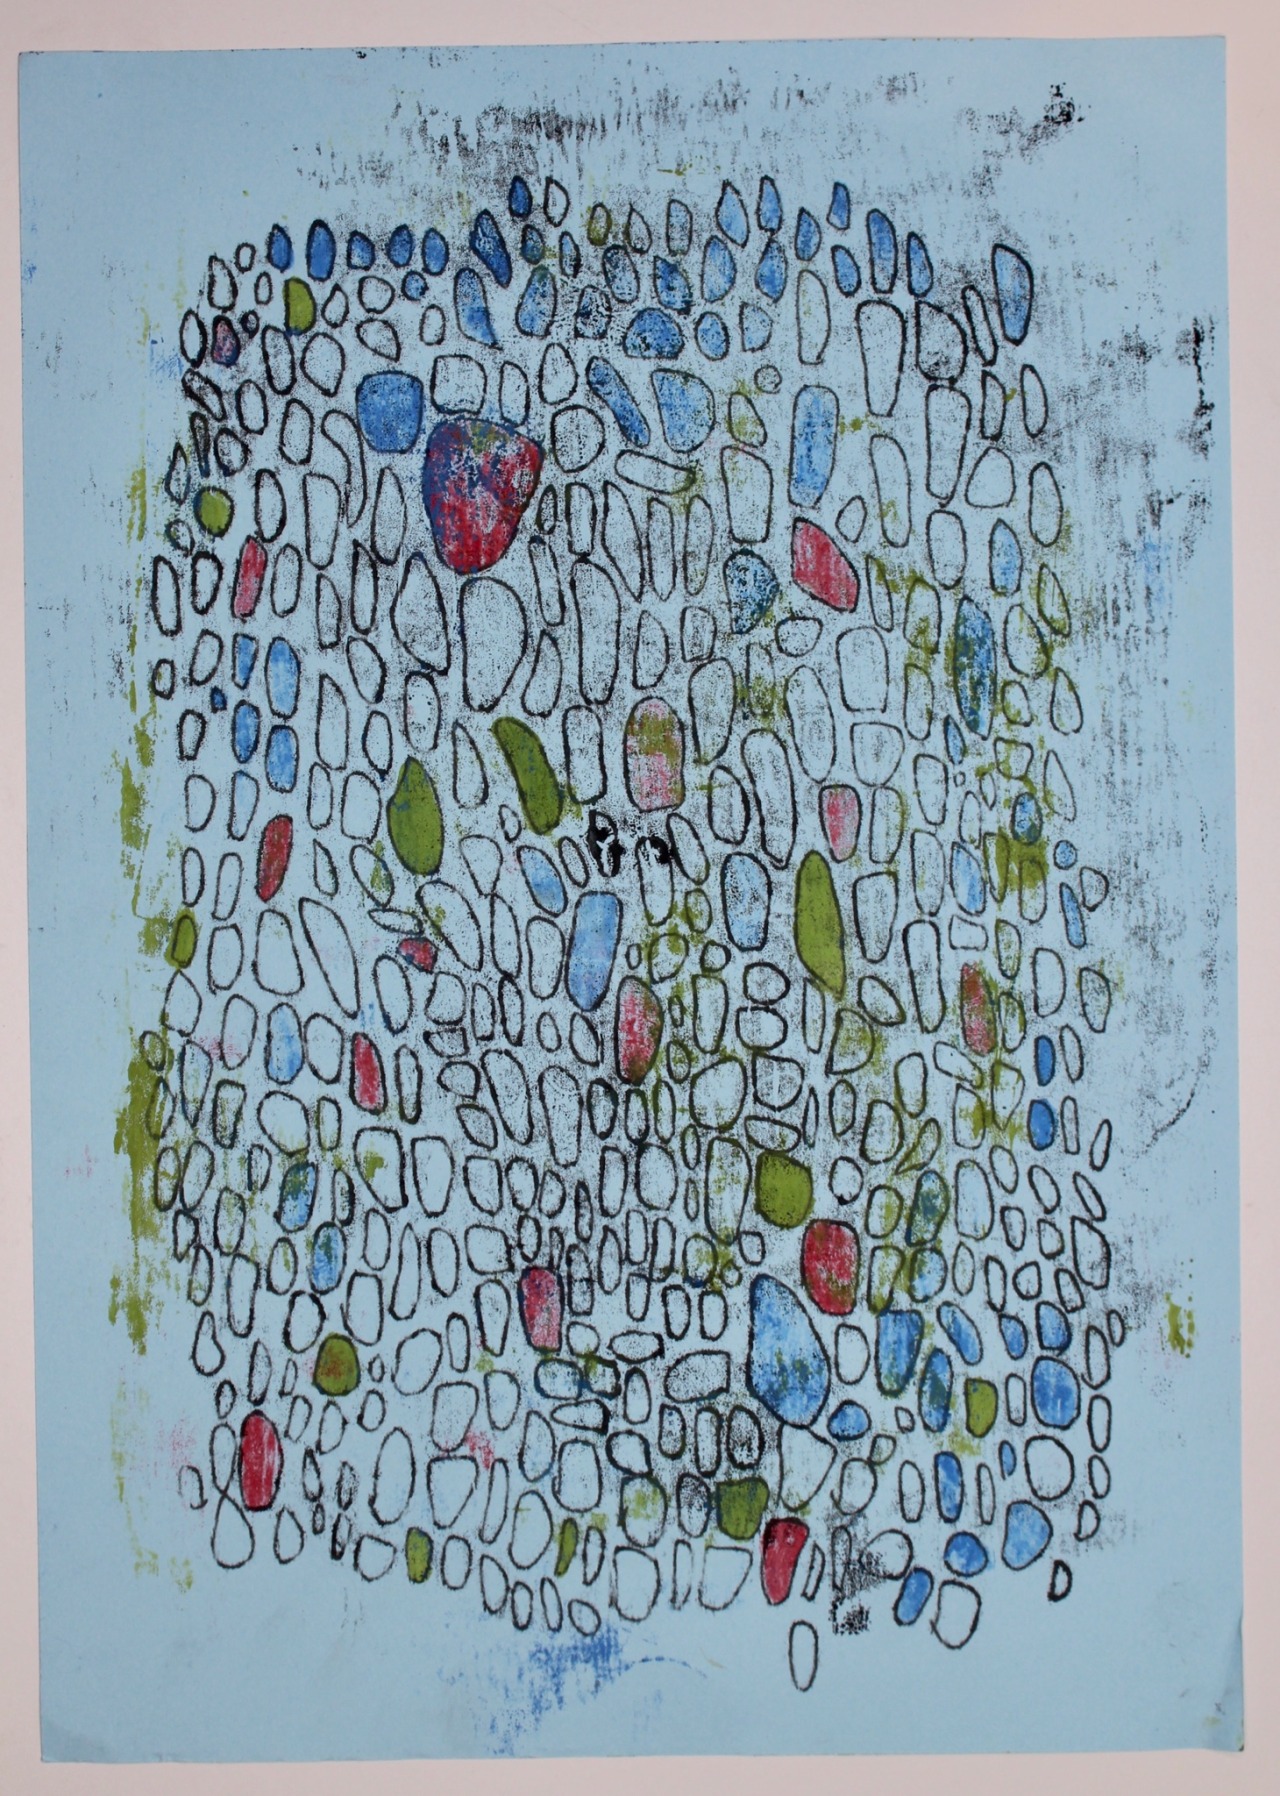
I spent today mono printing with my new found technique of drawing on the back of the paper to outline the cells. I really like this technique as it’s easy and you can create a large variety of outcomes by using different coloured inks and by printing onto different surfaces or coloured paper. The technique is also relatively simple but also gives a nice affect.
I experimented a lot today which was good as it enabled me to find the best way of using this technique. With trial and error I found that the prints work out better when the ink is thinner and dryer or else you get a big smudged affect when the paper picks up the excess ink. This means you don’t get the outline of the shape you want just a big splodge of ink. Although I found good ways of reducing messy ness this technique isn’t precise like screen printing which would be a better alternative if you want a sharp edge to your prints. I am happy however with the outcome of using this technique as it works well for what I’m trying to achieve which is colouring in the cells.
Reflection 24/03/20 - Mono printing
Here I am experimenting with a technique I’ve descovered while monopritning. You place the paper onto the tray which is covered in ink. You then draw the shape that you want to be dark onto the back of the paper. I did this firstly with black ink to print the black outline of the ‘cells’.
Here I am using the same technique slightly differently to create a different affect. You use the same principle of placing the paper onto the tray of ink but you colour in the space you want to be printed. You can use what ever colour ink you’d like. I experimented with a couple of different colours that I mixed up. Pink, blue, green and red.
The trick with this technique is to use a small amount of ink that’s almost dry but not completely. If it’s too wet or thick it’ll smear all over the paper and ruin the affect making it messy and less precise. You have to put down a small amount of ink but enough to be able to spread it across the tray with a roller. I found making prints using the ink while it was wetter was a good way to get the ink to the consistency I liked while still producing prints that I could use later without wasting it.
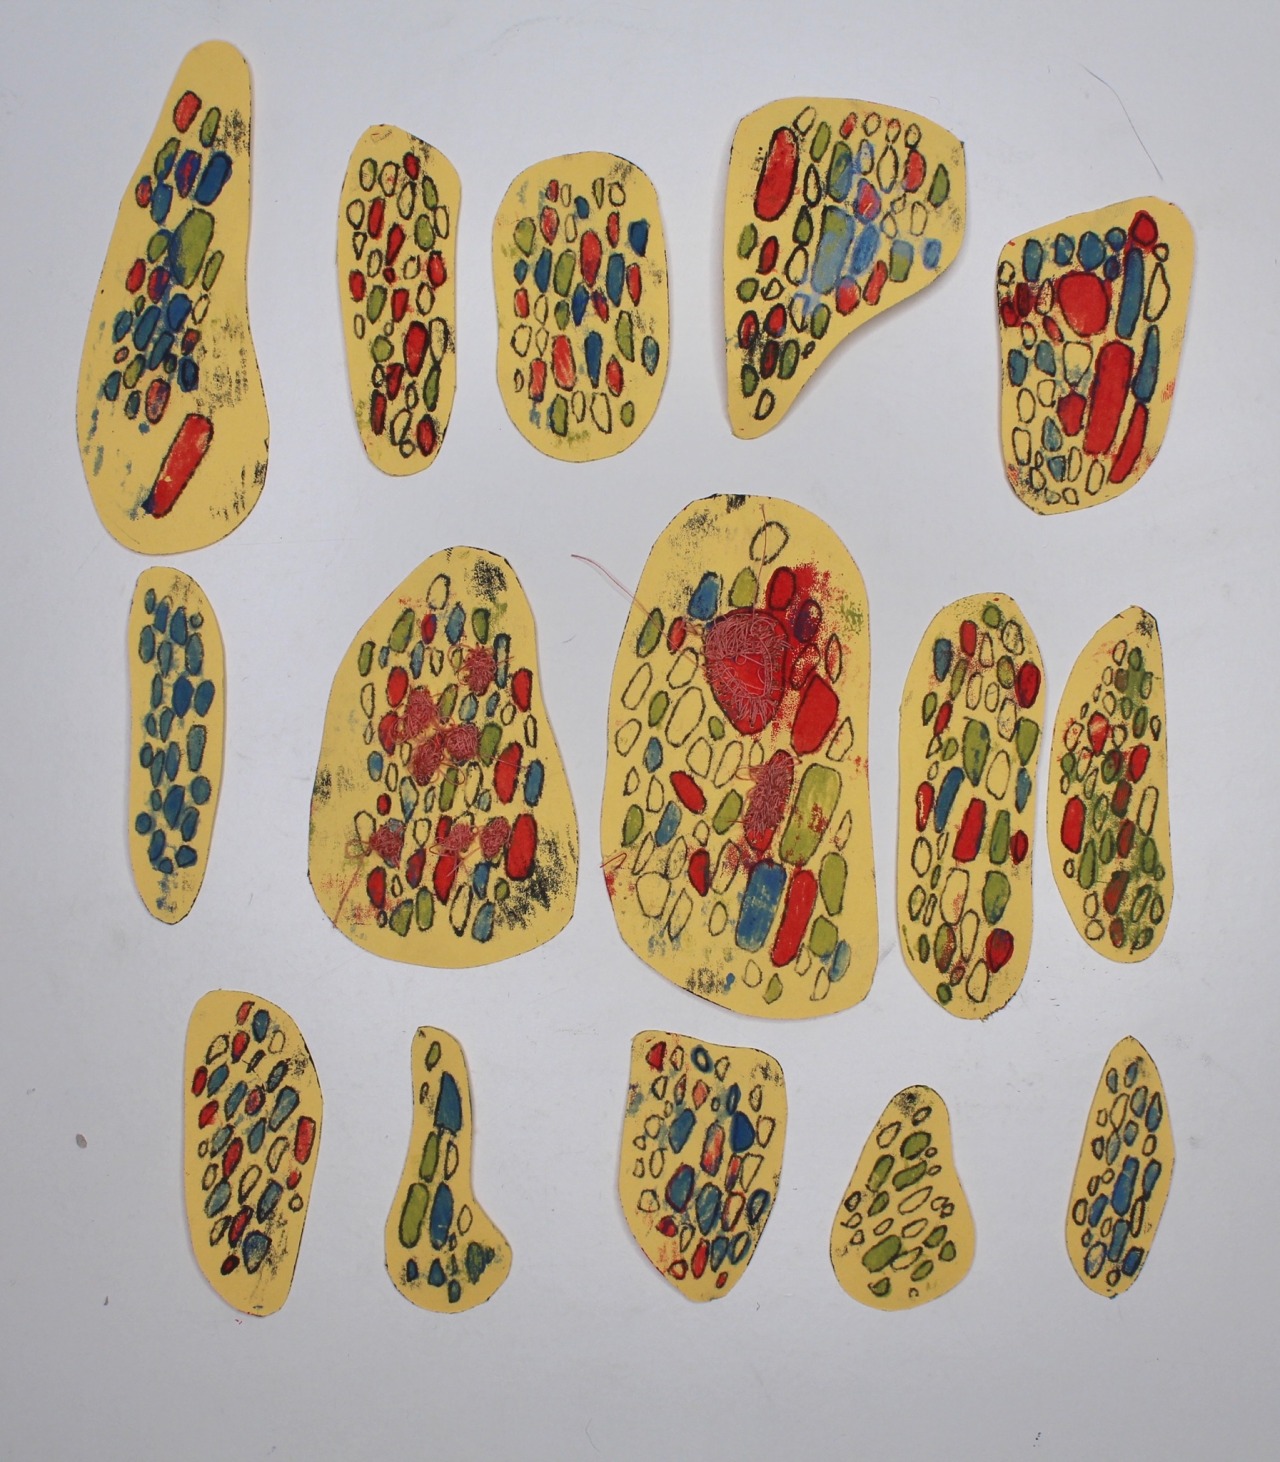
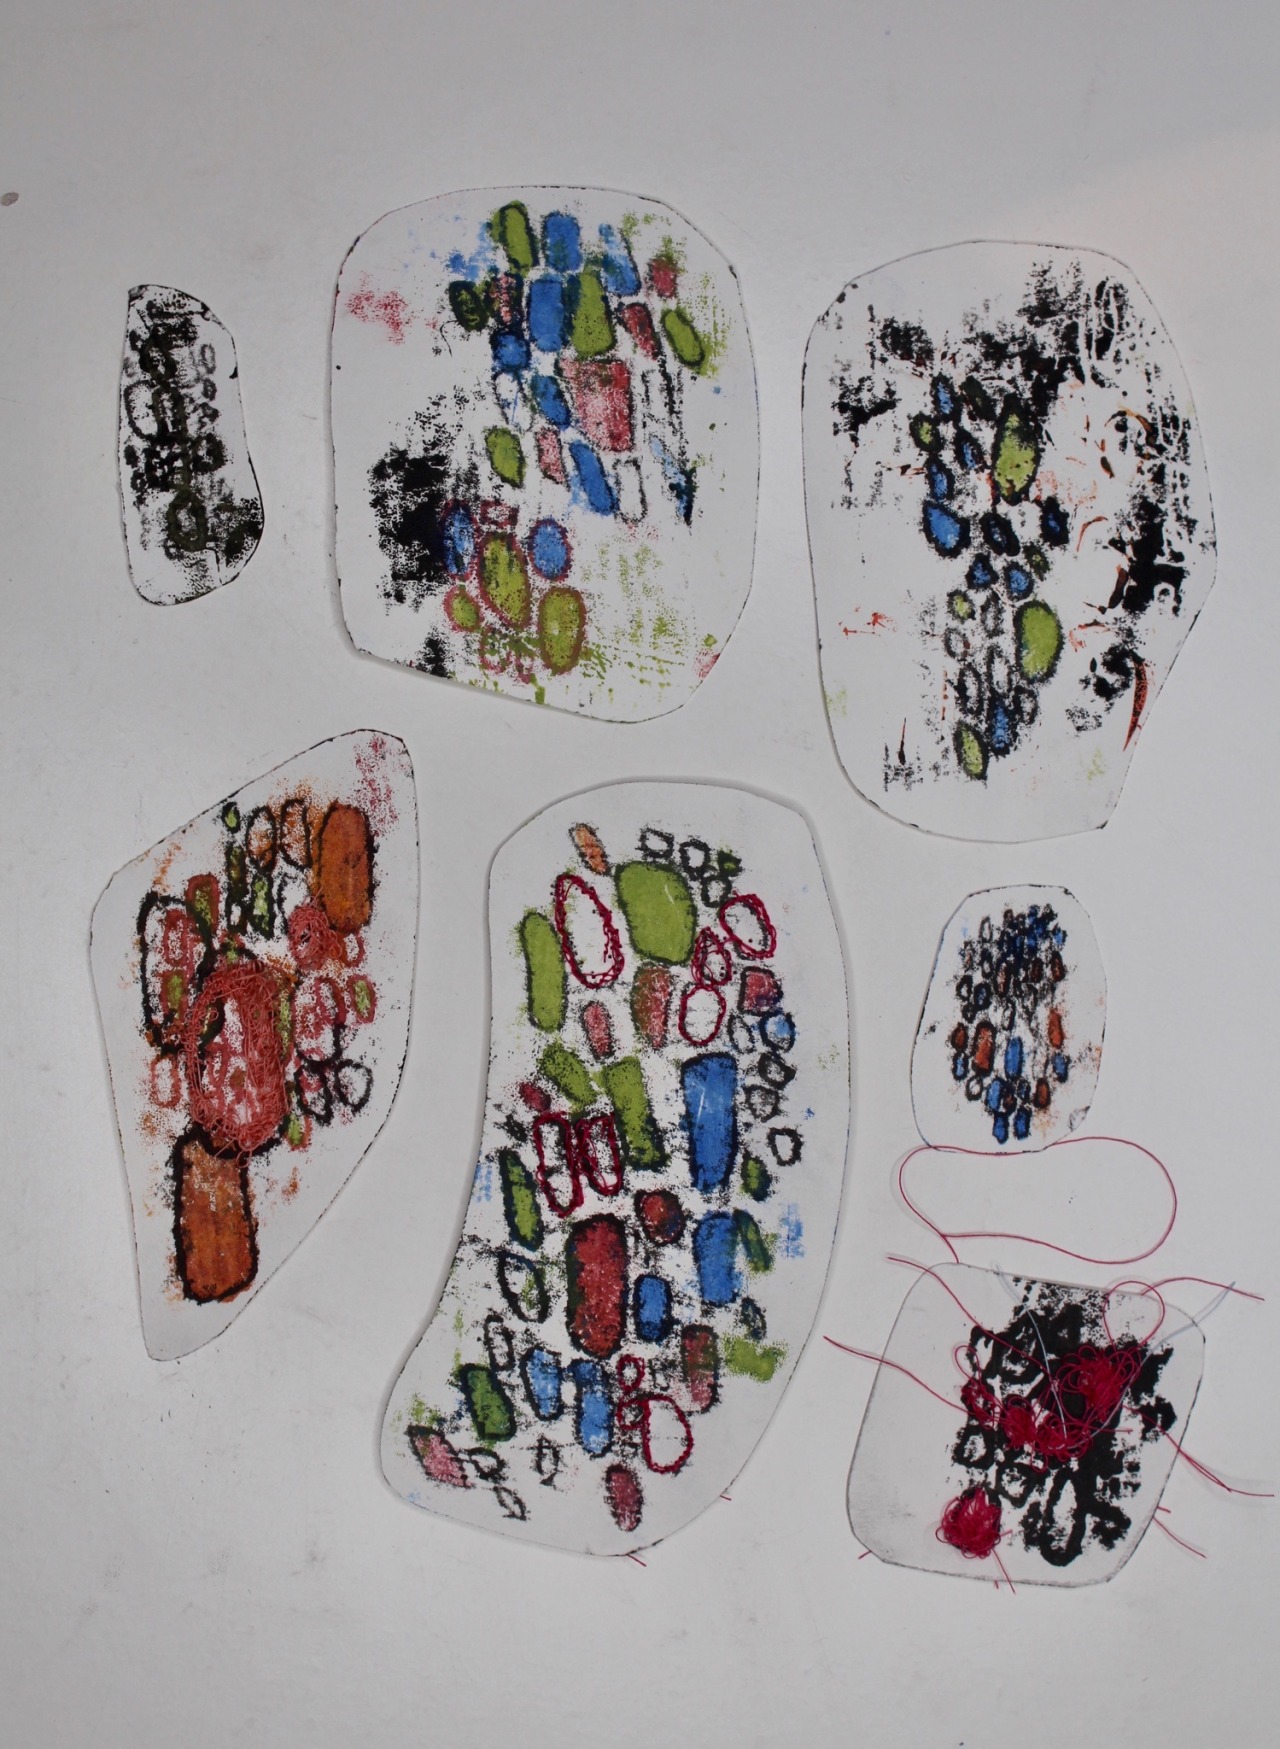
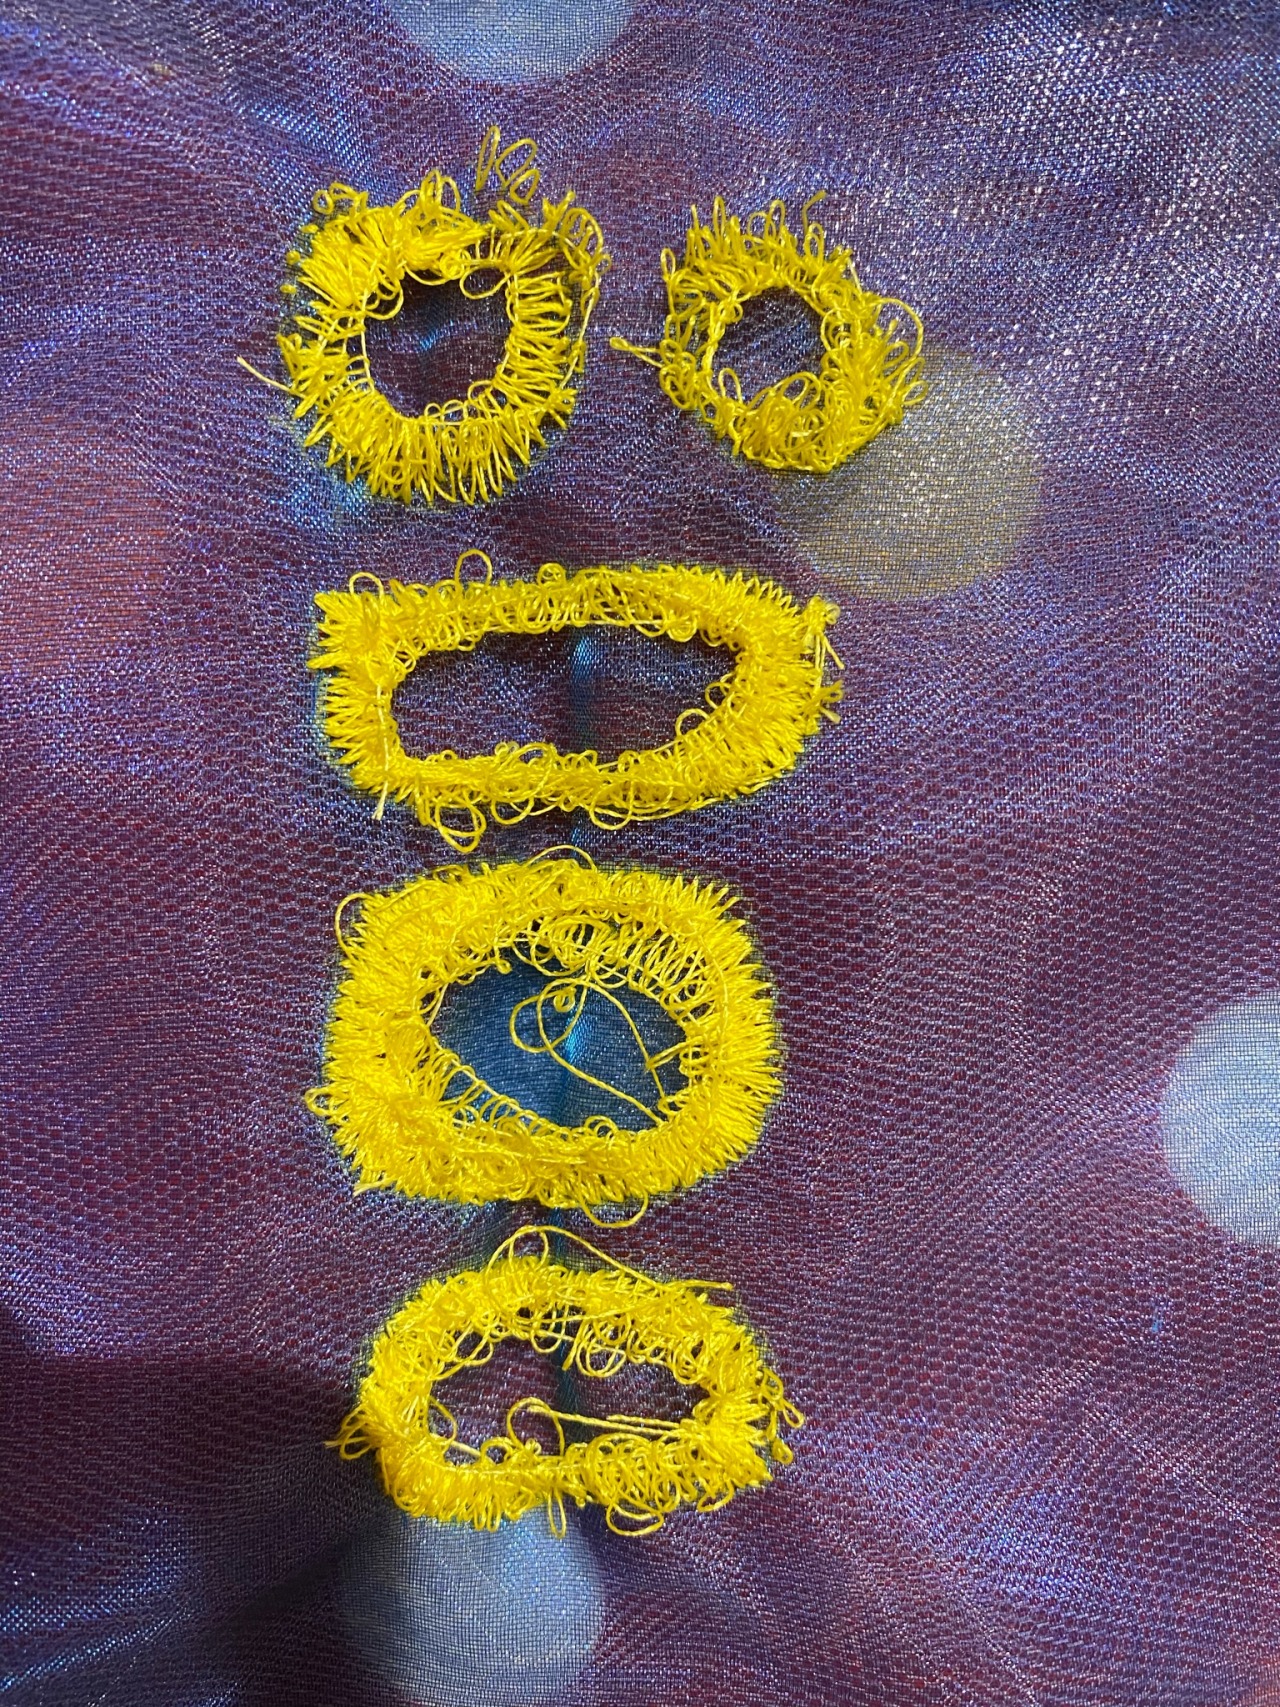
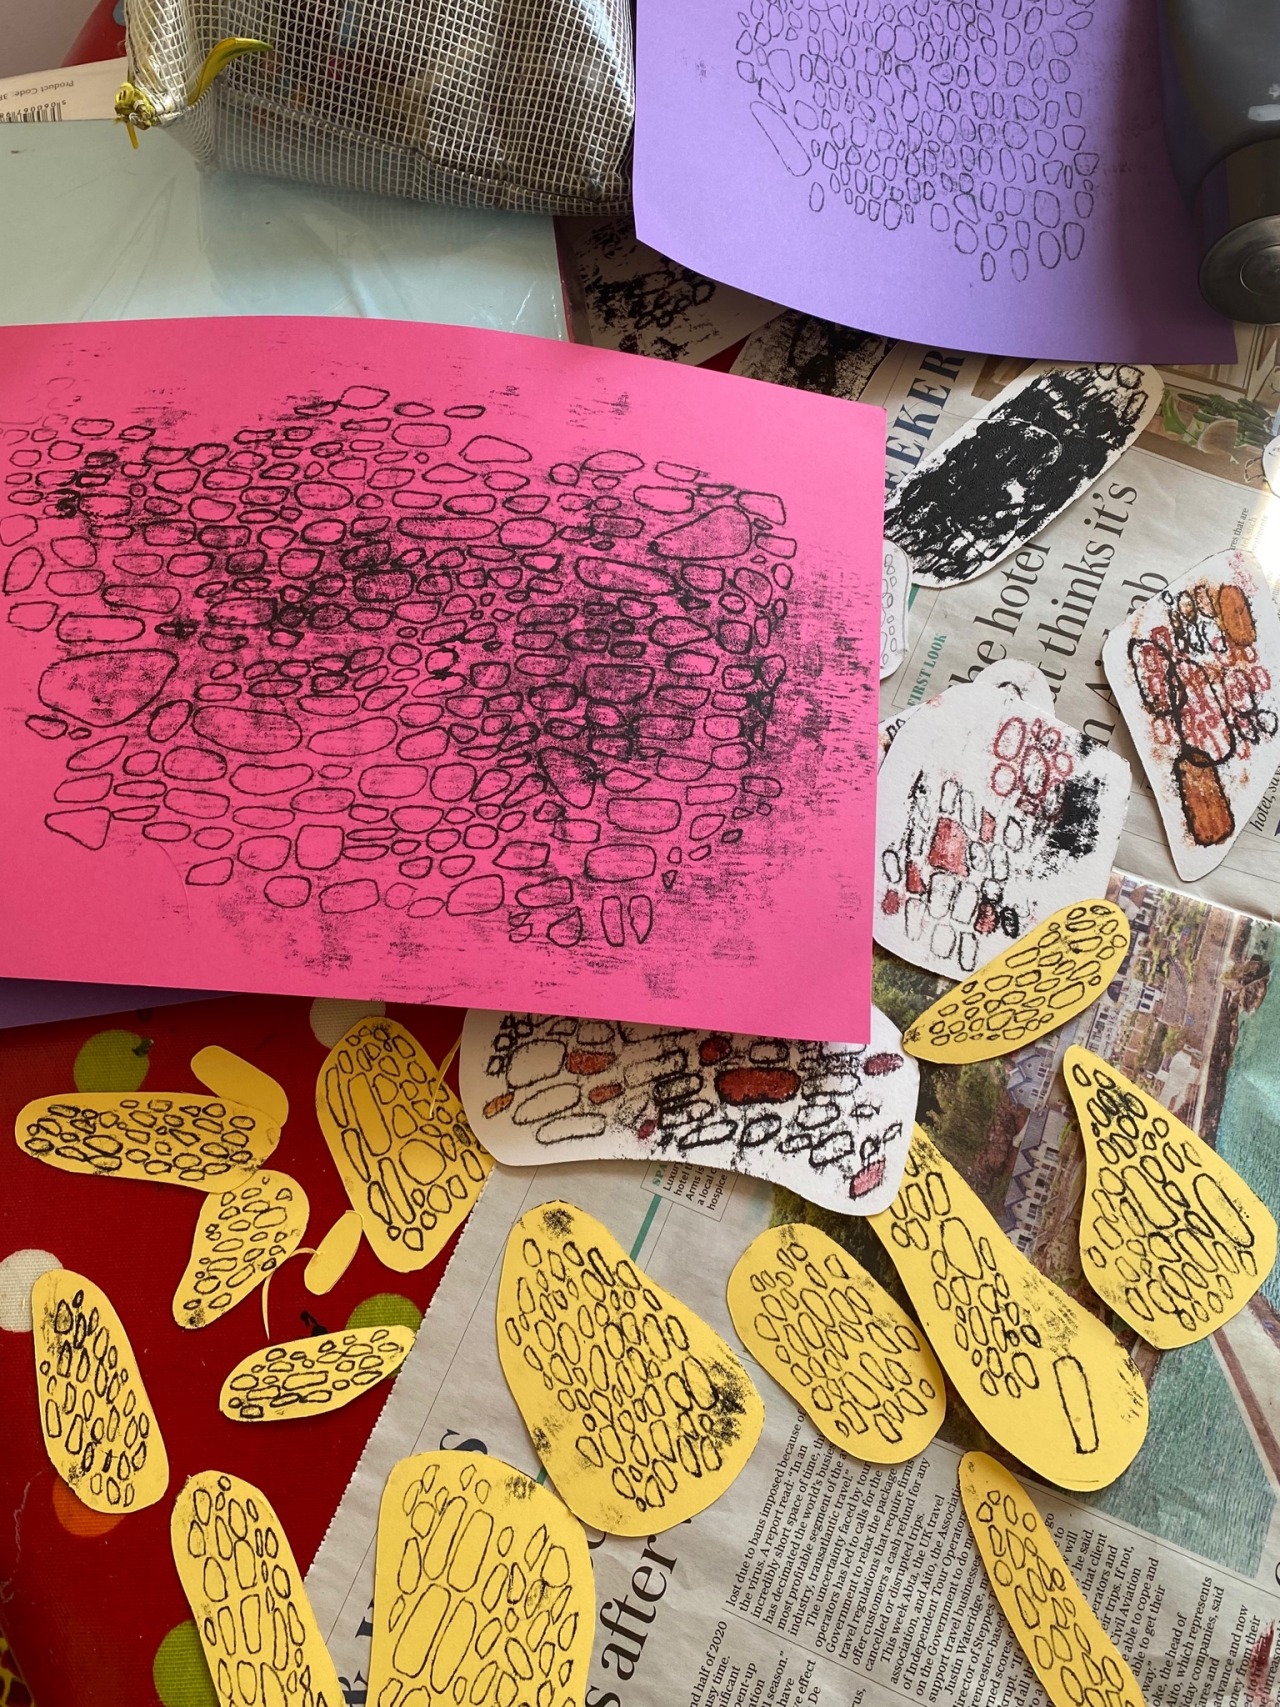
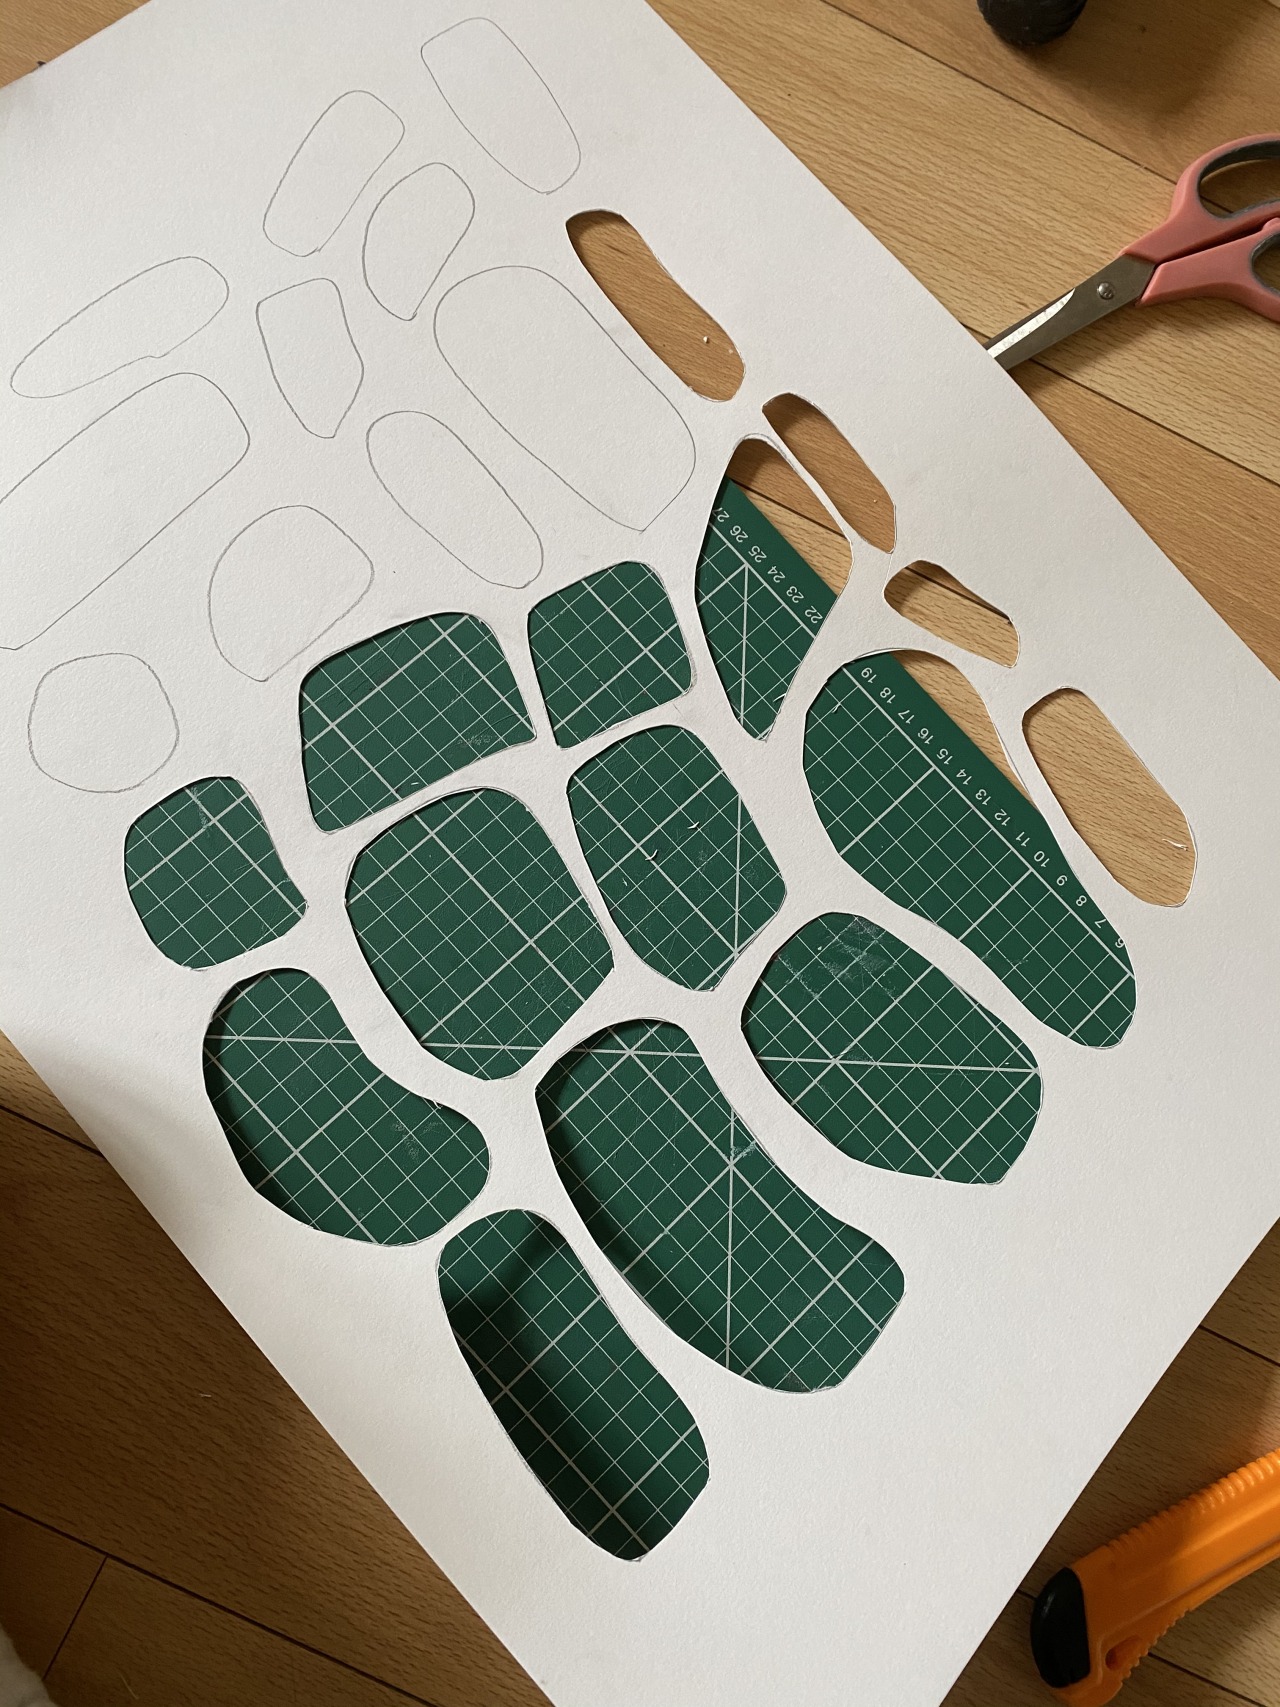
Here are some samples of prints I made. For today’s workshop we were asked to think about scale and to create smaller samples using a different technique. I wanted to continue printing but develop my new technique on a smaller scale so I cut out of a sheet of paper lots of the cells which I then printed more smaller cells onto.
I used a sewing machine to stitch onto some of the cells to create interesting tuffty textures which I really like.
Reflection 21/03/20
I started today by drawing the stretched out knitted sample I had in my sketchbook as sicgmone had said I needed some more drawing. I began drawing the spaces between the yarn developing these into more simple circular grids. Which replicated the cacti cells. I decided to create paper cut collages cell grids which I stuck in my sketchbook. I used the stencils to shade the negative space. I decided to create a large scale grid so I can make larger prints of this pattern.
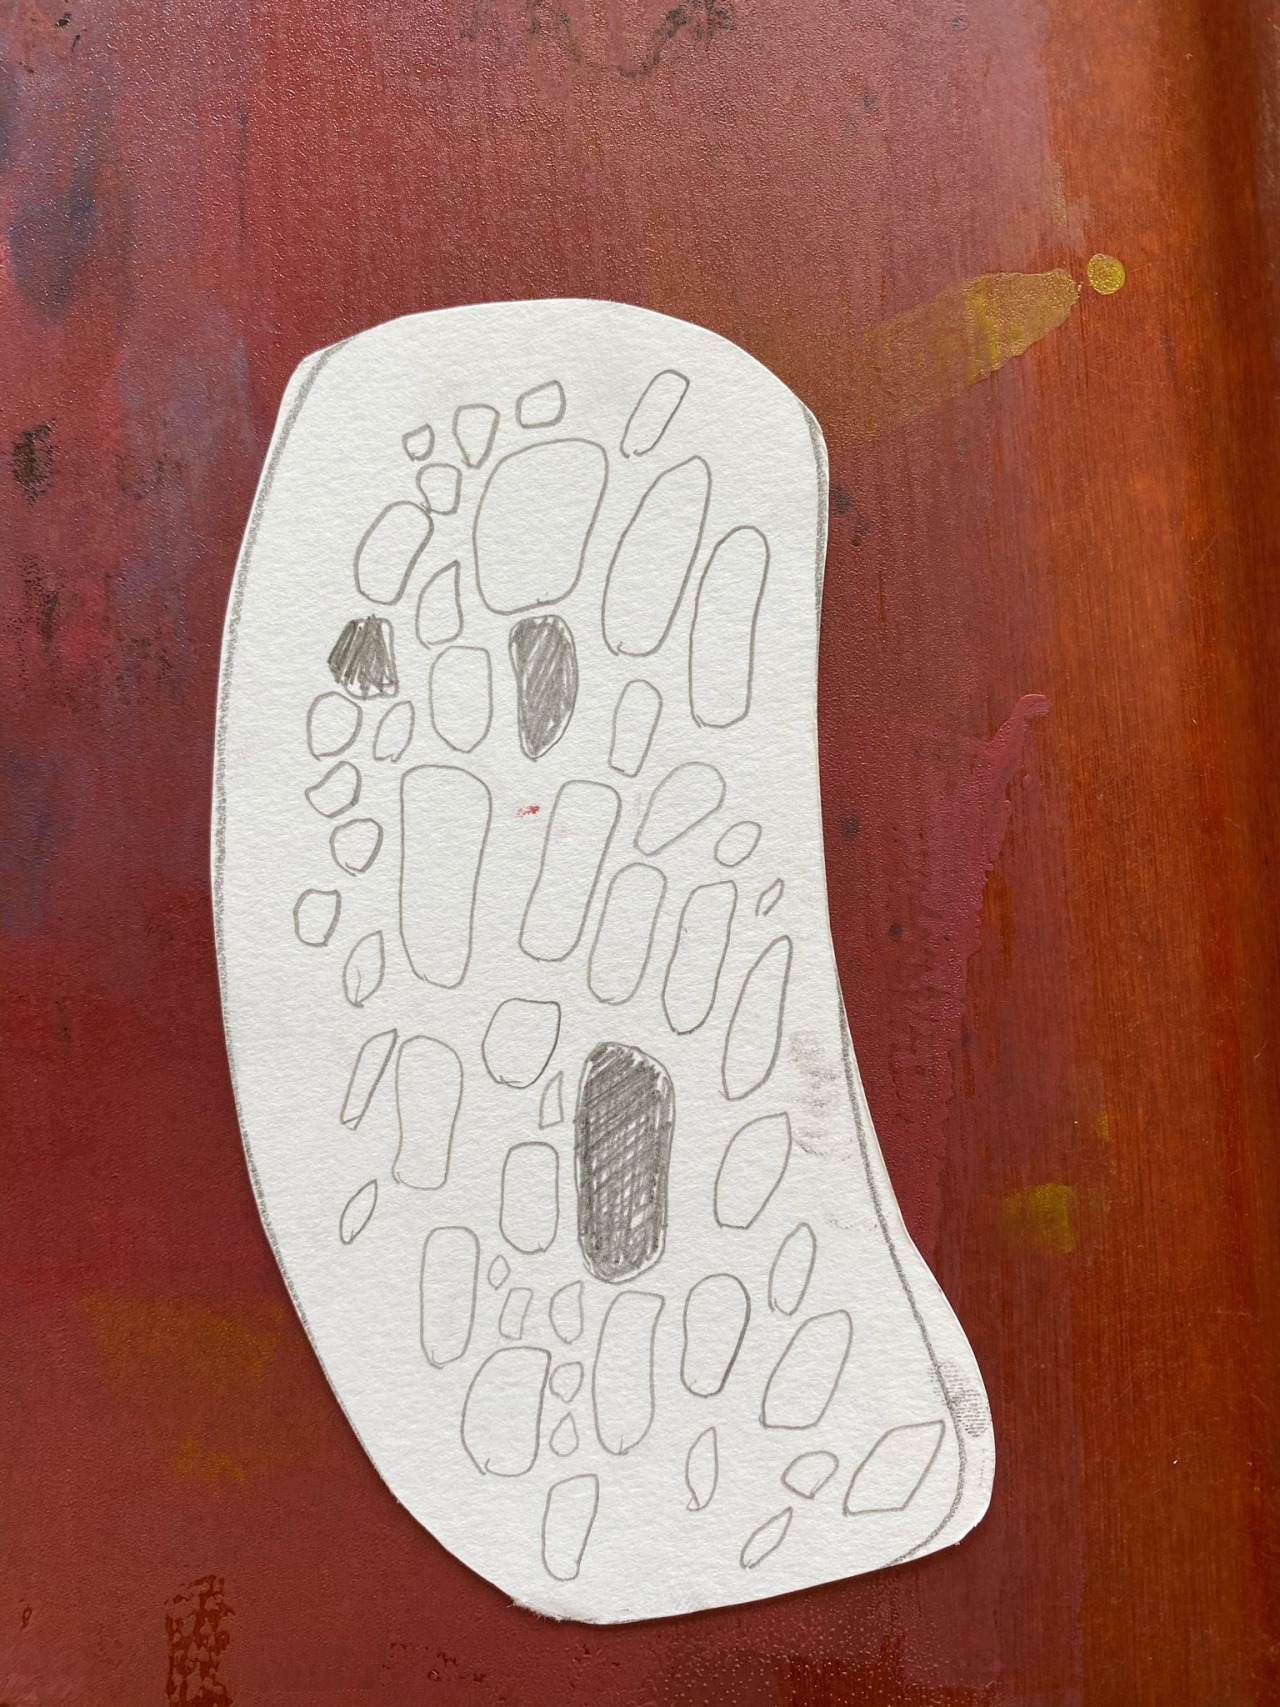
I wanted to continue repeating these patterns by mono printing so I used different coloured inks on some different coloured card and my own turmeric dyed paper. I created some prints by drawing into the printing ink before placing the paper down and others where I’d block out gaps using the paper cut out cells. I descovered that I could create different affects by drawing into the ink, placing the paper down onto the tray then drawing onto the back of the paper. When lifting this up it gave another darker line marking in the shape of my drawing. I continued to experiment with this process as I really liked the affect it gave on the paper. This pattern to me is interesting and I can have freedom by playing with the form. The pattern was inspired by the cacti cell structure of multiple curcular shapes laying next to one another.
Some of my favourite prints were the ones I layered on top of the shading pattern (with pencil) as this created a 3D effect. I can experiment with different colours.
I also did some prints onto fabric with the drawing onto the back technique, these turned out to be quite affective. I could see into these on the sewing machine.
By using the same technique I drew a more man made architectural pattern. This could be a good technique for doing this.
Overall I am really happy with the outcome of these prints. I’m going to continue experimenting with scale with the larger stencil and think about how I’m going to work onto these prints as well.


Part 3 tutorial feedback form: Reflection 19/03/20
Reflection 20/03/20
Button hole knitting samples stretched over embroidery hoops.
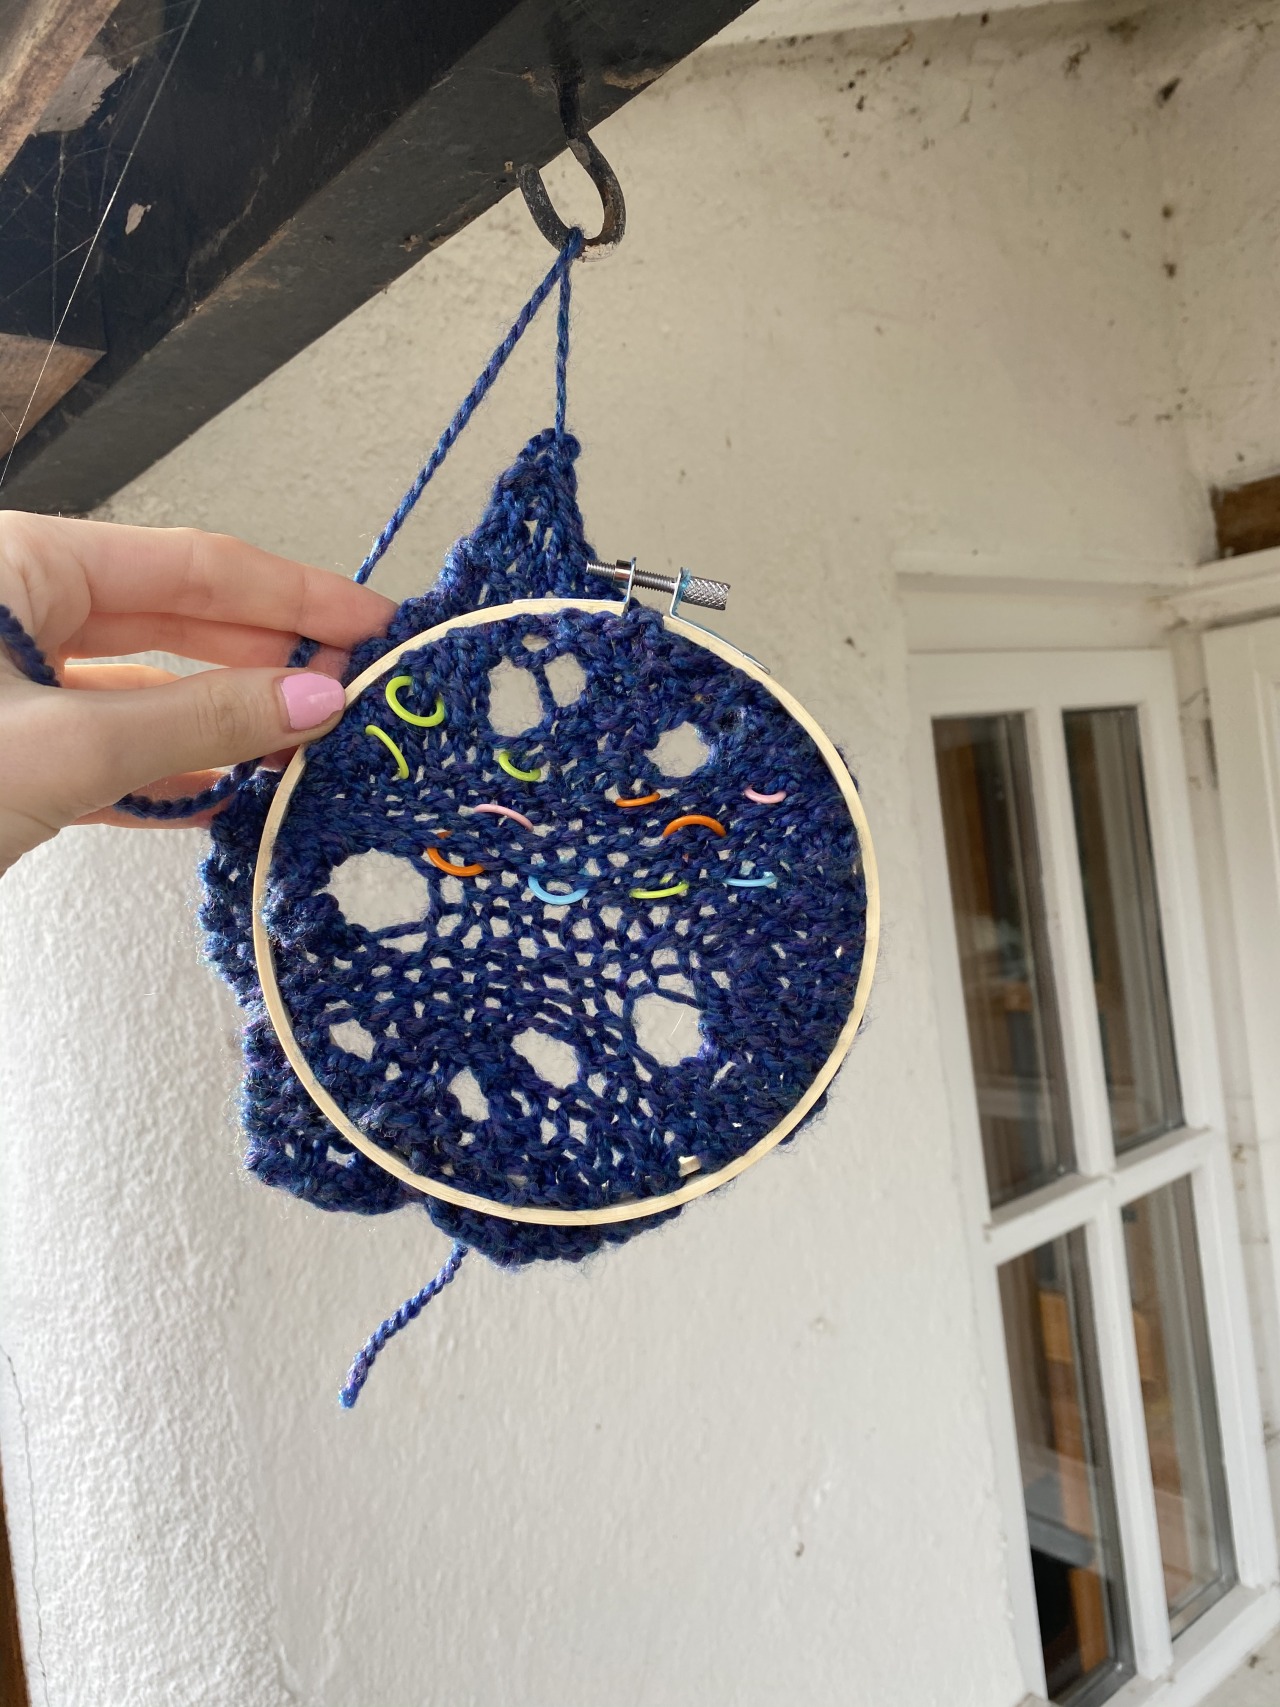
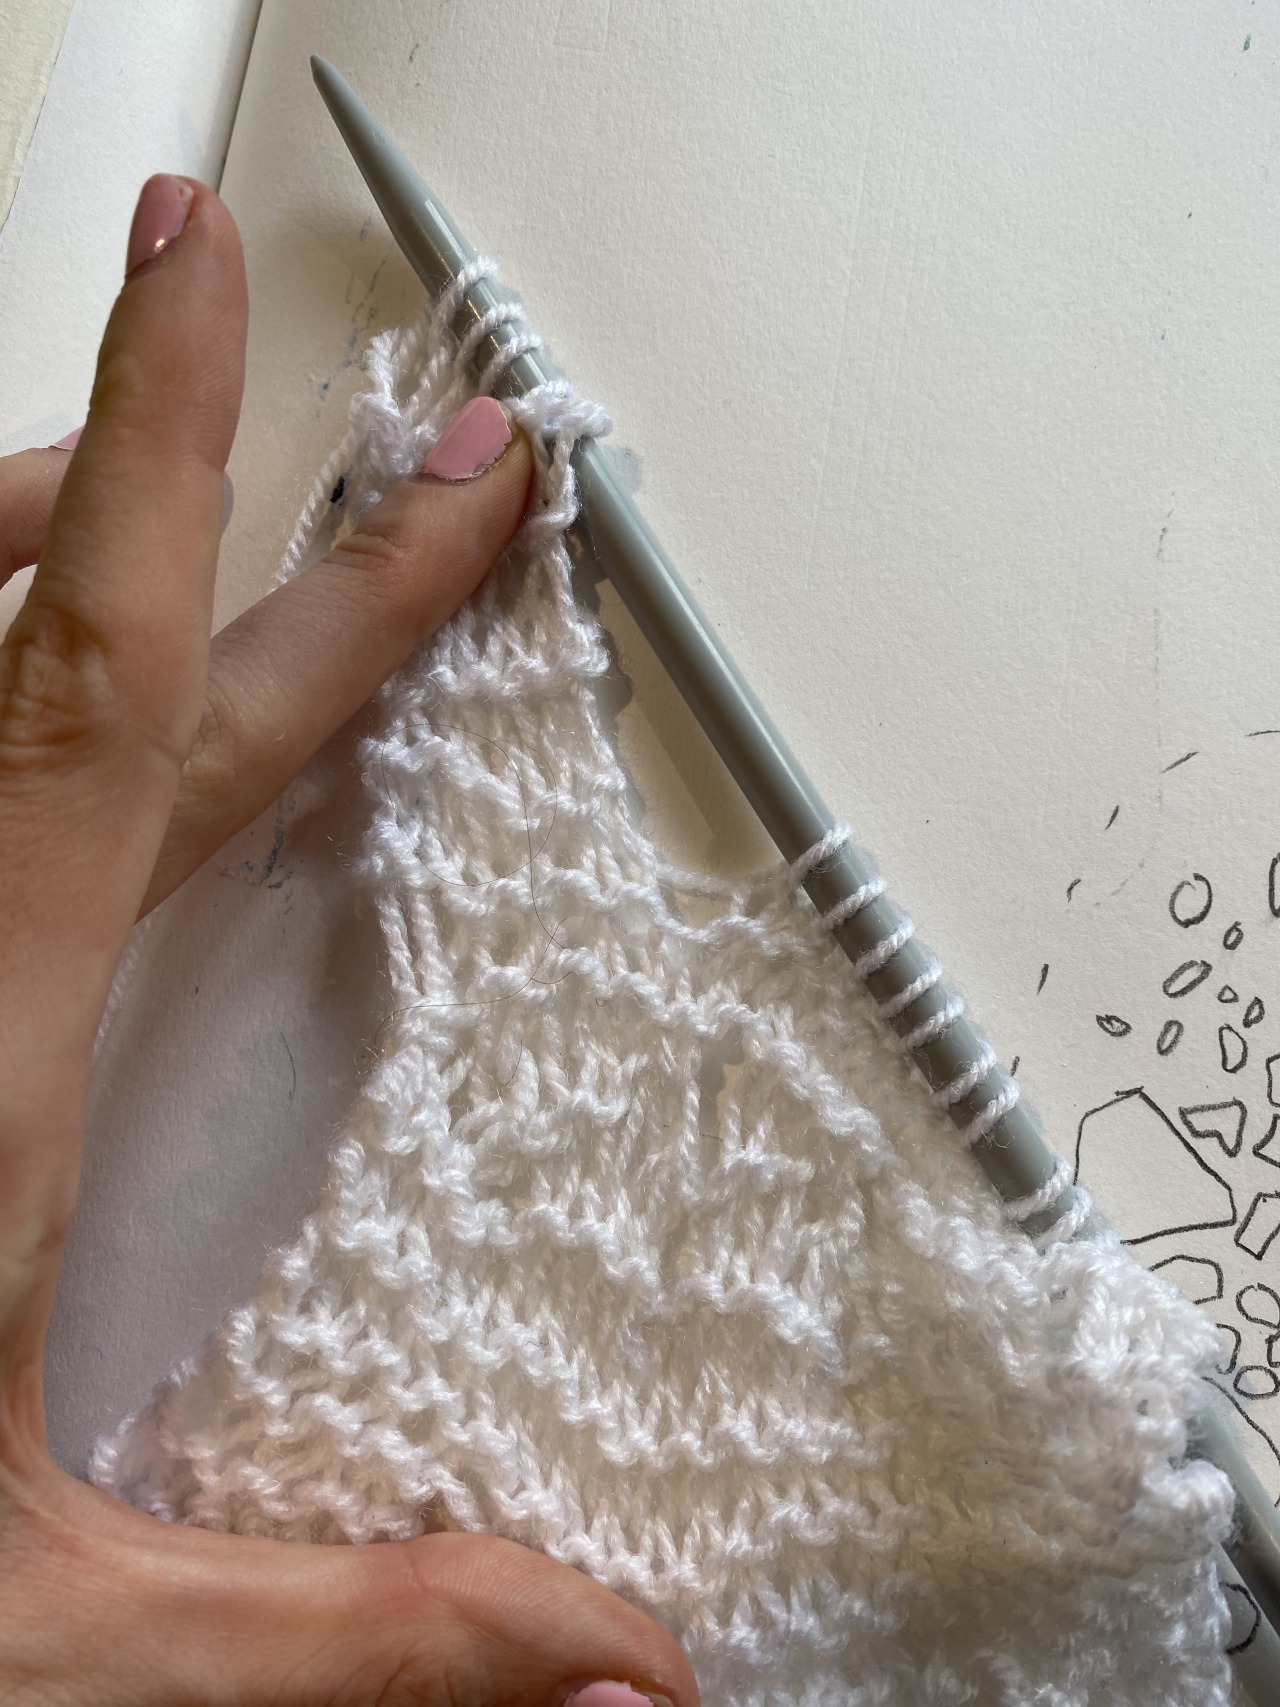
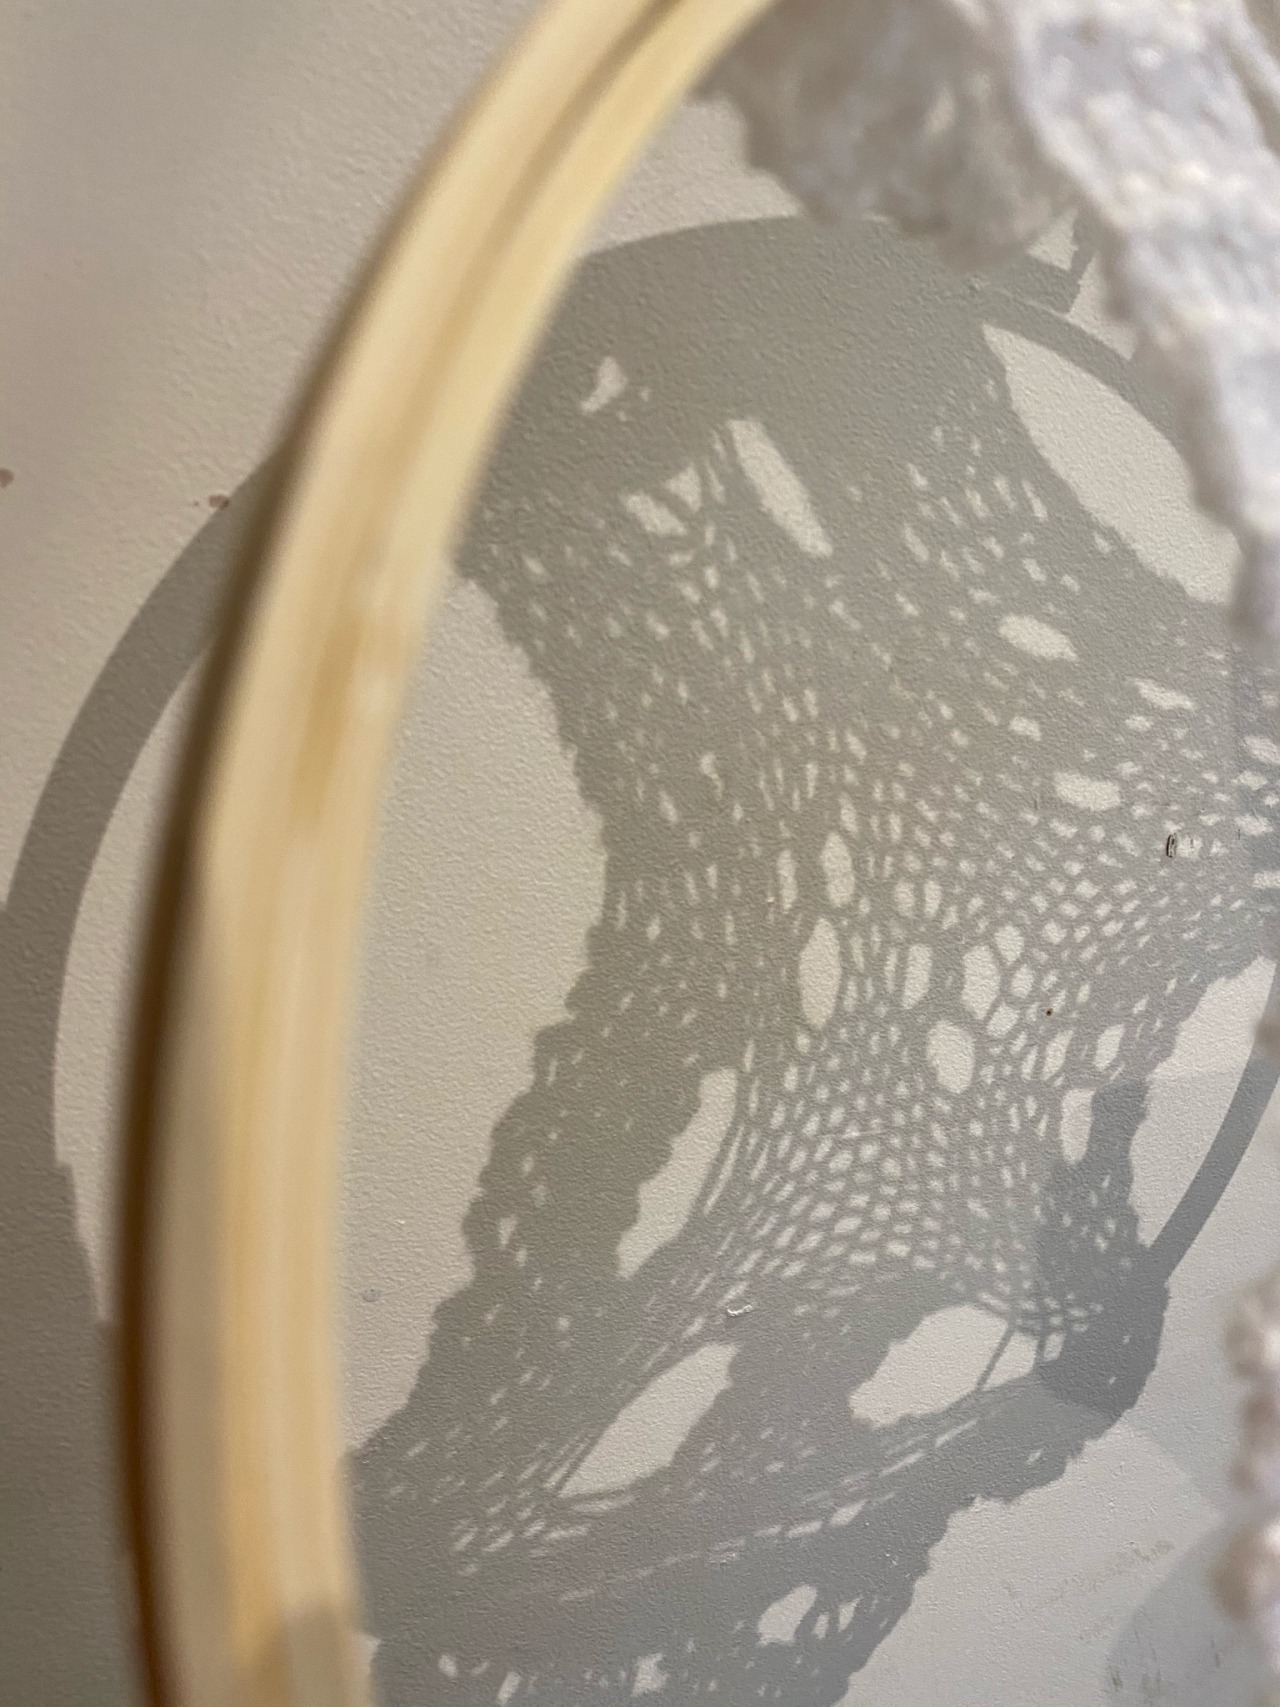
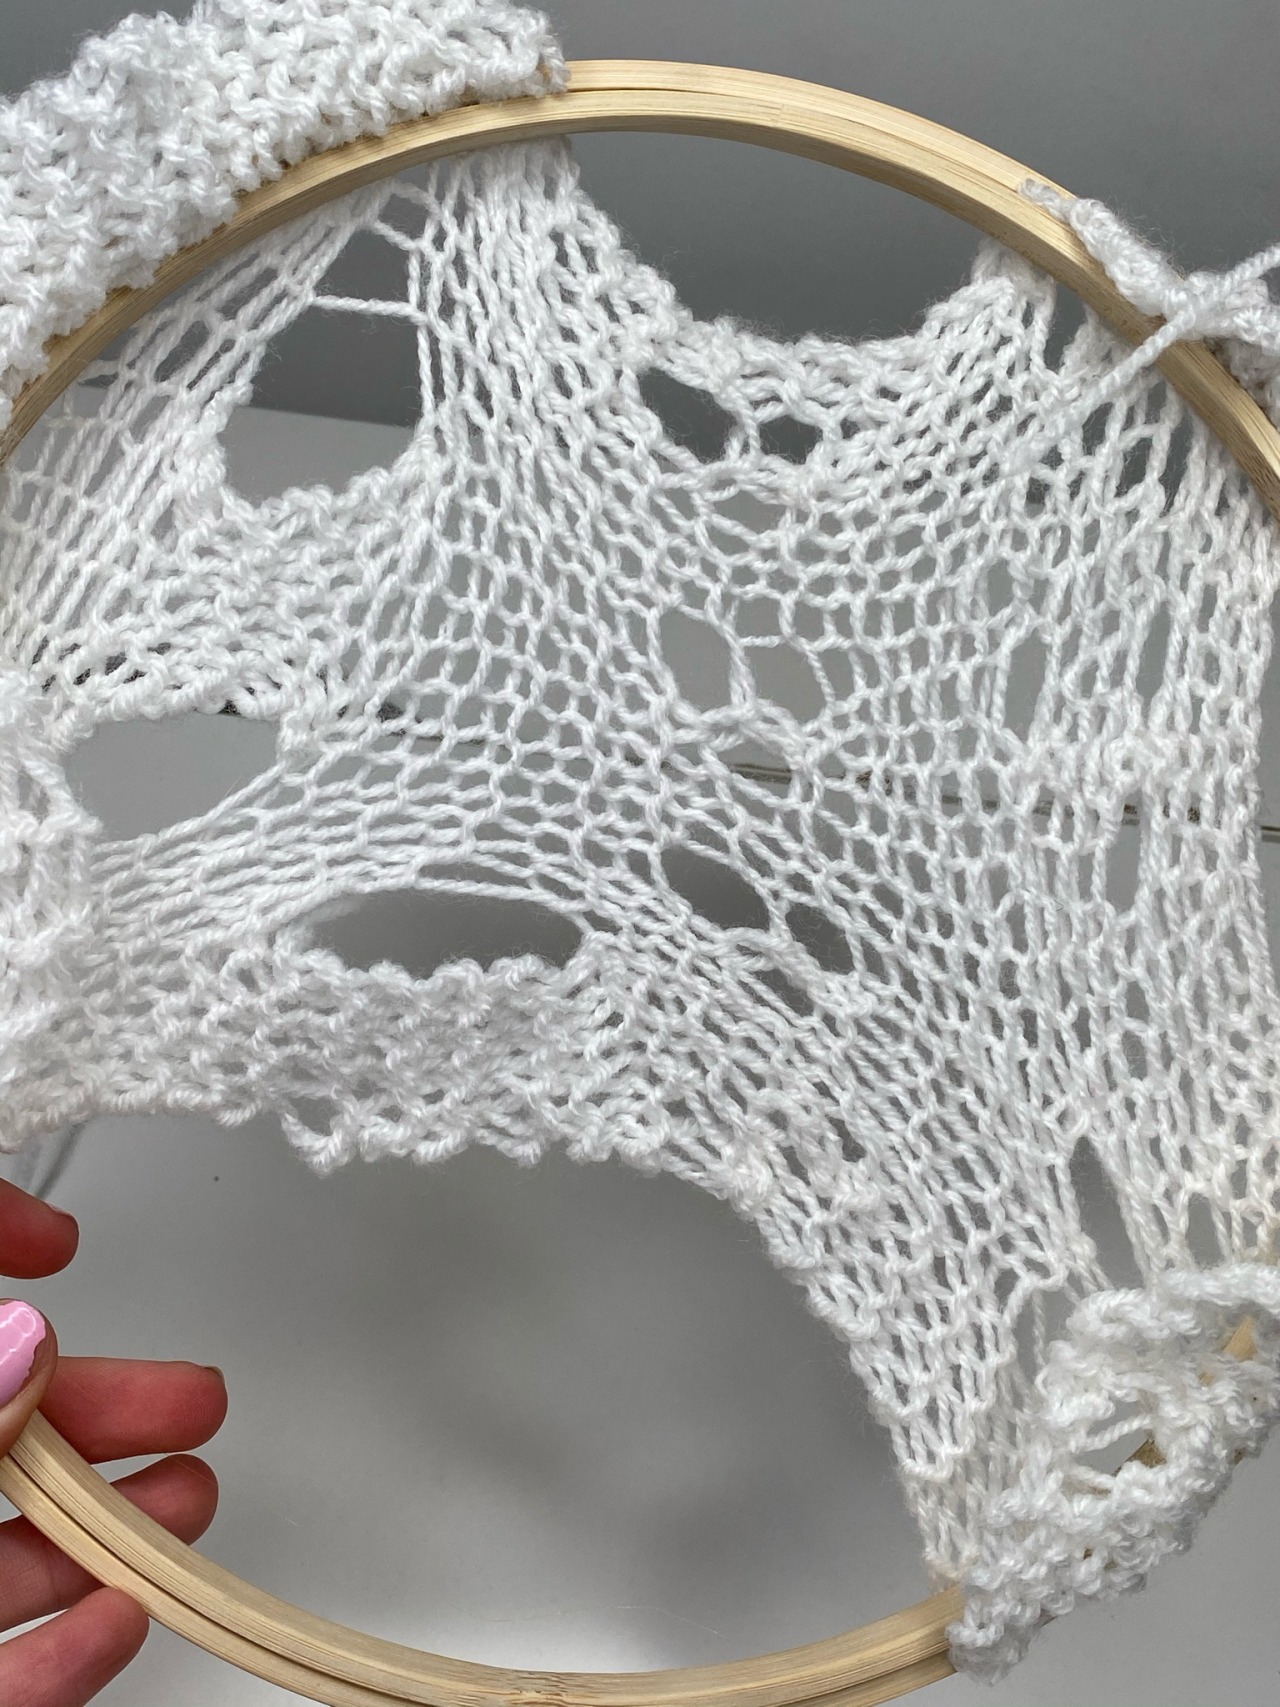
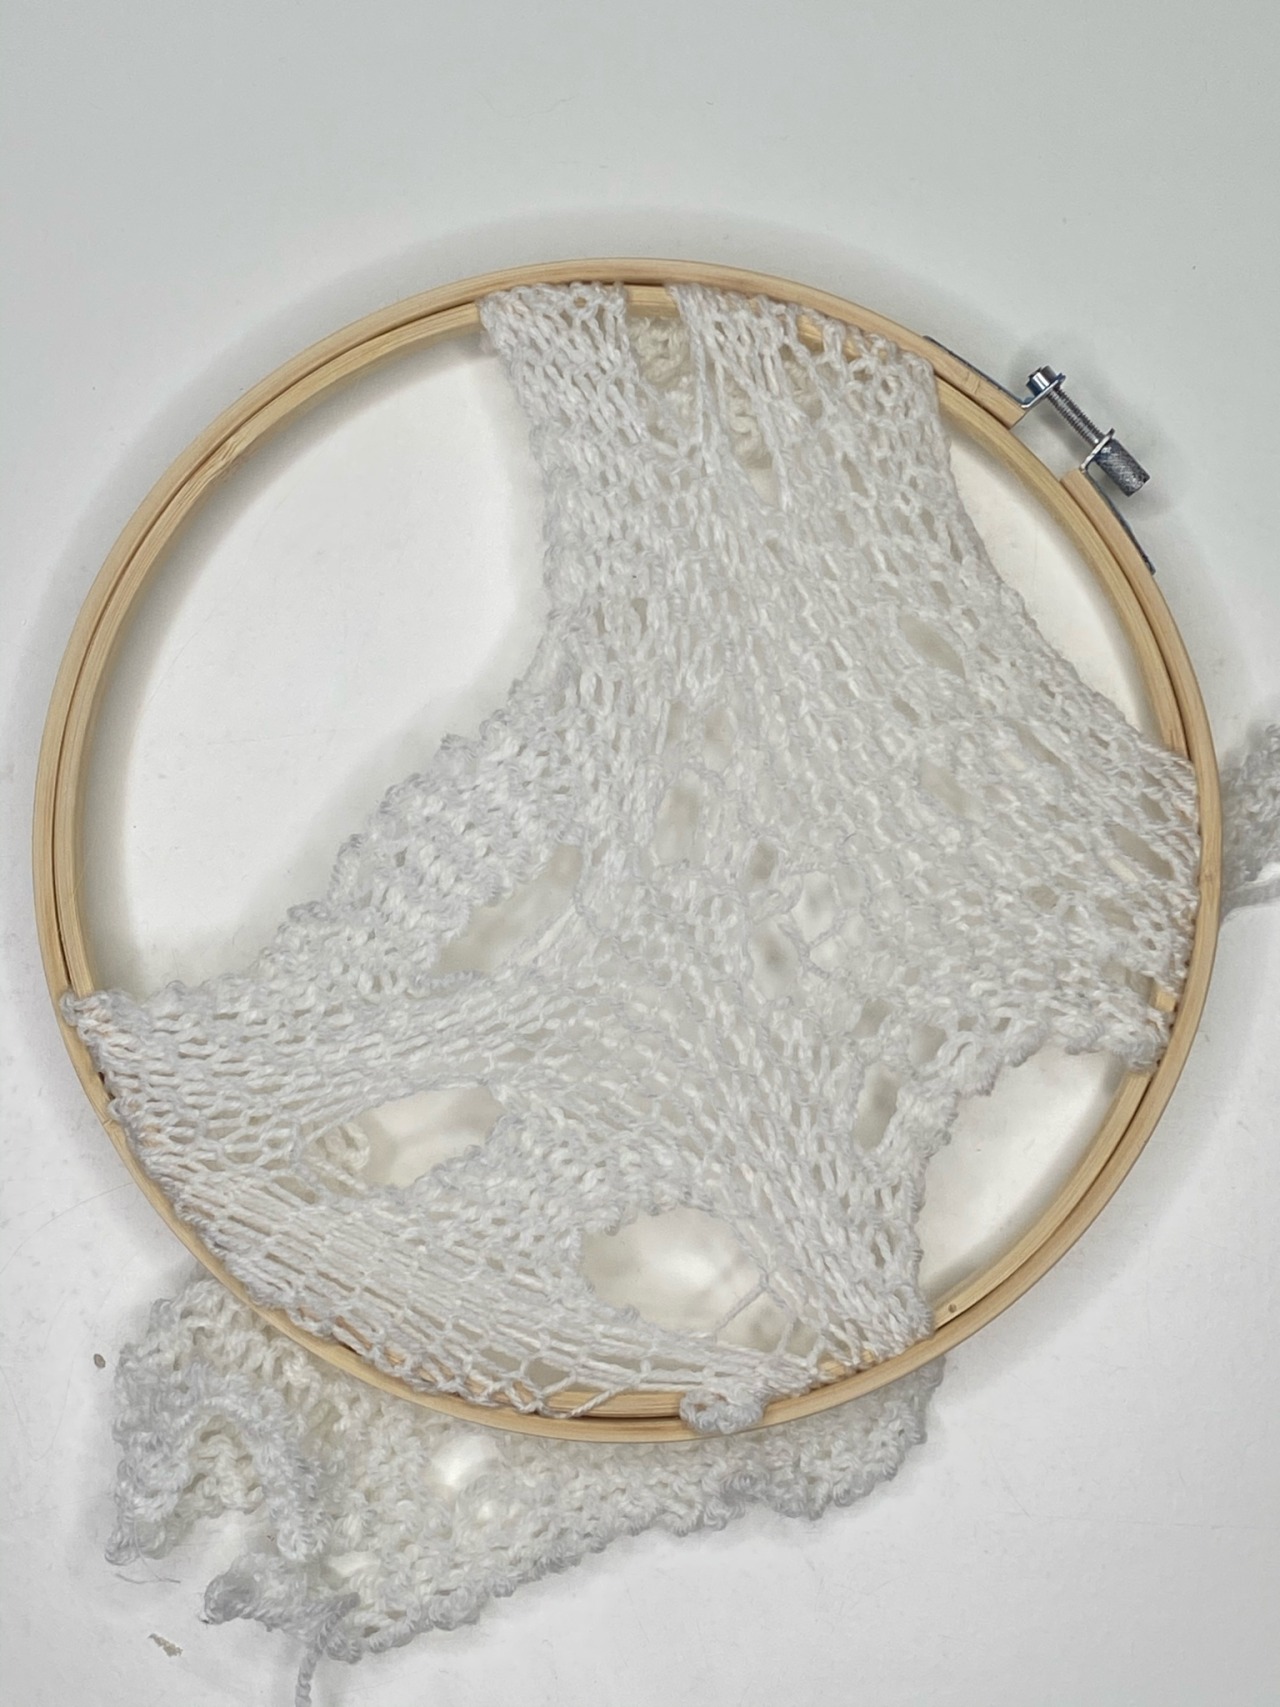
Here I wanted to show the cacti cell pattern I’ve imitated through the two button hole techniques. Stitching two together and stitching five back and forth to create small and large holes. On the white sample I played with both of these techniques with a variety of leanience to create smaller and bigger holes where desired. The idea of stretching them out reveals more ‘cells’ and I had control of what areas I wanted to highlight and which areas I left gaping space. I took pictures of the shadow it cast as it was really interesting. I’m happy with these outcomes and I will be looking to develop these further, possibly by stretching them over one another between a different frame or stitching them together or even encorporatinh material and stuffing to fill in the holes.
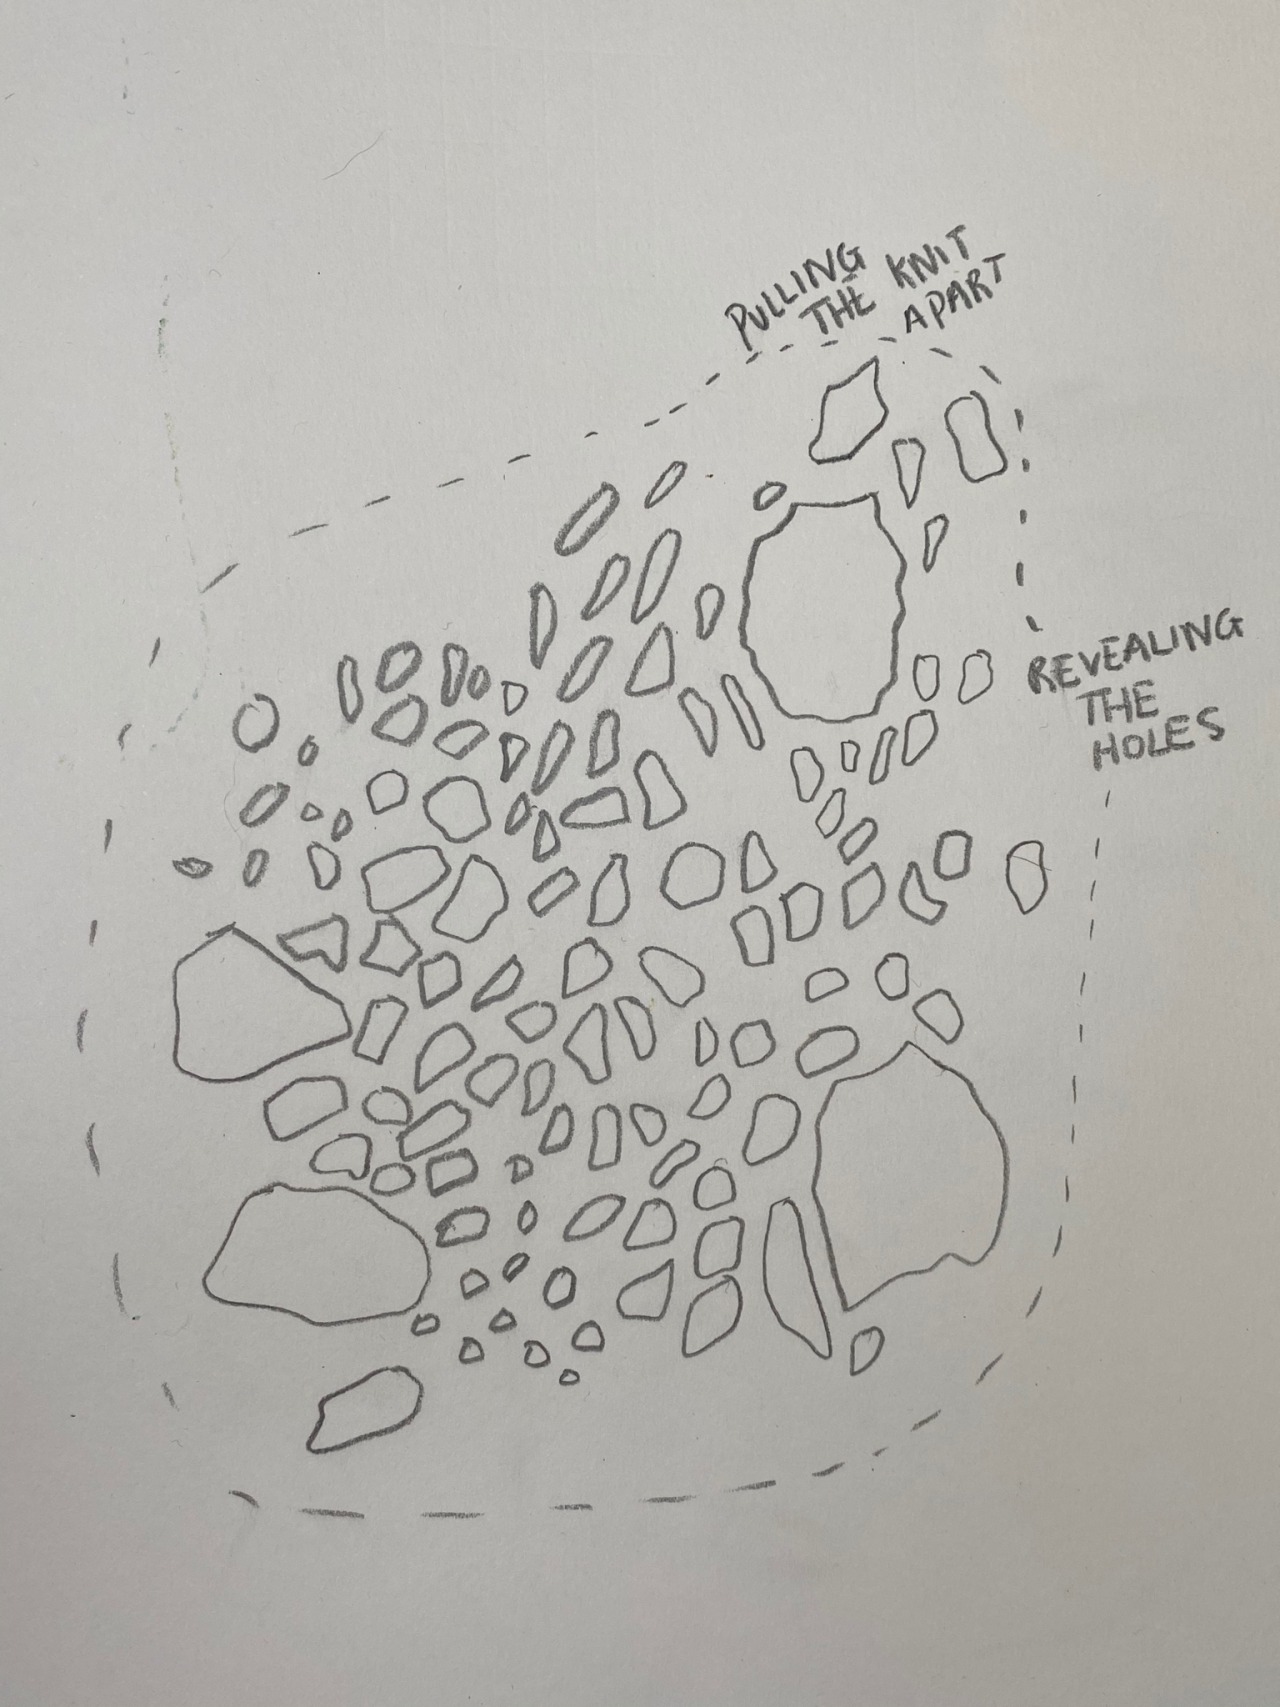
I drew the holes, these could be used to develop patterns for my prints. I’m going to continue with redrawing these images onto paper and seeing how I could print or create these shapes with dying.
Reflection 12/03/20
Today we spent the morning doing an arm knitting workshop with sicgmone and shane. We then collaborated our arm knitting samples with our peers and experimented with placement on the body. We then did drawings from these. Drawing from life is important so you can see the dynamics of the knitting. Although my project is more print based there are shapes and colours I could take from this workshop. However I would like to focus on developing my prints as we have done so many constructive textile workshops in the last two weeks and I haven’t been able to develop my ideas as much as I would like. I spent this afternoon finishing my drawings as well as cutting out my stencils for screen printing. I got to expose these on a screen which will be ready to print with next week.

Reflection 10/03/20 - Studio day
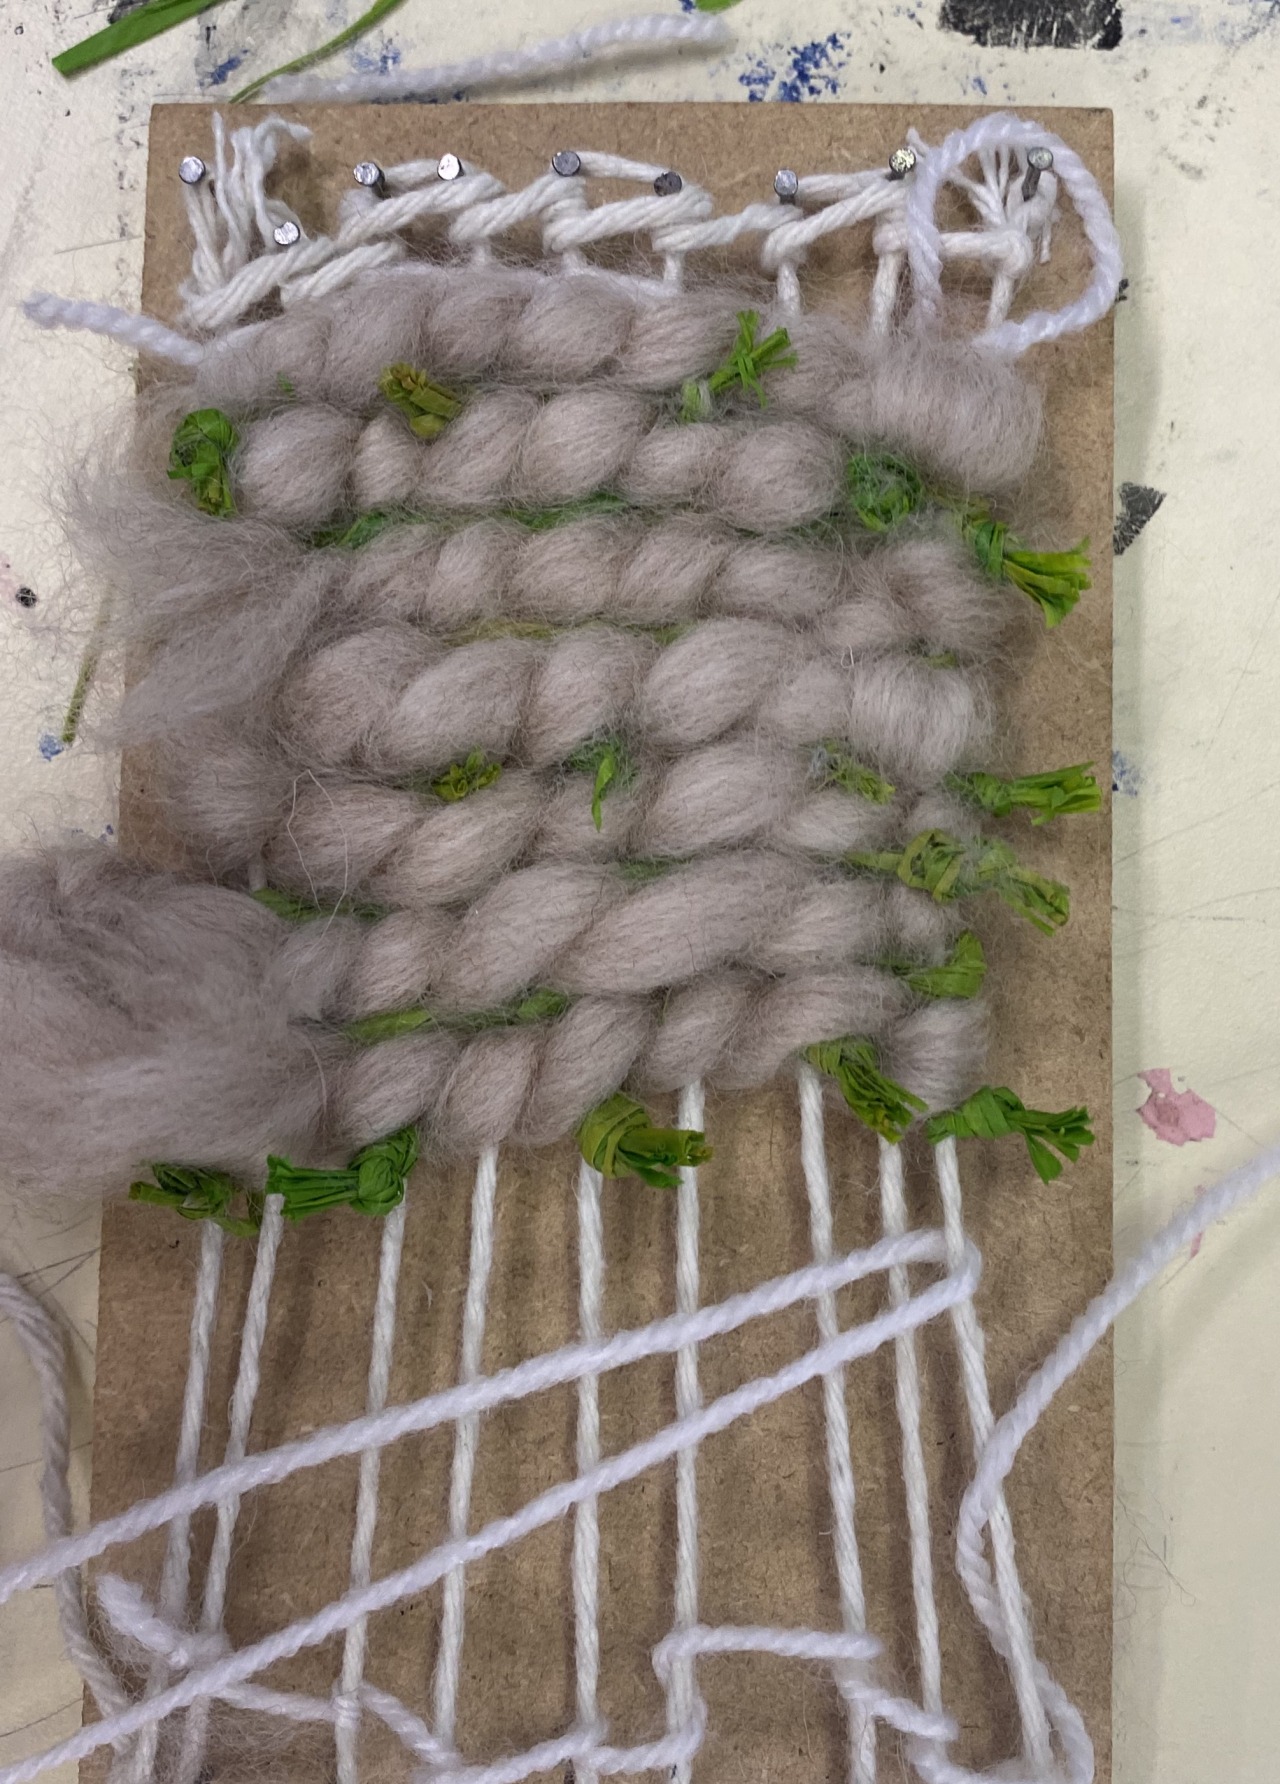
Today we were doing a weaving workshop where we had to create a weave in the image of our choice. I chose a drawing of a cactus I’d done in my sketchbook. I chose this image because I felt the lines of the cactus and the textures I could create would be interesting. I used a small handmade loom which I created my weave on using a variety of different yarns. I used the twisting technique weaving artist Esna Su taught us last term using soft and hard materials to highlight the sharp edges of the cactus. I knotted the raffia I was using (the hard sharper yarn) in small knots to create the spike of the cactus. I feel that this weave displayed the texture well. I created a second weave where I wanted to show the form of the lines more. I did this by using the rafia and two normal type yarns in different colours. This helped me define the line of where I wanted the form and structure to go.
We followed this by finding a partner and swapping our work, we were asked to discus our work and ideas, think about our materials and add our own interpretation to their weave. I partnered up with Rachel whose project is about stickers picking up fibers and what they collect. I interpreted this by adding loose black stitching to her weave to add definition and more messy fibres to the weave. I also added some yellow stitches with embroidery thread. I sewed in loose loops which I then cut open making them fall in different random directions the same way fibres do. I used clear tape and masking tape to collect different fibres I’d cut up. I also experimented with paper, pen and pencil with tape and stitching. I used the tape to layer with the stitching. These techniques proved to be effective and Rachel was really happy with the outcomes.
With my soft woven sample Rachel rolled up to create a cactus shape revealing the hidden green rafia which I thought was interesting. This was something I’d considered doing before hand as I felt the green rafia got hidden under the thick soft willy yarn. I could take this further by creating larger wooden weaves which were rolled up to create cacti sculptures. It’s important to stay consistent with the knotted spikes. I found this workshop helpful as it gave us the opportunity to give up some responsibility and let go of our work. It was very helpful and interesting to see other people’s interpretations of our work and see the marks they left.
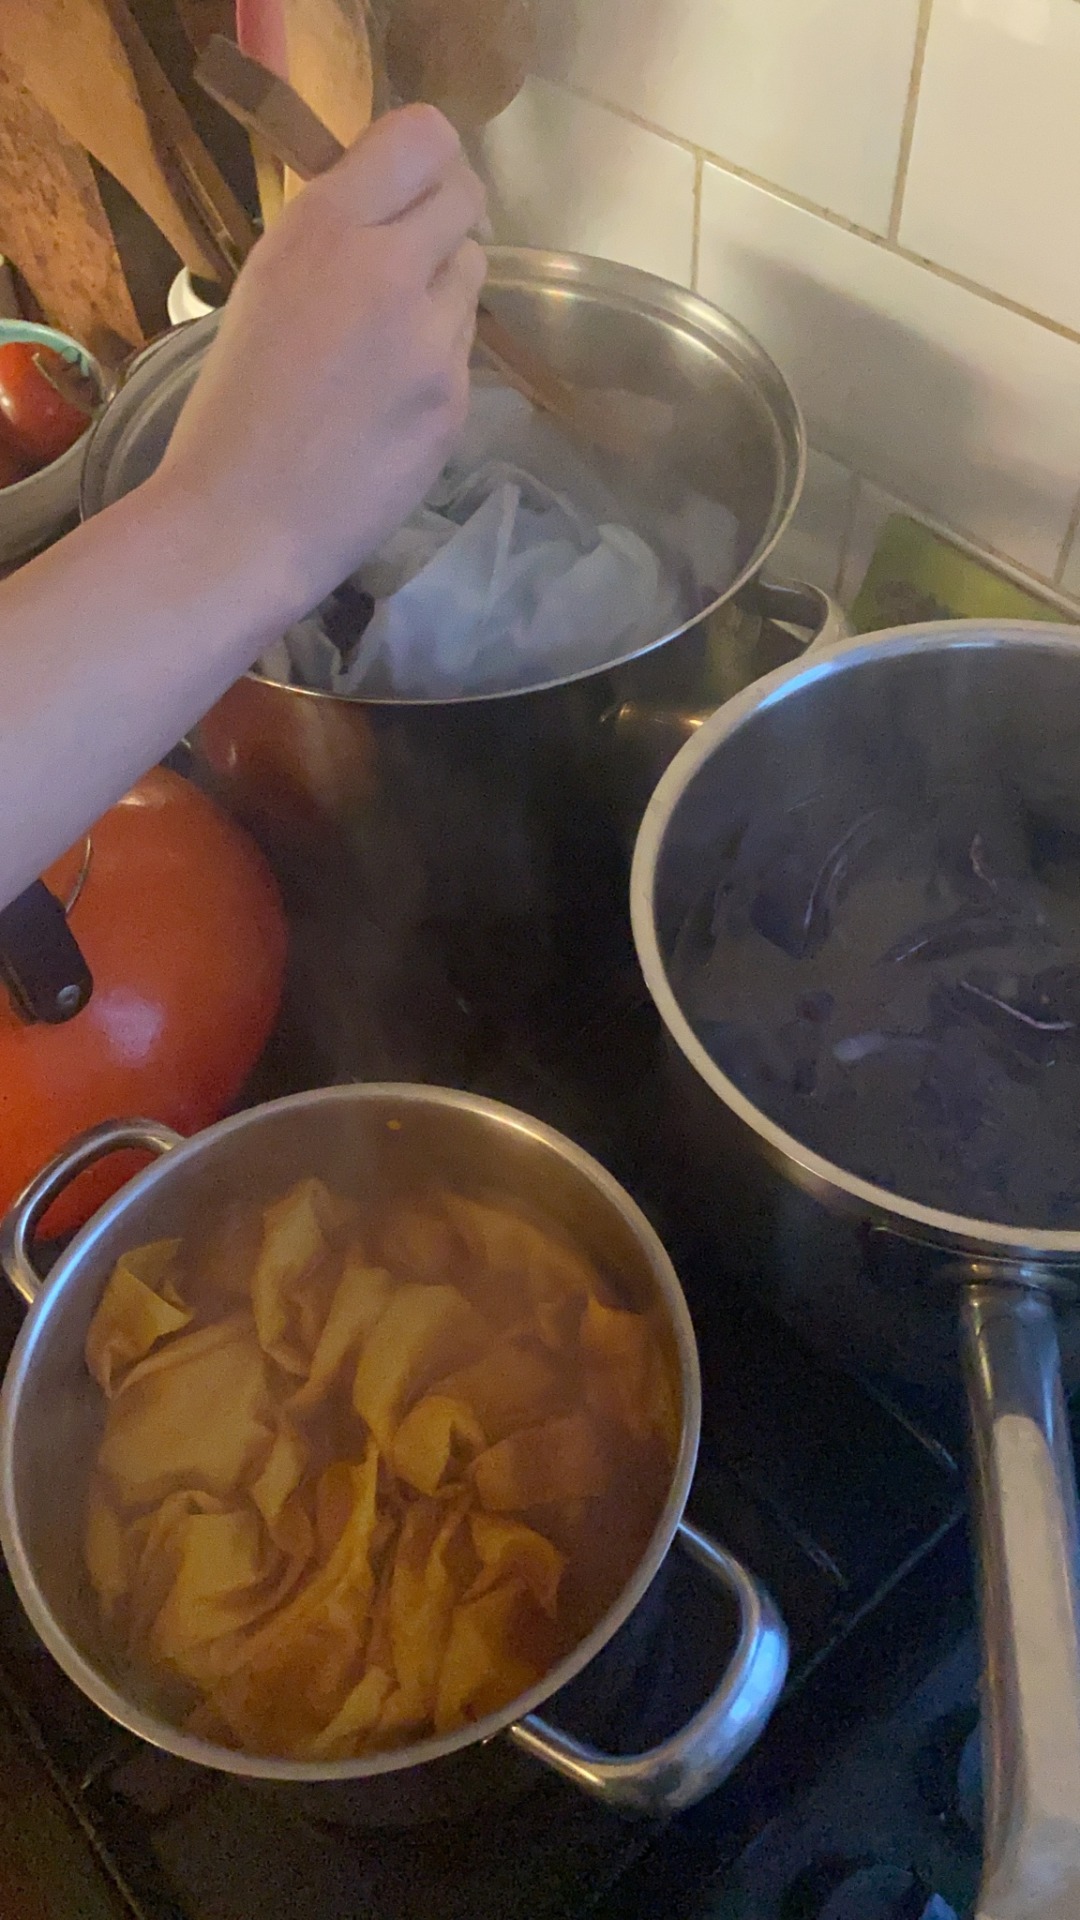
Natural Dying
This evening after collage me and two classmates delved into some natural dying using cabbage and turmeric. All we needed to buy was a cabbage, some turmeric powder, salt, lemon juice, three pans and some boiling water. With these ingredients we were able to dye fabrics as well as papers.
Natural dying
Red cabage and salt - blue
Red cabbage and lemon juice - purple
Turmeric and water - yellow / orange if left in for longer
Mix turmeric dye and blue cabbage dye makes green
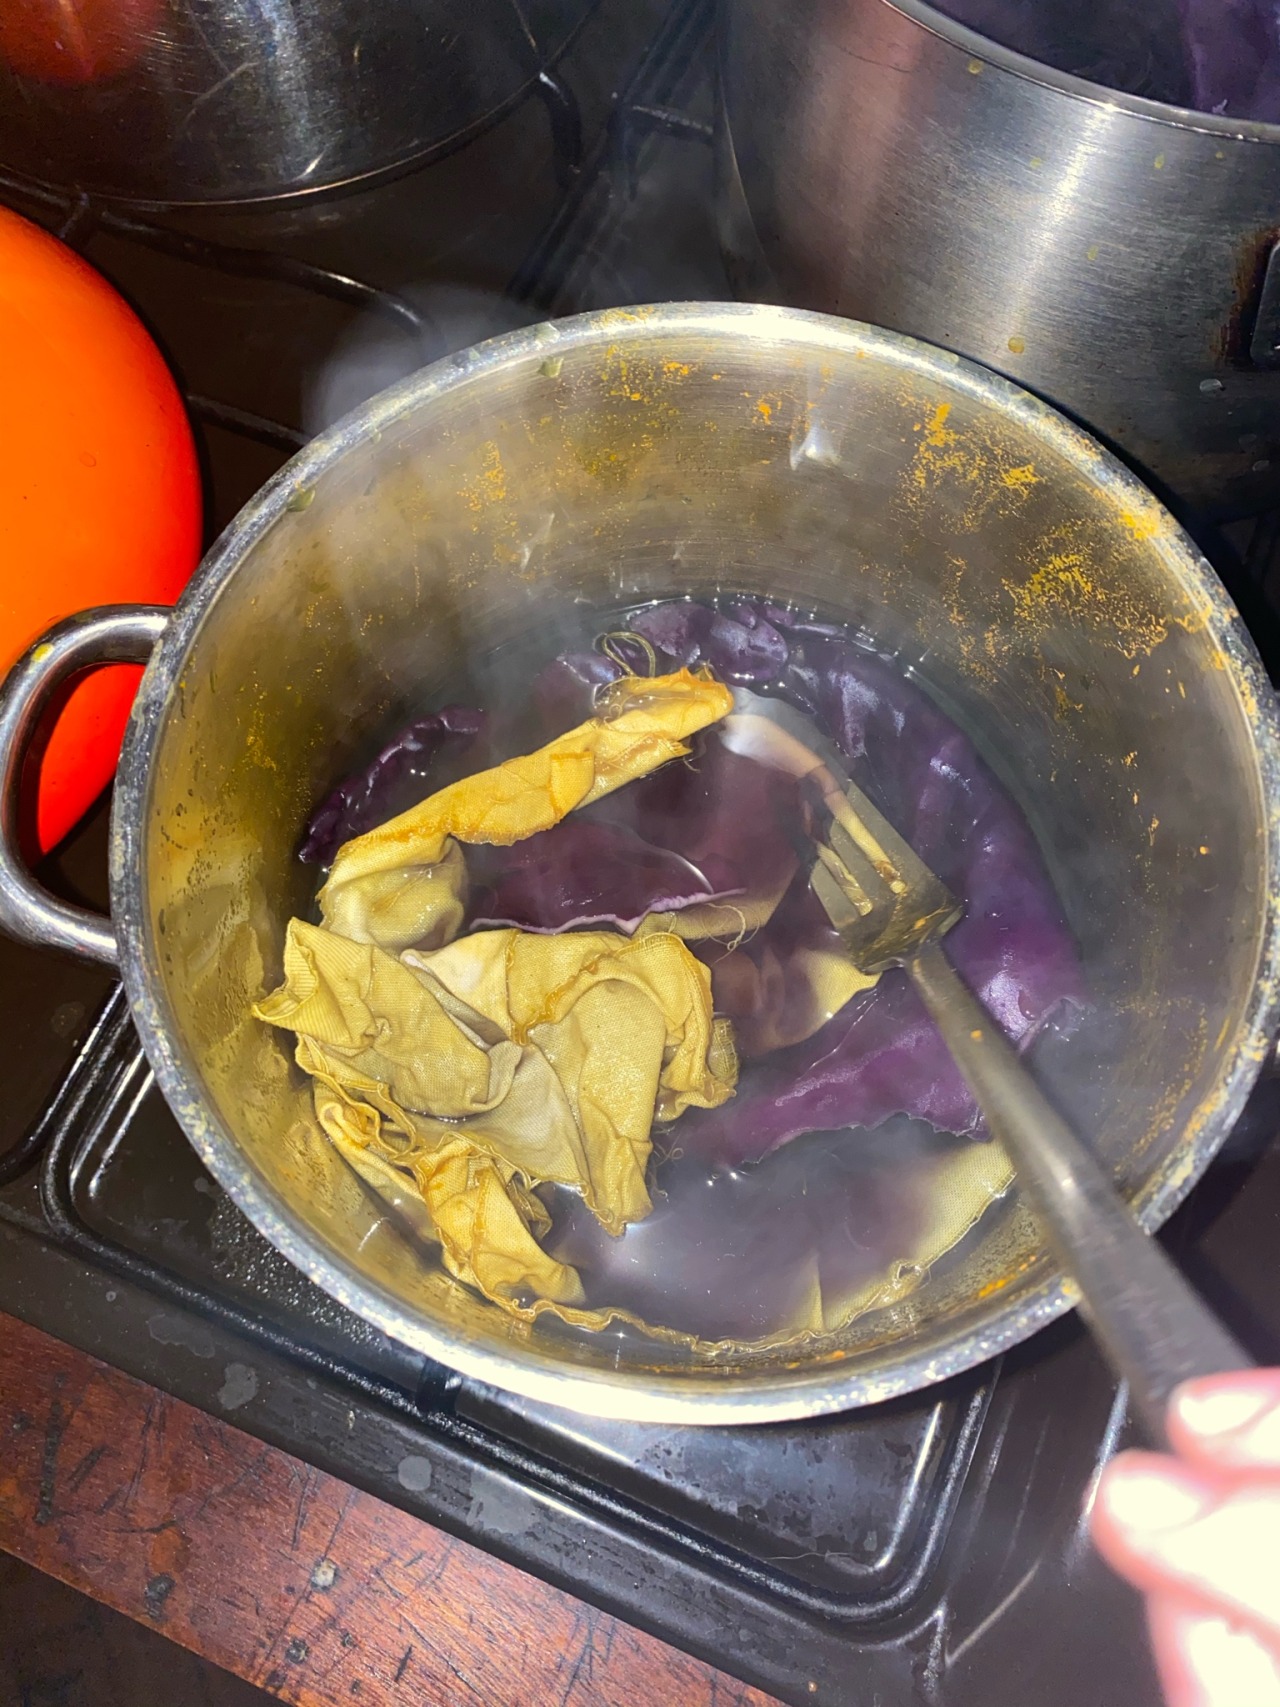
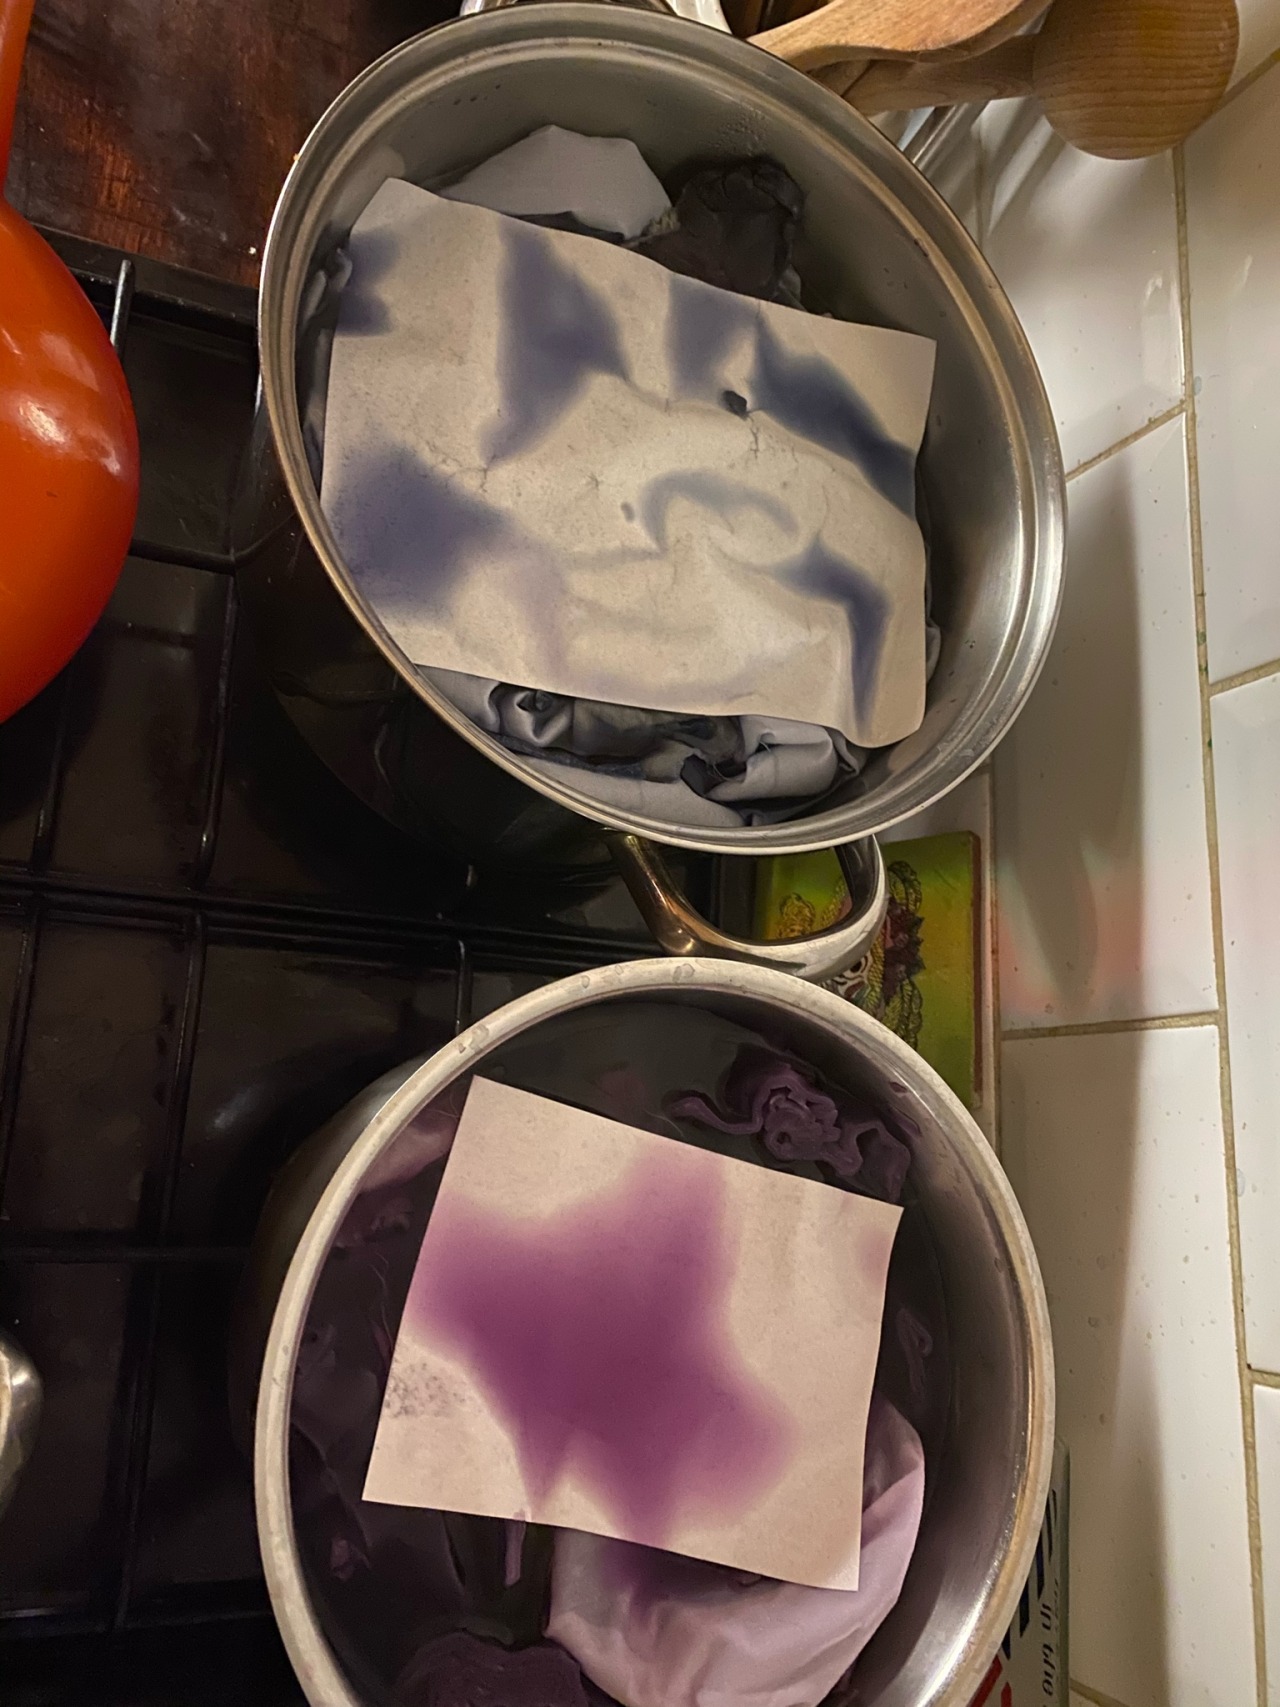
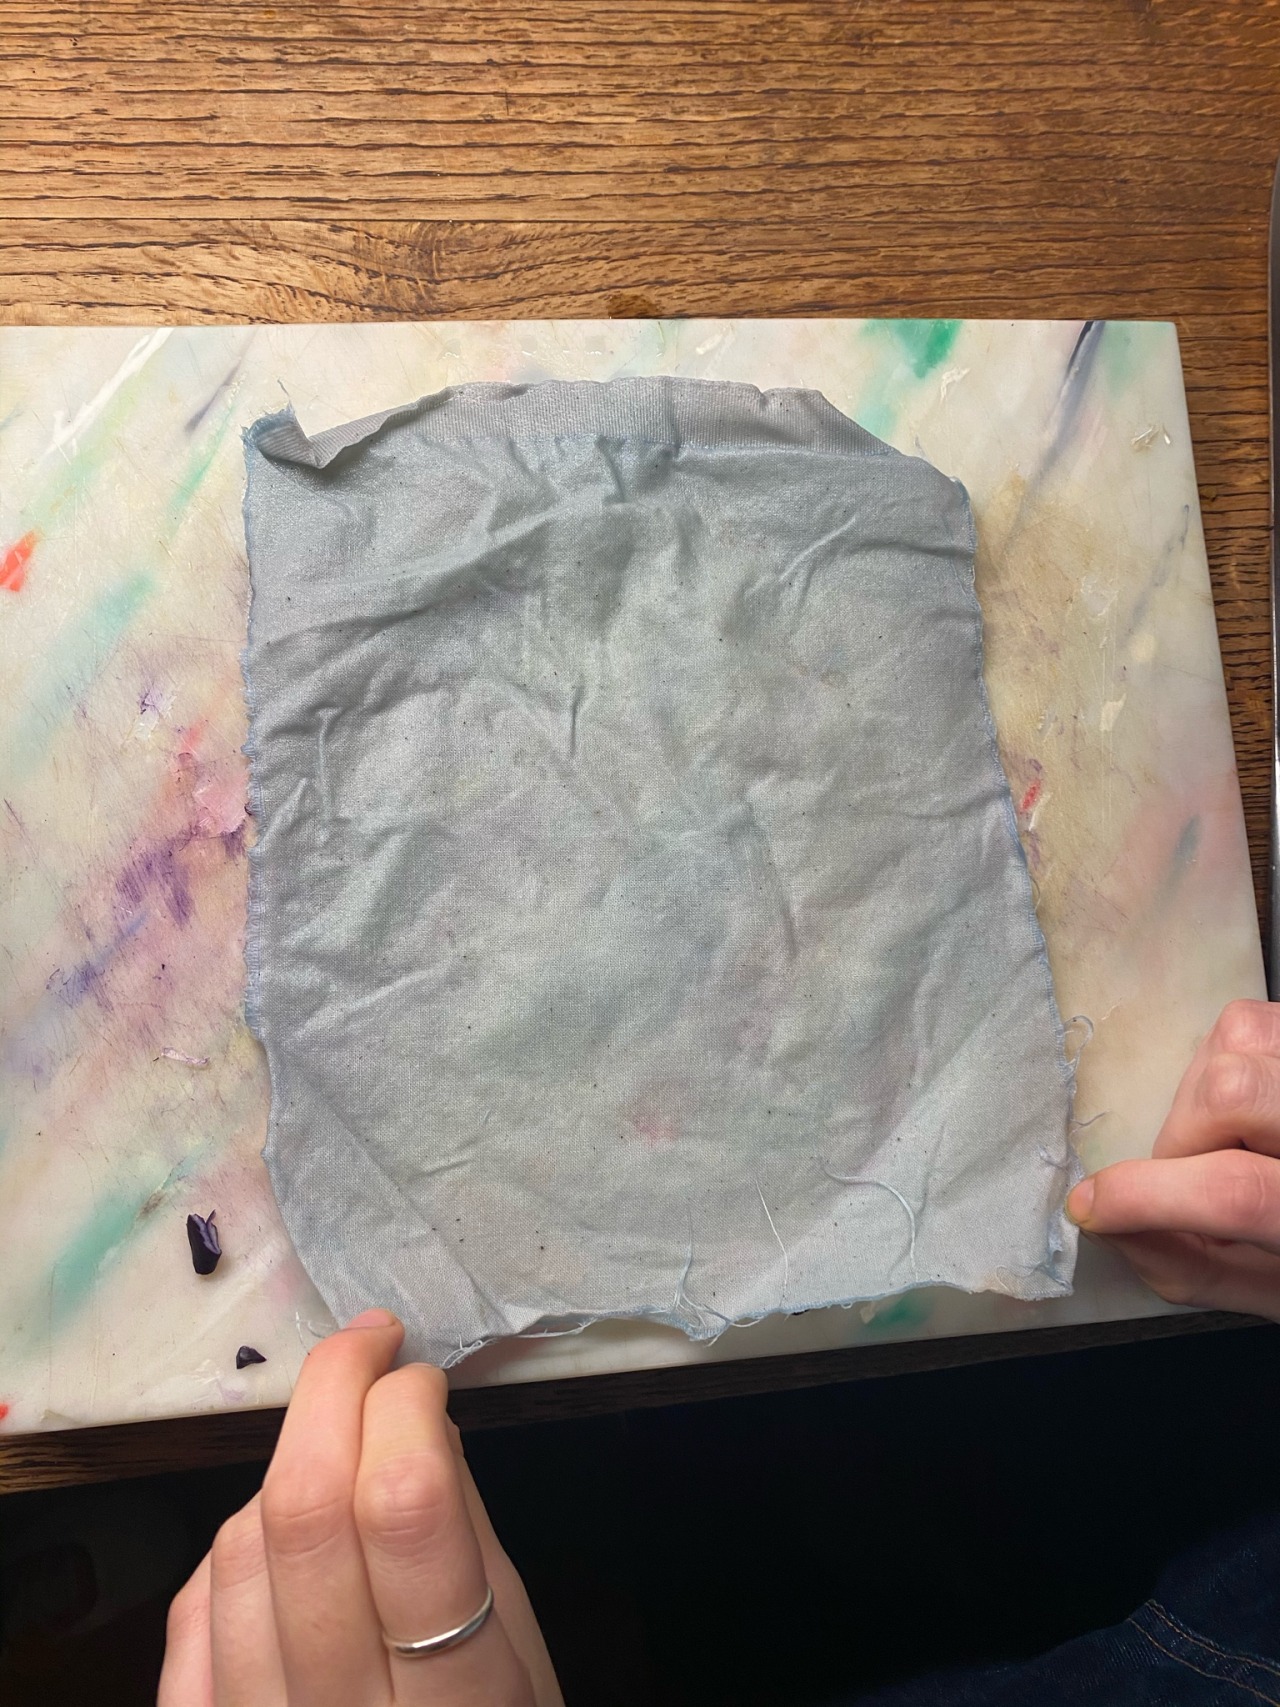
We cut the cabbage into two, one half to make blue (with salt) and the other for purple (with lemon juice) the acidity determines the PH and what colour the dye will become. The turmeric we found was the most effective dye as it became saturated and bright orange. This worked better on a calico fabric as it already had a hint of orange undertone within the material. However it was still very vibrant on white cotton. The purple was second most effective, after letting the cabbage colour leak into the water and leaving the fabric to soak it up for a good 30 to 40 minutes the fabric was dyed to a lavender purple shade. The fabric took the colour more than the paper but if we’d left the paper in for longer it would of been more effective. Because the paper becomes fragile and vulnerable to rips we couldn’t leave it in for as long duration as we could the fabrics.
Finally the blue became a pale sky blue and was the least vibrant. If we’d added more ingredients however it would of been more vibrant.
We left the fabric to dry outside over night, it’s raining so this may effect the colour and vibrancy but I’m very happy for that as I would like to work in conjunction with nature and embrace its impact on the human process of dying the fabrics.


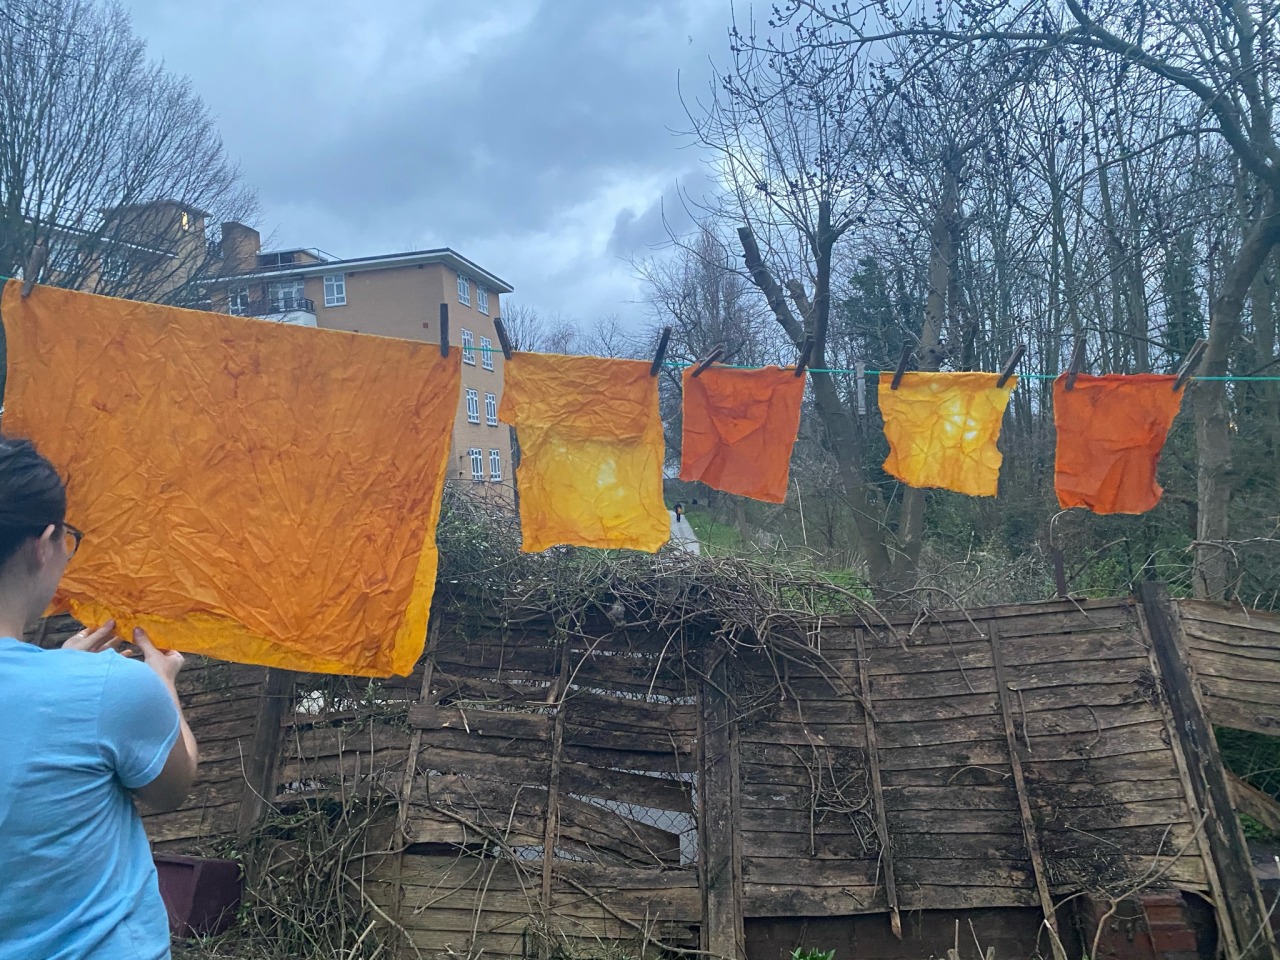
Over all I’m really happy with the outcome of this natural dying experiment, it’s amazing what you can do with so little ingredients. I hope to monoprint. Screen print and sew onto these fabrics. Working with plants and natural dyes is relevant to my project as I’m working with nature, unlike something man made.
The Code - reflection 26/02/20
I found the first episode of the code on shapes very interesting and informative. I learnt lots about how soap film from a bubble represents the ways the earth will try to use the least resources and energy to be the most efficient it possibly can be. This explains the hexagonal shapes found at the giants casuway and the reason to why bees will create their honeycomb shape using their body’s as a ruler to make honey. The documentary brought more knowledge and relevance to the book Li I’ve read. The documentary gave a more mathematical approach and reason to why the shapes are that way and gave more detail than ‘Li’ does. However the book Li gives a broader explaination on the different types of Li we see in the world and shows why they are those shapes. I will be writing a more detailed review on the book soon. I am going to the Sky garden today to try to identify different kinds of Li as well as draw plants that interest me.